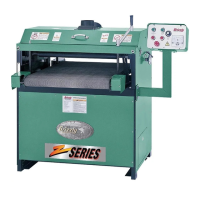
Model G1066R/Z/G1079R (Mfd. Since 02/11)
-23-
Assembly
The machine must be fully assembled before it
can be operated. Before beginning the assembly
process, refer to
Needed for Setup
listed items.
To ensure the assembly process
goes smoothly, first clean any
parts that are
cov-
ered or coated in heavy-duty rust preventative (if
applicable).
To assemble machine:
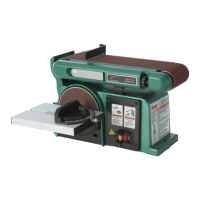
1. Attach (2) 4" dust ports to top cover with
double-sided tape, as shown in Figure 57.
Note: The dust ports on the Model G1066Z
are positioned front-to-back, rather than side
-by-side as on the G1066R and G1079R.
Attach the dust hoods to the Model G1066Z
in the same manner as described here.
Figure 57. Dust ports attached to top cover
(G1066R shown).
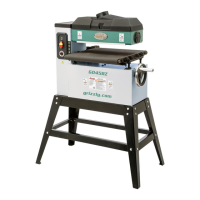
3. Attach crank handle (see Figure 58) to
leadscrew shaft and secure with (2) pre-
installed set screws. Crank handle may be
attached to leadscrew on left, right, front or
rear of machine, depending on operator pref-
erence.
Figure 58. Crank handle attached to right front
leadscrew shaft (G1066R shown).
2. Secure dust ports to top cover with (8)
#8 x
1
⁄2" self-tapping screws and (8) 10mm flat
washers.
4" Dust Ports
Top Cover
DO NOT operate machine without an ade-
quate dust-collection system. This machine
creates substantial amounts of wood dust
while in operation. Failure to use a dust-
collection system can result in short- and
long-term respiratory illness.
4. G1066Z Only: Attach control panel pedestal
to right side of machine with (2)
5
⁄16"-18 x 1"
hex bolts and (2)
5
⁄16" flat washers, as shown
in Figure 59.
Set Screw
Set Screw
Crank
Handle
Figure 59. Attaching control panel to machine
base.
Machine
Base
Control
Panel
Pedestal
 Loading...