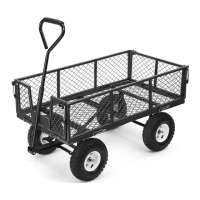
Step 4
A. The rear axle attaches to the rear
section of the rear frame. Double check
the rear frame placement before
assembling to the tray. As shown in
Figure 1 , the side holes on the rear frame
must be towards the rear of the bed.
Please reference the backside of the rear
frame to confirm the correct placement.
Step 3
Slide rear struts onto the ends of the
rear axle assembly.
NOTE: If the rear frame is installed incorrectly (see figure 2), the dump lock assembly
installation in Step 6 will not engage when the cart tray is in the down position.
Rear
Frame
Rear
Frame
Step 2
Attach the front struts to connect the
front axle assembly to the front frame
using M8x20 carriage bolts (4), M8 lock
nuts (4), and M8 washers (4). Tighten all
bolts from Step 1 and Step 2 securely.
Step 5
Attach the rear frame to the
front frame using M8x20
internal button head bolts
(2), M8 lock nuts (2), and
M8 washers (2).
C. Please use the M8x20
internal button head bolt in
the front center location of
the rear frame, as shown in
the illustration.
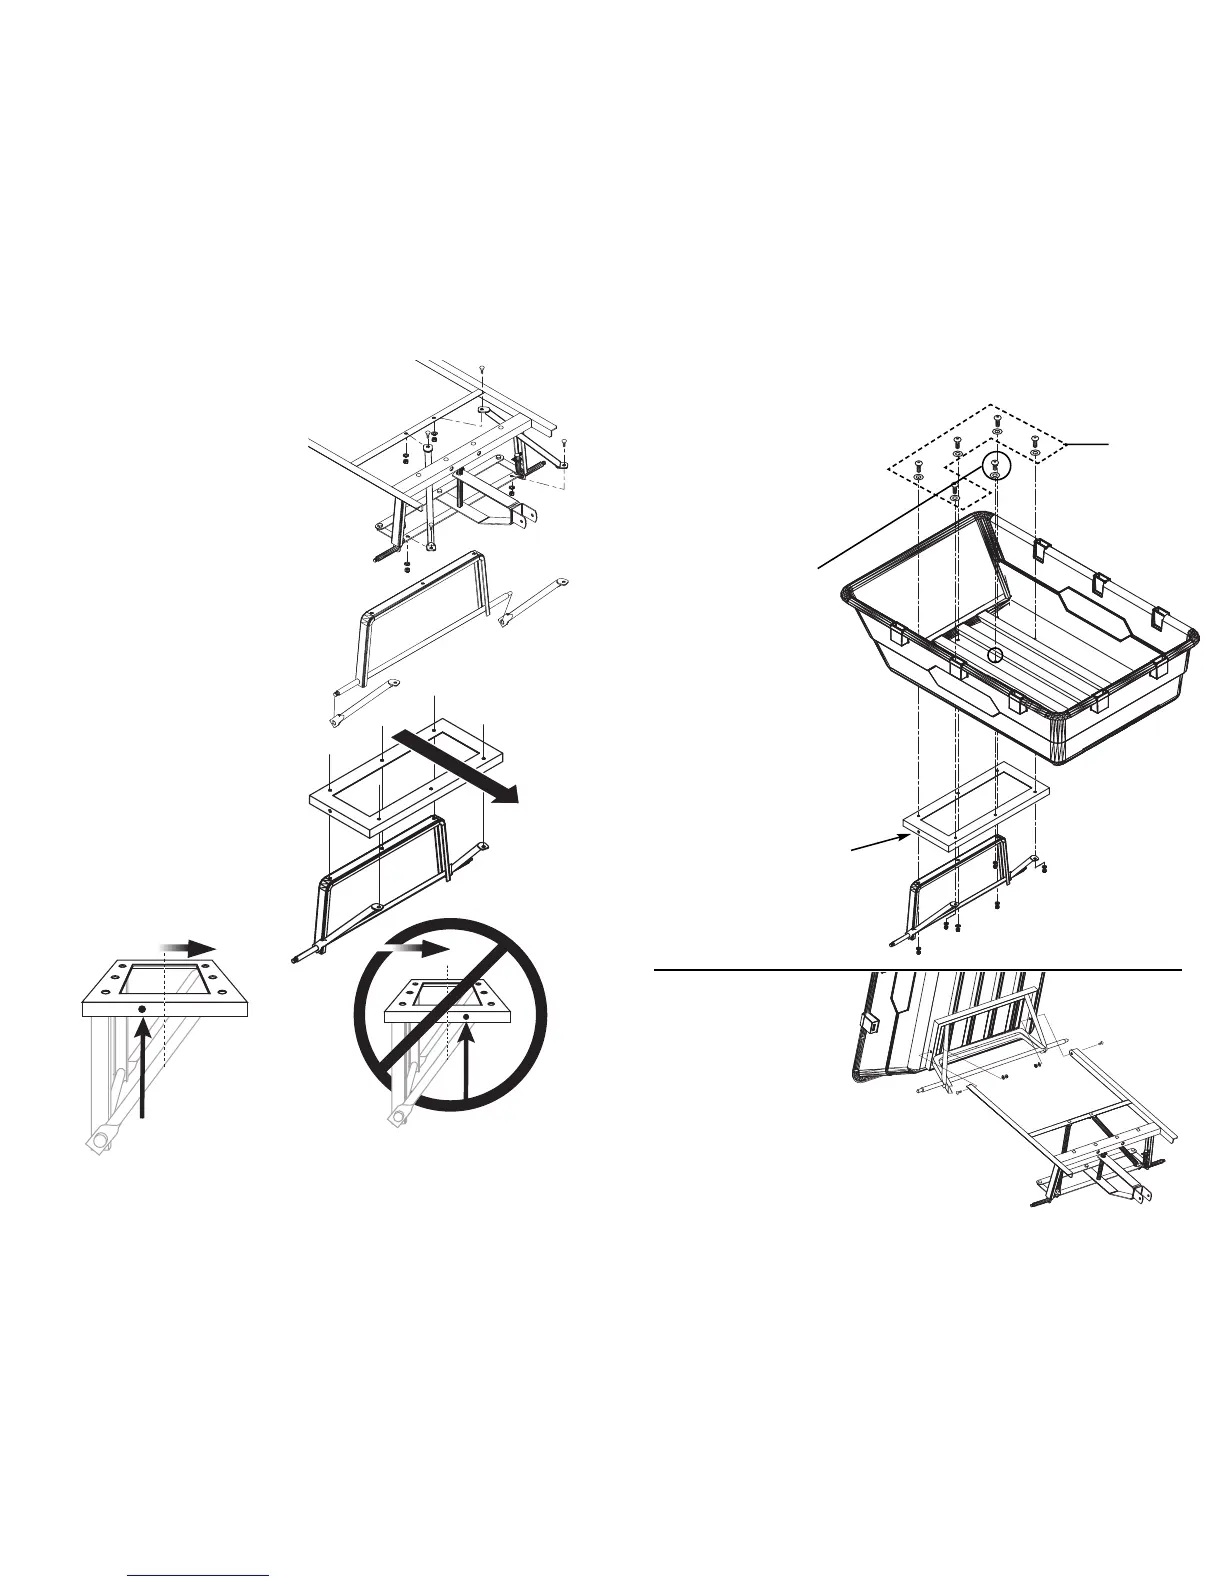
Step 4
B. Attach the rear axle
assembly with rear struts and
the rear frame to the tray using
M8x25 internal button head
bolts (5), M8x20 internal button
head bolt (1), M8 lock nuts (6),
and M8 flat washers (12).
HOLE
CLOSER TO
REAR OF TRAY
M8x25 button
head bolt
FRONT
OF TRAY
REAR
OF TRAY
 Loading...