17
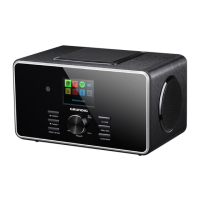
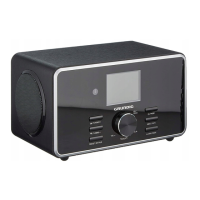
ENGLISH
SETTINGS
---------------------------------------------------------------------------------------------------------------------------------------
5 Select the input source from which the automat-
ic time synchronisation should be performed.
Selection options:
– »Update from DAB«;
– »Update from FM«;
– »Update from Network« (from an Internet
station);
– »No update« (no automatic time synchroni-
sation).
Select one of the options by pressing » « or
» « or by turning the Jog-Shuttle and confirm
by pressing on the Jog-Shuttle or »OK« on the
remote control.
– The menu »Set timezone« appears (only if
»Update from Network« was selected).
Note:
T
If »Update from DAB« or »Update from FM«
was selected, continue from point 8.
6 Select the time zone (ex. »UTC +00:00 Dub-
lin, London«) by pressing » « or » « or by
turning the Jog-Shuttle and confirm by pressing
»OK«.
– Display: »Daylight savings« menu opens.
Time/Date
Daylight savings
ON OFF#
Daylight saving
7 Select Daylight savings (for Central Europe)
by pressing » « or » « or by turning the Jog-
Shuttle to select »ON«, and confirm by press-
ing »OK«.
Normal time is set using »OFF«.
– The menu »Internet Setup« appears.
Time/Date
Internet Setup
YES NO#
Keep network connected
8 If the device is to be switched on via the network,
select the »YES« button with » « or » « or by
turning the jog shuttle and confirm with »OK«.
If the device is not to be switched on (low
stand-by power), select the »NO« button with
» « or » « or by turning the jog shuttle and
confirm with »OK«.
– The menu »Wlan region« appears.
Time/Date
Wlan region
Most of Europe
9 Select one of the WLAN regions by pressing
» « or » « or by turning the Jog-Shuttle and
confirm by pressing »OK«.
(This setting depends on the location where
you are operating your Cosmopolit 4.)
– The »SSID« menu appears, and the avail-
able networks (access points) are displayed.
Time/Date
SSID
ED-wifi
rd-linksys
arts-pmd
[Rescan]
[Wired]
Notes:
T
If you wish to connect via a LAN cable, se-
lect the option »[Wired]« using » « or » «
or by turning the Jog-Shuttle and confirm by
pressing »OK«.
The initial set-up is then finished.
T
If the connection to the router is via a
WLAN, there are two options, depending
on the router in use: If the router supports
[WPS], then continue operation from step
10/11 or step. 10/12.
If the router does not support [WPS], then
continue operation from step 13.
 Loading...