27
ENGLISH
ADJUSTING/
FIXING THE ANTENNA (WIRE TYPE)
DEVICE MAINS POWER CONNECTION AND
SETTINGS
The number and quality of broadcast stations depends on the reception conditions at the location
of the device as well as the radio antenna. Optimum reception can be achieved with the wire
type antenna when it fixed and placed at the right position.
7
Precise alignment of the wire type antenna is important, especially in the fringe areas of the DAB/FM reception.
Check the position of the nearest radio mast at your region could need.
7
Then locates the wire type antenna facing the radio mast if possible
7
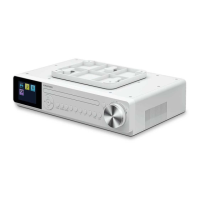
Attach the main wire of antenna run horizontally to the cupboard or shelf by the provided wire fixer (4pcs). (See
below example picture)
7
Radio reception may be restricted in bad weather.
Mains adapter connection
– first installation
Place the connection cable’s DC plug in
the socket DC IN 6V 1.5A and the mains
adapter into a properly installed 230V ~
50Hz earthed power socket which is acces-
sible at all times.
1 When the device is connected power at first
time, the device starts at the standby mode.
7
Display: logo < GRUNDIG > and <Digital
Radio>, and then < 00:00:00 (blinking) >
and < Time is not set >.
7
in background operation, the device starts to
search DAB and FM radio stations for auto
time sync function in background.
2 The time will be updated automatically in
minutes.
7
Display: < Current Time and Date (if
available)
Note:
7
If the radio station signal is too weak, the time
will not be sync. In this case, the blinking <
00:00:00 > and < Time is not set > will
keep show on the display.
7
Then the time need consider be set manually.
4 wire fixer
Tuning and storing radio stations
(DAB and FM) – first installation
When the device is connected to power source
for the first time or after factory reset; as
defaulted the Auto Tuning System will start to
scan the whole DAB bandwidth. The device
will then scan the FM waveband. The time is
updated automatically.
1 Once power source is connected, the device
starts at the standby mode. (when you use the
device for the first time or after Factory reset)
2 Long press the » /MODE« button, for 3
seconds, to switch the device on.
3 The device starts the Auto Tuning System
functions to scan the whole DAB bandwidth
and stores the found stations in the station list
(program list).
7
Display: < Scanning >
4 After the full scan processing completed, the
device is used DAB mode and the first recei-
ved station for listen.
5 Rotates the »OK« knob to » - « or » + « to
set the volume level when necessary.
 Loading...