ES0755 rev A 1/11
11
Column Axis Ballscrew Cover
Remove the cover from around the colum axis ballscrew. There are two parts to the cover, a long section
above the ballnut and a short section below the ballnut. Be certain to completely remove the cover from the
ballscrew to prevent contamination after the column axis is later enabled. Inspect the ballscrew for any con-
tamination that may have gotten through the dust cover during shipping and remove if necessary.
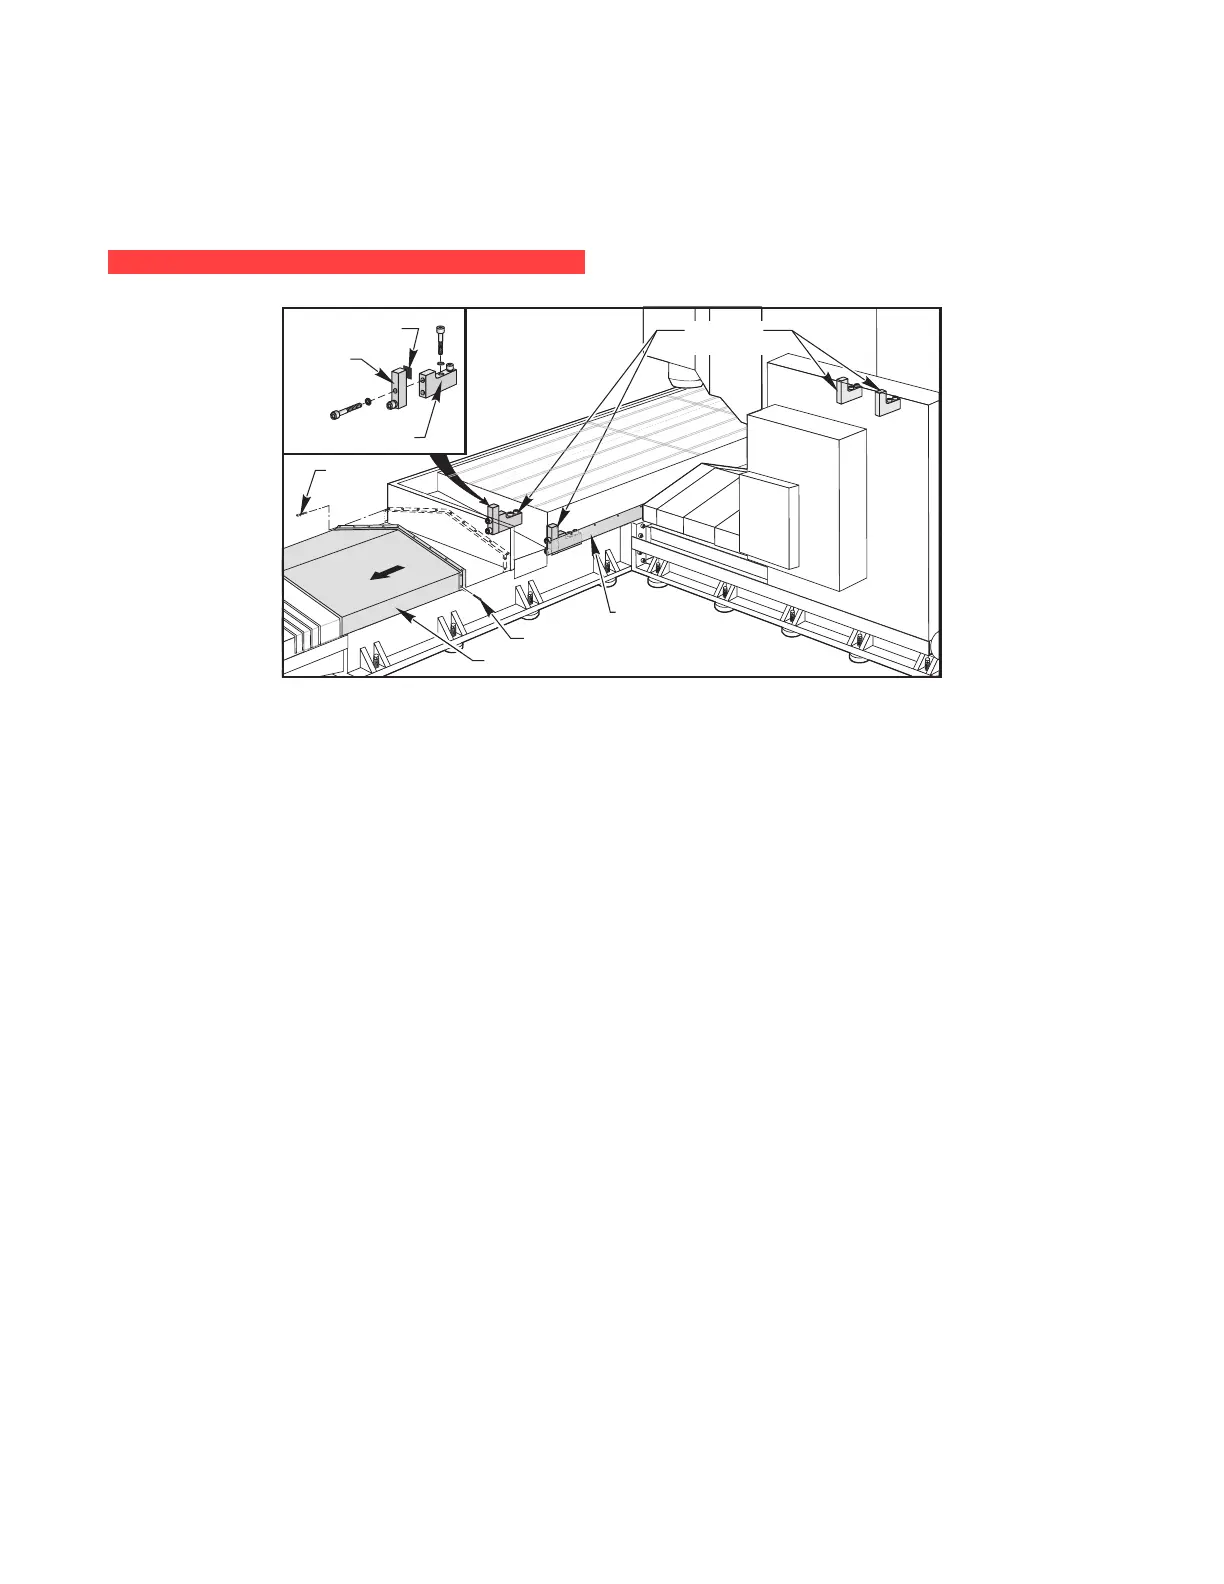
unblockinG the table
The table is held in place for shipping by means of blocks that are screwed into the table base. There is one block on each end of the table. These blocks must be removed before normal operation of the X-axis is possible. To access the shipping blocks, both X-axis way covers need to be fully retracted from the table. The X-axis has been disabled in parameters for reasons of safety on power up of the machine.
Rubber Pad
Support Block
SHCS (9)
FHCS (4)
Way Cover
Clamp
Block
X-Axis Chip
Guard
Shipping
Blocks
1. Disconnect both X-axis way covers from the table and fully retract the way covers.
2. Remove the blocks from the table base to prevent any inadvertent damage.
WARNING!
Be certain the machine is powered off when connecting or disconnecting servo motor cables.
3. Uncoil the X-axis servo motor cable and connect to the motor. Do not attempt to dress the cable
to the nal conguration at this time, but go directly from the control to the motor. This will provide
power to the motor so the machine can be jogged in the X direction without zero return.
4. After the X-axis motor cable is connected, power the machine up and enable only the X-axis at
this time.
5. Enable jog without zero return (setting 53) and move the table toward the left position taking
extreme care that the X-axis cable does not get pinched between the table and any obstruction.
Also be aware that there may be cables on the underside of the table that could be damaged
while jogging in the shipping conguration.
6. Continue jogging the X-axis far enough to allow access to the cable access hole.
7. Power the machine down. Disconnect the X-axis cable.
8. Route the table base cables and lines through the cable access hole.
 Loading...