ES0755 rev A 1/11
14
• The table base will be leveled to earth
• The column base will be leveled to earth
• The X-Y axes will be checked for perpendicularity
• The table will be swept for parallel to the X-Y plane of the machine
• The Z axis will be adjusted for perpendicularity to the Y axis
• The Z axis will be adjusted for perpendicularity to the X axis
• The mating ange will be completely tightened
• Final leveling, squaring, and anchoring
• Geometry check
establishinG the table as the datum surface
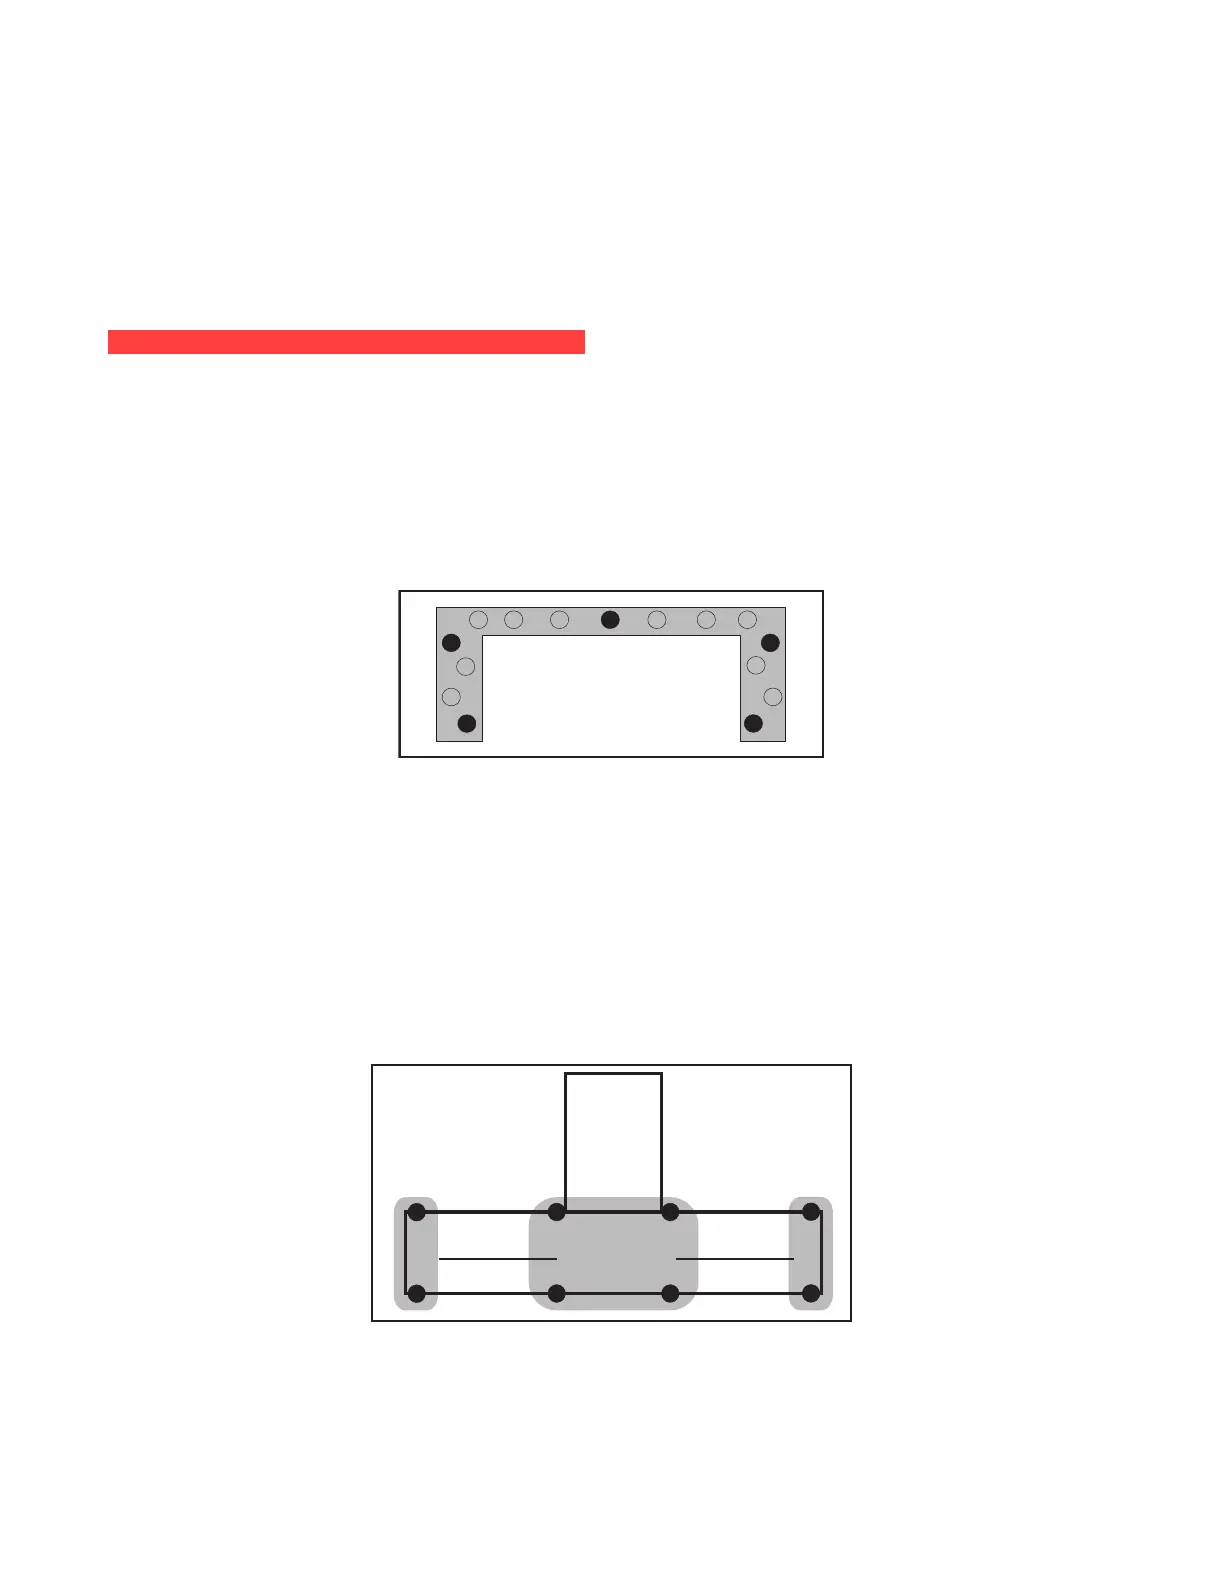
1. Remove all but ve of the mating ange connecting screws. The ve that should be left in position
are the four that are in the corners of the mating ange and the one that is in the center of the top
of the mating ange. Be sure that the ve remaining screws are able to rotate freely, indicating
that no binding will occur by changing the level of the table base. (The freedom of these screws
is important to the process, and they should be checked frequently since, if they bind, the level-
ing process associated with the column base could alter the table base level). If the screws do
begin to bind, the column base should be raised or lowered accordingly to free the screws. While
maintaining full face contact of the mating ange surface.
2. Zero return all axes
3. Move the X-axis to the center of travel.
4. Place two levels at right angles to each other as close as possible to the center of the table. One
will show the level across the width of the table and the other will show the level along the length
of the table.
5. Focus on leveling the table only in this X-axis position to establish a primary datum for the ma-
chine. Adjust only the four leveling screws indicated (the two on the table base closest to the col-
umn base, and the two immediately on the other side of the table base). No other leveling screws
on the table base should be in contact with the leveling pads at this time.
Step #5
Step #6
Column
casting
Table casting
Step #6
6. When the table level is close to zero in both directions, the four very end leveling screws may be
brought down to touch the leveling pads.
7. Continue to level the table base until both levels on the table read zero.
 Loading...