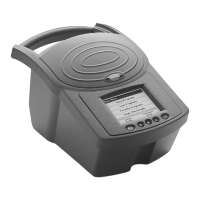
Chlorine, Total
Chlorine, Total
Page 4 of 6
ChlorineTot_PT_Other_DPD_Eng_Ody.fm
Treating Analysis Labware
Glassware used in this test must be chlorine demand-free. Fill the 100 mL mixing
cylinder and sample container with a dilute solution of chlorine bleach prepared
by adding 1 mL of commercial bleach to 1 liter of water. Soak in this solution at
least one hour. After soaking, rinse thoroughly with deionized water and allow
to dry before use. If the mixing cylinder is rinsed thoroughly with deionized
water and allowed to dry after use, only occasional pretreatment is necessary. Do
not use the same mixing cylinder for Free and Total Chlorine analysis.
Treat the Pour-Thru Cell similarly with dilute bleach and let stand for several
minutes. Rinse several times with deionized water.
Cleaning the Pour-Thru Cell
The Pour-Thru Cell may accumulate a buildup of colored reaction products,
especially if the reacted solutions are allowed to remain in the cell for long
periods. Remove the buildup by rinsing the cell with 5.25 N sulfuric acid
followed by several rinsings with deionized water.
Accuracy Check
Standard Additions Method (Sample Spike)
1. After reading test results, leave the sample cell (unspiked sample) in the
instrument.
2. Touch
Options. Touch Standard Additions. A keypad will appear. Enter the
average chlorine concentration shown on the certificate enclosed with the
chlorine voluette ampules. Touch
OK.
3. A summary of the Standard Additions procedure will appear. Touch
OK to
accept the values for standard concentration, sample volume, and spike
volumes as shown. Touch
Edit to change these values. After values are
accepted, the unspiked sample reading will appear in the top row. See
Standard Additions for more information.
4. Snap the top off a Chlorine Voluette
®
Ampule Standard Solution, 50 to
75-mg/L Cl
2
.
5. Prepare three sample spikes. Use the TenSette
®
Pipet to add 0.3, 0.6, and
0.9 mL of standard to three 80-mL samples, respectively. Swirl gently to mix.
6. Analyze each sample spike as described in the procedure above, starting with
the 0.1 mL sample spike. Accept each standard additions reading by touching
Read. Each addition should reflect approximately 100% recovery.
7. After completing the sequence, touch
Graph to view the best-fit line through
the standard additions data points, accounting for matrix interferences. Touch
View: Fit, then select Ideal Line and touch OK to view the relationship between
the sample spikes and the “Ideal Line” of 100% recovery.
See Section 3.2.2 Standard Additions on page 32 for more information.

 Loading...