62
Basic programming setup
13-A. Highlight Setpoint Sampling using the UP and DOWN keys on the Advanced
Sampling Menu. Press
SELECT.
13-B. Enable or Disable Setpoint Sampling using the
CHANGE CHOICE key. Press
ACCEPT to continue.
13-C. Select either Start on Setpoint or Stop on Setpoint by pressing
CHANGE CHOICE.
Press
ACCEPT to continue.
• Start on Setpoint will start a program when the setpoint condition is met. The
program continues to run even if the condition falls back within the setpoint limits.
• Stop On Setpoint halts the program if the setpoint condition falls back within the
setpoint limits and starts again if the limits are exceeded.
13-D. Highlight the desired channel to trigger from, then press
SELECT.
13-E. Press either
HIGH CONDITION or the LOW CONDITION.
Note: Flow Rate of Change and Rainfall are signals that only increase and never decrease in value,
therefore these signals do not require Low Condition.
The external control signal must be configured on the external equipment for the desired
setpoint. An external control device must provide a dry contact and can include a float
switch, push-button, external flow meter, etc. For interface connections refer to
section 4.10 on page 44.
13-F. Enable or Disable the trigger point using the
CHANGE CHOICE key.
13-G. Select the desired high or low trigger point using the numeric keypad. Press
ACCEPT to continue. Refer to Table 4.
11:00 AM 21 - APR - 01 ADVANCED SAMPLING
SELECT
PGM CMPLT OUTPUT
SETPOINT SAMPLING
RETURN
SPECIAL OUTPUTS
START/STOP TIMES
11:00 AM 21 - APR - 01 SETPOINT SAMPLING
SETPOINT CONDITION:
HIGH
CONDITION
LOW
CONDITION
11:00 AM 21 - APR - 01 SETPOINT SAMPLING
ACCEPT SETPOINT SAMPLING:
HIGH TRIGGER POINT:
CANCEL
00000 in. CLEAR
ENTRY
(USE NUMERIC KEYPAD)
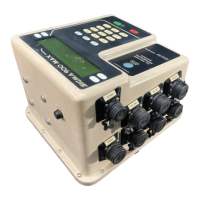
Goodnal STP ST041 Pre Treatment (Sigma 900 MAX All Weather Refrigerated Sampler) Vendor Manual
 Loading...