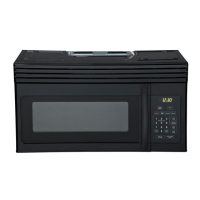
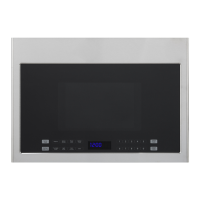
INSTALL GREASE FILTERS
Grease lters are located on the underside of microwave oven. For
installation instructions, see the User Manual packed with the microwave.
A
Surface Lights
B
Door
C
Grease Filters
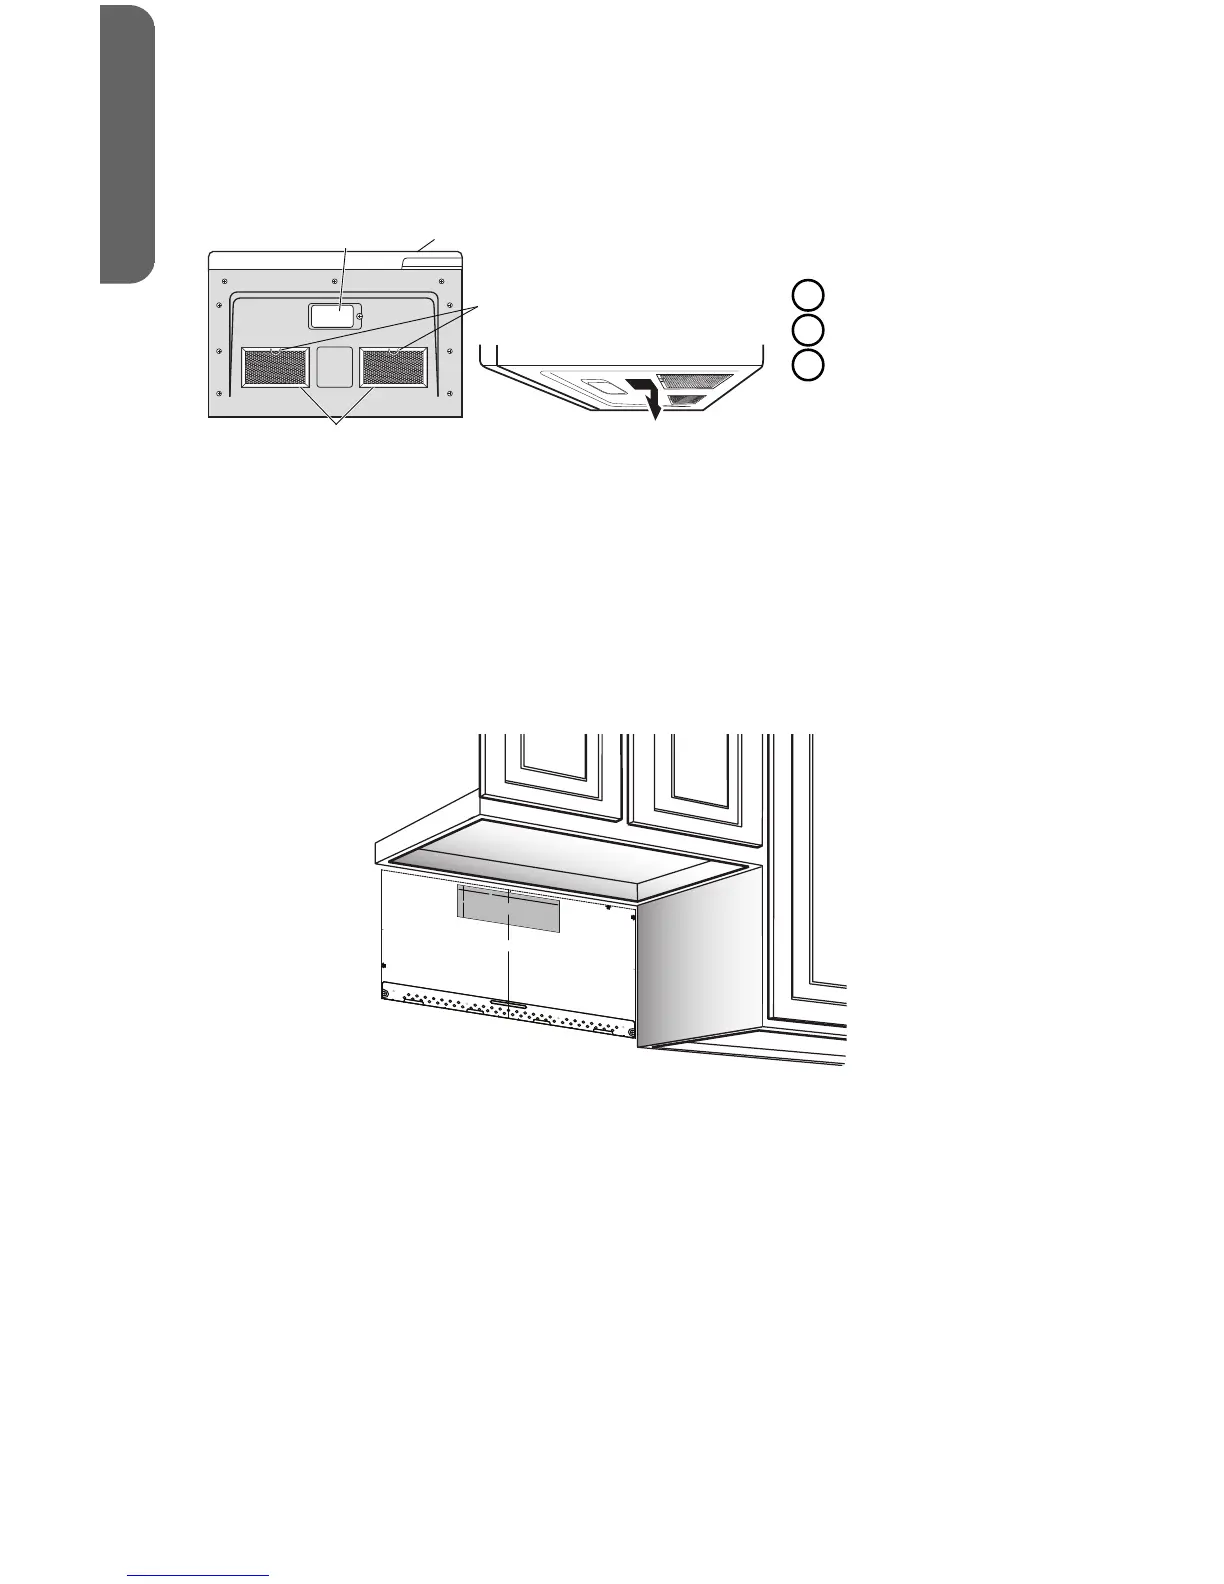
METHOD B - OUTSIDE BACK EXHAUST (HORIZONTAL DUCT)
IMPORTANT:
•
Make sure the screws for the blower motor and blower plate are securely
tightened when they are reinstalled. This will help avoid excessive vibration.
•
Make sure the motor wiring has been properly routed and secured, and that
the wires are not pinched.
CREATE REAR WALL EXHAUST OPENING
3
/8" TO E
DGE
NO
TE: IT IS VE
RY IM
PORTAN
T TO
RE
AD
AND
FOLL
OW
TH
E
DIR
EC
TIONS
IN T
HE IN
STA
L
LATION INSTRU
CTIONS
BEFORE
PR
OCEED
ING
WITH
THIS
RE
AR
W
ALL
TEMPLA
TE.
This
Re
ar
Wall Tem
plate
serv
es
t
o posit
i
on th
e bot
tom
mounting plate and to loc
a
te the horizontal exhaust
ou
tlet.
1. Use
a level t
o
check that th
e templat
e
is
positioned
accurately.
2.
Locat
e
and
mark at
l
ea
st
one
stud on
t
he left
or
right
side o
f
t
he c
ent
erl
ine.
It is
important to
use at least
on
e
wood
scr
ew moun
te
d
f
irmly in a
st
ud
t
o sup
port
t
he
weight
of th
e
m
i
crowave.
Mark two
a
dditional, e
venly spaced
locat
ions f
or
the suppl
ied toggle bolts.
3. Dri
ll
holes in
th
e
m
arked locations.
Where t
here is
a st
ud, drill a
3/
1
6"
hole for wood screws.
F
or h
oles
that do n
ot
line up wit
h
a
stud,
d
rill
5
/
8
"
hole
s for
t
oggle
bolts.
DO
NOT
I
N
S
T
ALL
THE
MOUNTING
PLATE
AT T
HI
S
T
I
M
E.
4.
Rem
o
v
e
the template from the rear wall.
5. Review the Installa
t
ion Instruction boo
k for y
our
installation sit
u
a
t
io
n.
Lo
cate and mar
k hol
es to
a
lig
n with holes
in the
mo
unti
ng plate
.
IMP
ORTANT:
LOCATE
AT LEAST ON
E STUD
ON
EITHER
S
ID
E
OF
TH
E
C
ENTER
LIN
E.
MARK THE L
OCATION FOR
2 ADD
ITIO
NAL, EVEN
LY
SP
ACED TOGGLE BO
LTS IN
THE
MOU
NTING PLATE
AREA.
Locate and mar
k hol
es to
a
lig
n with holes in the
mo
unting
plate.
IMPORTA
NT:
LO
CATE
AT LE
AST ON
E STU
D O
N EITH
ER
SIDE OF
THE CE
NTERLINE.
MA
RK TH
E LOCATION FOR
2 AD
DIT
IO
NAL, EVEN
LY
SP
ACE
D
TOGG
LE
BOLTS
IN THE
M
OU
NTI
N
G PLA
TE
AR
EA.
Trim the r
ea
r wall templa
te a
l
ong the dotted
line.
Trim the
r
ea
r
wall te
mpla
te
alo
ng
the
d
otted
lin
e.
12"
4"
Darle vuelta a la hoja
par
a co
nsultar
la
versión en E
spañol.
1. Read the instructions on the Mounting Plate/Rear Wall template.
2. Tape the Mounting Plate/Template to the rear wall, aligning it with the holes
previously drilled for holes A and B in the mounting plate.
3. Cut the opening, following the instructions on the Rear Wall template.
REMOVE THE BLOWER PLATE
1. Remove and save the screw(s) fastening the blower plate to the microwave.
2. Lift o the blower plate.
16
ENGLISH
 Loading...