Do you have a question about the Haier HWF05XC7-2 and is the answer not in the manual?
Record essential product details like model, serial number, and purchase date for warranty and service.
Ensure proper electrical connection and grounding to prevent shock and fire hazards.
Do not use damaged power cords, adapters, or extension cords.
Securely install the unit in a strong window to prevent falling hazards.
Avoid blocking airflow, be cautious of sharp edges, and use multiple people for lifting.
Proper grounding is essential to reduce electric shock and fire risks. Call electrician if unsure.
Strongly advise against using adapter plugs. Test power plug before each use.
Install in double hung windows, tilt unit outward for drainage, ensure window strength.
Use correct voltage/amperage, employ a certified electrician for modifications, and use a dedicated line.
Seal air leaks, ensure unobstructed airflow, and avoid blocking air circulation.
Minimize heat sources, draw blinds, use exhaust fans, and select correct BTU size.
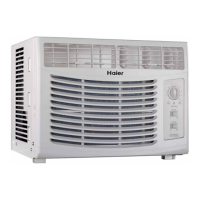
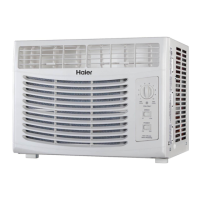
Adjusts air temperature for comfort, from warmest (min. cool) to coldest (max. cool).
Controls fan speed (HI/LO) and cooling speed for customized operation.
Adjustable louvers direct airflow left or right for desired air distribution.
Kit for installing the unit in double hung windows; extra brackets may be needed.
Moisture collects and evaporates; never drill holes in the drain pan.
Familiarize with normal sounds like thermostat clicks, airflow, water, and compressor noises.
Details on using POWER, SPEED (HI/LOW), and thermostat controls for various modes.
Set speed to HI/LO and thermostat to 'FAN ONLY' for fan-only mode.
Set speed to HI/LO and thermostat to desired temperature for cooling.
Set speed to HI and thermostat to 'MAX COOL' for maximum cooling.
Set speed to LOW and adjust thermostat as needed for quieter performance.
Compressor won't work below 61°F; wait 3 minutes before restarting after shutdown.
Ensure clear airflow, strong window/sill, adequate power, and check for obstructions.
Avoid sharp edges, adapter plugs, extension cords, improper wiring, and damaged cords.
Lists supplied parts including screws, frames, curtains, and window seal gasket.
Lists necessary tools for installation: scissors, screwdrivers, pliers, wrench, drill, etc.
Specifies minimum/maximum window opening widths for unit installation.
Install top rail and side curtains using screws, ensuring proper alignment.
Slide left/right frames onto unit tracks and adjust length; install curtains.
Adjust window sill height with wood strips to accommodate unit and storm windows.
Position unit on inner sill, attach basepan angle for secure placement.
Slide unit into window, engage bottom guide, and lower sash behind upper guide.
Extend side curtains, cut seal gasket, and fasten basepan angle with screws.
Unplug unit, remove, clean, and dry air filter regularly. Do not operate without filter.
Clean front panels/cabinet with mild soap and water. Avoid harsh chemicals and abrasives.
Check plug, power mode, and fan control settings if the unit does not operate.
Adjust A/C setting or check outside temperature (below 61°F inhibits compressor).
Address cold outside temps, low settings, or incorrect BTU size causing coil icing.
Check for heat sources, obstacles, open windows, dirty filter, or insufficient BTU.
Sounds may include air movement, water, compressor clicks; refer to Operating Guide.
Normal dehumidification; water dripping inside may require checking installation.
Covers mechanical/electrical parts for 12 months, sealed system/compressor for 1 year.
Excludes damages from improper installation, shipping, misuse, abuse, or unauthorized service.
Contact authorized Haier service depot. All service must be performed by authorized personnel.
| Brand | Haier |
|---|---|
| Model | HWF05XC7-2 |
| Category | Air Conditioner |
| Language | English |