4
Notes on use
• The [OK] button and ► on the r
emote control
correspond to the [POWER/VOLUME/ENTER/
NAVIGATE] button (11) on the front of the radio.
• The ◄ button on the remote control corresponds to
the [ ] button on the front of the radio
• The ▲ ▼ buttons on the remote control correspond
to turning the navigation controller to the left and
right on the front of the radio.
Preparing the remote control for use
Open the cover on the battery compartment. This can
be found on the back of the remote control and can be
opened by sliding in the direction indicated.
The extent of delivery includes two AAA batteries which
must be inserted into the battery compartment for the
remote control to work. When inserting the batteries,
ensurethat they areinserted with the correct polarity.
The relevant polarity (+ /-)ismarked inside the battery
compartment.
Setting up anetwork connection
WLAN (wireless network)
• Ensurethe router is switched on, is functioning correctly
and that thereisaconnection to the Internet.
• Activate your router's WLAN function.
• To ensurethe correct functioning of your WLAN
connection, follow your router's operating instructions.
• Then proceed as described under point 5, "Getting
started".
5. Getting started
Note -optimising reception
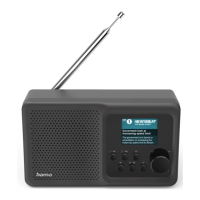
"DIR3300SBT" has an antenna connection for external
antennas with acoaxial connection. Asuitable telescopic
antenna that allows DAB, DAB+ and FM reception is
included in the extent of delivery.Alternatively,you
can use an active or passive antenna to improve the
reception or to adapt it to your requirements.
Please note:
• Always pull the antenna out completely.
• We recommend you adjust the antenna vertically to
ensureoptimal reception.
Note
• Optional, switchable light sources or brightness
sensors result in higher power consumption in the
switched-on state.
5.1 General notes on use
5.1.1 Switch On /Off /Standby
• Press [POWER/VOLUME/ENTER/NAVIGATE](11) to
switch on the radio.
• Press and hold [POWER/VOLUME/ENTER/NAVIGATE]
(11) for 3seconds to switch the radio off (standby).
• To completely switch off the device, disconnect it from
the power supply.
5.1.2 Navigation and control
• After pressing ashortcut button, navigate through the
menu items using.
• Select the individual menu items by turning [POWER/
VOLUME/ENTER/NAVIGATE](11).
• Conrm the selection by pressing [POWER/VOLUME/
ENTER/NAVIGATE](11).
5.1.3 Volume adjustment
• Turn the volume up (right) or down (left) by turning
[POWER/VOLUME/ENTER/NAVIGATE](11)
accordingly.
5.2 Switching on
Warning
• Only operate the product from asocket that has been
approved for the device. The socket must be installed
close to the product and must be easily accessible.
• Disconnect the product from the power supply using
the On/Off switch –ifthis is not available, unplug the
power cordfromthe socket.
• If using amulti-socket power strip, make surethat the
total power consumption of all connected devices does
not exceed the power strip's maximum throughput
rating.
• If you will not be using the product for aprolonged
period, disconnect it from mains power.
• Connect the power supply to the mains connection (1) on
the back of the radio.
• Connect the network cable to aproperly installed and
easily accessible network socket.
• Wait until the radio has initialised fully.
• Press [POWER/VOLUME/ENTER/NAVIGATE](11) to
switch on the radio.
 Loading...