OK
X
BEFORE YOU START REARMING
Make sure you have a smooth, at and dry
work surface.
1. Insert the opening key between the black
locking ring and the yellow cap. Turn the
key anticlockwise. The black locking ring
will now turn anti clock wise.
2. Hold the yellow cap with one hand and
continue to turn the black locking ring
anticlockwise with the other hand until it
stops.
3. Lift off the yellow cap. Remove the old
inator body and gas cylinder from
inside the bladder and dispose of it in an
environmentally friendly manner.
4. Check the rearming kit. Ensure that all the
following four points are met before you
continue.
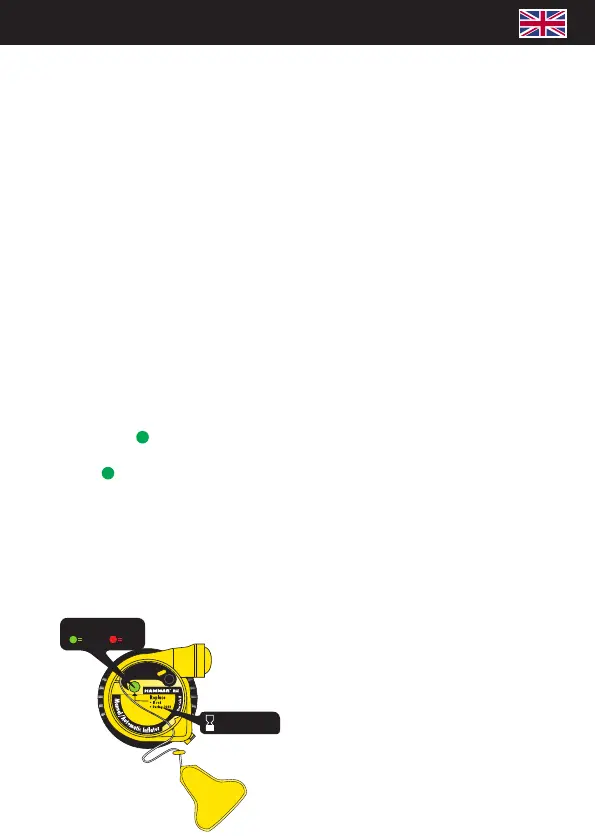
• The single point indicator on the inator
cap is green. ( )
• The indicator on the black body is
green. ( )
• The expiry date on the inator cap is
within limit.
• The size of the gas cylinder is correct.
Do not assemble any cap or body that
does not meet these requirements.
Expiry Date
Single point indicator
5. Insert the inator body with the gas
cylinder pointing upwards in the bladder.
Let the sealing ring rest on the rounded
sealing surface on the body.
6. Position the replacement cap with the
hydrostatic valve pointing to the right, 90°
relative to the gas cylinder and put the cap
in place on the body.
7. Press rmly on the inator cap and turn
the black locking ring clockwise into the
locked position.
FINAL CHECK
• Pull the cap to make sure it has locked on
the inator body properly.
• Check that the locking ring is pro
perly locked and cannot be turned
anticlockwise by hand.
• Inate the lifejacket through the oral tube
and check that it stays inated at least
over night.
PACKING
Before packing, deate the lifejacket
through the oral tube. Make sure that
all residual air is pressed out from the
bladder so that it can be folded properly
according to the manufac turer´s instruc
tion. Make sure that the lifejacket is dry
before packing.
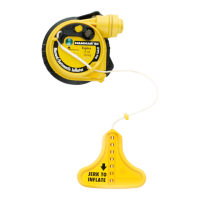
PULL TAB
3
 Loading...