EasyManua.ls Logo

Hasbro Optimus Prime 6778020000 User Manual

Hasbro Optimus Prime 6778020000
1 page
Page #1 background imageLoading...
Page #1 background image
1
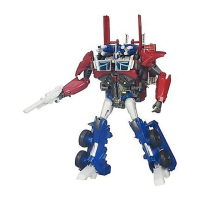
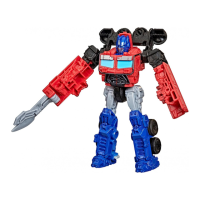
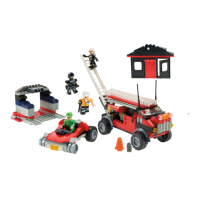
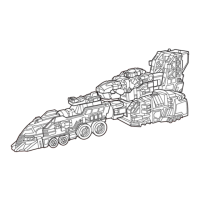
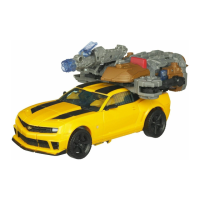
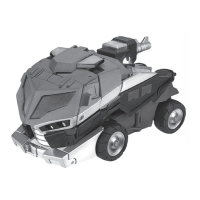
ReveRse oRdeR of instRuctions to
conveRt back into veHicLe.
P/N 6778020000
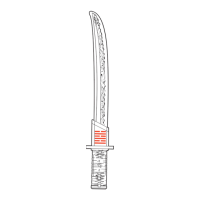
NOTE: Some parts are made to detach if excessive force is applied and are designed to be
reattached if separation occurs. Adult supervision may be necessary for younger children.
CHANGING TO ROBOT
5
4
6 7
AS
SEEN
ON
CARTOON NETWORK and the logo are trademarks
of and © Cartoon Network
2
Some poses may require hand support.
© 2007 Hasbro. All rights reserved.
TM & ® denote U.S. trademarks.
Manufactured under license from Tomy Company, Ltd.
AGES
5
+
83672/83463 Asst.
TRANSFORMERS.COM
O
P
TIMUS PRIME
®
9 10
8
ROBOT MODE
ROBOT MODE
3
11 12






A

A
A






Question and Answer IconNeed help?

Do you have a question about the Hasbro Optimus Prime 6778020000 and is the answer not in the manual?

Hasbro Optimus Prime 6778020000 Specifications

General IconGeneral
BrandHasbro
CharacterOptimus Prime
Toy TypeAction Figure
Product Number6778020000
CategoryToy
SeriesTransformers
MaterialPlastic
Recommended Age8 years and up
FeaturesArticulated

Summary

Changing to Robot Mode

Step 1: Detach Part A

Detach component A from the main vehicle body.

Step 2: Prepare Base Structure

Prepare the primary vehicle chassis for transformation.

Step 3: Unfold Legs

Initiate the transformation by unfolding the leg sections.

Step 4: Extend Legs

Extend the lower parts of the leg assemblies.

Step 5: Unfold Arms

Begin the arm transformation by unfolding them from the body.

Step 6: Connect Arms

Connect the unfolded arm components to the main torso.

Step 7: Unfold Lower Legs

Unfold the final segments of the robot's legs.

Step 8: Unfold Feet

Deploy the foot components for the robot mode.

Step 9: Position Arms

Adjust and position the robot's arms.

Step 10: Adjust Shoulders

Move the shoulder joints into the correct position.

Step 11: Final Arm Placement

Complete the positioning of the robot's arms.

Step 12: Assemble Head

Complete the robot's head assembly or unfolding.

Robot Mode Features and Accessories

Ion Axe Transformation

Convert the trailer component into the Ion Axe accessory.

Flip-Up Face Armor

Deploy the flip-up face armor feature on the robot's head.

Weapon Storage

Instructions on how to store the Ion Axe weapon.

Hand Weapon Transformation

Convert the extinguisher cannon into a hand-held weapon.

Water Squirt Feature

Fill the weapon with water and use the squirt function.

Vehicle Conversion

Reverse Transformation Steps

Follow the reverse order of instructions to convert back into vehicle mode.

Important Safety Information

Choking Hazard Warning

Warning: Not suitable for children under 3 years due to small parts.

Related product manuals