Do you have a question about the Haverland RC WAVE and is the answer not in the manual?
Avoid covering the radiator to ensure proper heat circulation and prevent overheating.
This appliance is unsuitable for installation in bathrooms due to potential moisture and safety risks.
Directs users to the complete manual for comprehensive safety guidance and information.
Optional feature that reduces radiator output for a gentler, lower surface temperature.
Instructions for setting the current day and time on the radiator's controller.
Guide on programming heating modes (comfort, economy, frost) for hourly time slots.
Explanation of how to select between frost, comfort, and economy heating modes.
Procedure for locking and unlocking the radiator's control panel to prevent accidental changes.
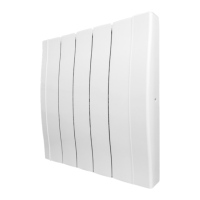
This document serves as a quick start guide for the Haverland RC Wave electric radiator, providing essential information for installation, basic operation, and programming. A full manual with comprehensive details is available online via a provided QR code and web link.
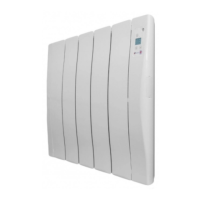
The Haverland RC Wave is an electric radiator designed to provide heating for indoor spaces. It offers various operating modes, including comfort, economy, and frost protection, allowing users to tailor the heating output to their specific needs and preferences. The radiator features a programmable timer, enabling users to set a heating schedule for each hour of the week, optimizing energy consumption and comfort. An optional "Baby Care" function is also available, which reduces the radiator's surface temperature for enhanced safety, albeit with a slower heating rate.
The installation process involves securely mounting the radiator to a solid and level wall. A cardboard template is provided to assist with positioning. The mounting bracket requires four screws (5.5 x 50 mm) for attachment. Once the bracket is in place, the radiator is slid onto the top tang and gently lowered into position, then secured by screwing down fully to lock it. It's crucial to ensure the socket is within reach and that the unit is not mounted within 15cm of any adjacent objects or walls. The radiator is designed for indoor use and is not suitable for bathrooms.
To begin using the radiator, it must be plugged into a 13 Amp socket, and the ON/OFF switch, located on the right-hand side, should be pressed.
To set the current day and time, the user needs to press the "M" button until the frost screen (indicated by "7°C") appears. Holding down the "M" button for 5 seconds, then pressing it once more, allows access to the setting mode. The "+" and "-" buttons are used to adjust the weekday, hours, and minutes, with the "M" button used to confirm each selection.
The radiator offers different operating modes:
Programming allows users to assign a heating mode (comfort, economy, or frost) to each hour of each day of the week. To access the program setting, press the "M" button until the frost screen appears, then hold it down for 5 seconds. The program starts at midnight on Monday. The "+" and "-" buttons are used to choose the mode for the current hour. The "M" button moves to the next hour without making changes, while the "P" button copies the current mode to the next hour. This process is repeated for every hour of every day. If a mistake is made, the user can press the "M" button twice, then hold it down for 5 seconds, and use the "P" button to skip back to a desired point. Once the program is set, the controller returns to the time setting screen.
The keypad can be locked or unlocked by holding down the "+" and "-" buttons simultaneously for 3 seconds. This prevents accidental changes to the settings.
The "Baby Care" function is activated or deactivated by holding down the "+" and "P" buttons. When active, "BABY CARE" and "ON" will flash on the keypad; when deactivated, "BABY CARE" and "OFF" will display. This function reduces the radiator's wattage, resulting in a lower surface temperature for increased safety, particularly around children. However, it's important to note that this mode will cause the radiator to heat up slower and may be less effective at reaching desired room temperatures.
The quick start guide does not explicitly detail maintenance features. However, it emphasizes safety precautions such as "DO NOT COVER" and "NOT FOR USE IN BATHROOMS," which are crucial for the proper and safe operation of the device, indirectly contributing to its longevity and reducing the need for maintenance due to misuse. For comprehensive maintenance information, users are directed to consult the full manual online.
| Control Type | Digital |
|---|---|
| Timer | Yes |
| Thermostat | Yes |
| Mounting | Wall-mounted |
| Eco Function | Yes |
| Energy Consumption Display | Yes |
| Voltage | 230V |
| Frequency | 50Hz |
| Remote Control | Yes |
| Safety Features | Overheat protection |
| Construction Material | Aluminum |
| Dimensions | varies by model |
| Weight | varies by model |
| Type | Electric Heater |