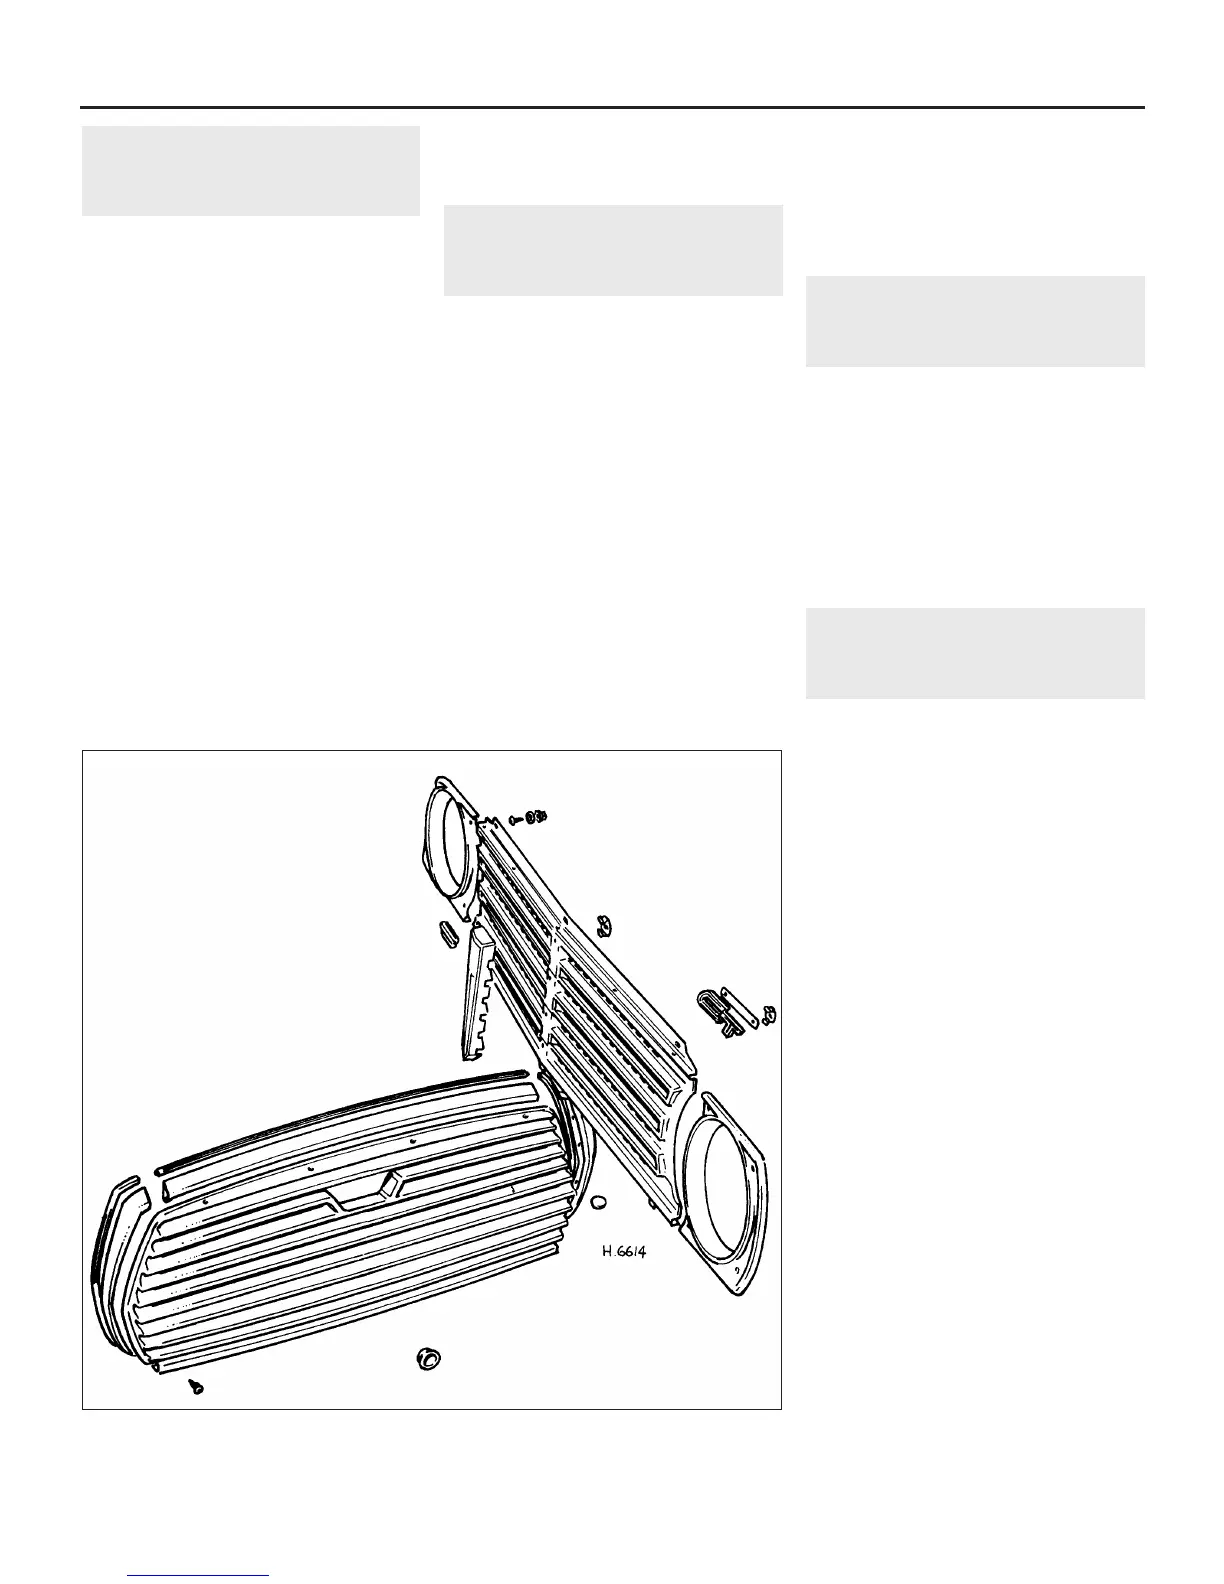
29 Front grille - removal and
refitting
1
All models except
Clubman and 1275 GT
Removal
1 Undo and remove the self-tapping screws
securing the edge trim to each side of the
grille and lift off the trim (see illustration).
2 Undo and remove the remaining screws
securing the centre panel of the grille and
withdraw the panel.
Refitting
3 Refitting is the reverse sequence to
removal.
Clubman and 1275 GT models
Removal
4 Undo and remove the self-tapping screws
securing the grille panel and the headlight
extension panels.
5 Lift off the extension panels, disengage the
lugs on the lower edge of the grille from the
grommets in the lower body panel, and lift off
the grille.
Refitting
6 Refitting is the reverse sequence to
removal.
30 Bodywork seam trim strips -
general information
2
1 The welded seams on the exterior of the
Mini bodywork are covered by protective
metal and push-fit trim strips which are either
chromium plated or sprayed to match the
exterior colour scheme. Additionally, a
chrome, black, or body-coloured trim strip is
used to cover the side sill seams and, on
models without flared wheel arch extensions,
the wheel arch edges. On most models, this is
a one piece plastic moulding running the full
length of the car.
2 The side seam trim strips are removed by
carefully prising up with a screwdriver and
lifting off.
3 To refit the strips, ensure that the small
retaining clips are in sound condition and
simply push the trim into place, giving it a firm
push with the palm of your hand to ensure
that it is fully home.
4 The wheel arch and side sill plastic
moulding is removed after first drilling out the
pop rivet that retains each end of the trim to
the wheel arch.
5 Before fitting a new trim, heat it slightly in a
warm oven until it is pliable and then carefully
position it over the wheel arch edges and side
sill seams. Secure each end with a pop rivet
or self tapping screw.
31 Front and rear bumpers -
removal and refitting
1
The layout of the bumpers and their method
of attachment varies considerably according
to model type and year of manufacture. The
location and type of retaining nuts, bolts or
screws will be obvious after a visual
inspection, and no problems should be
encountered (see illustration). On models
with a full width wrap-around bumper, it is
helpful to engage the aid of an assistant to
support the bumper, thus ensuring that the
paintwork is not scratched as it is removed.
32 Sunroof components -
general information
The sunroof is a complex piece of
equipment, consisting of a large number of
components. Adjustment and/or repair of the
sunroof is outside the scope of this manual,
and it is recommended that work of this
nature should be entrusted to your Rover
dealer.
11•12 Bodywork and fittings
29.1 Front grille panels and attachments
 Loading...