FAULT CODE THUMBNAILS – PAGE F 13
FAULT CODE THUMBNAILS – PAGE F 13
Heater System Solving Guide
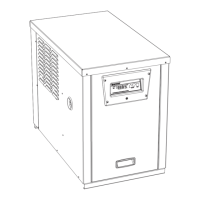
Fault Code Thumbnails LO Switch Open within Safety Limit String (UHS, IDL2)
LO
SWITCH OPEN WITHIN SAFETY LIMIT STRING
UHS, IDL2
PARTS THAT MAY BE NEEDED
• High Limit Switches • Control Module
• (Water) Pressure Switch • Wiring Harness
• Vent Pressure Switch
NOTE: “lo” is normal when pump is off. Otherwise, “lo” means a con-
trol loop switch is open. Therefore, check for the following:
DIAGNOSTIC SEQUENCE
Possibility 1: Water Pressure Switch Fault
A. To verify that the pump is running, turn the pump OFF and watch to see that
the LO code clears. If LO does not clear, proceed to next step.
B. Verify that water flow rate to heater is above minimum required:
20 GPM for H150--- and H200---,
25 GPM for H250--- and H300---,
30 GPM for H350--- and H400---.
If OK, proceed to next step.
C. Check the water pressure switch for faulty wiring and connections: Ensure
wire harness terminals are securely fastened to spade terminals on water
pressure switch. If OK, proceed to next step.
D. Verify the state of water pressure switch contacts: Remove wire leads from
water pressure switch and jumper leads. Then attempt to operate the heat-
er, measuring continuity across water pressure switch. If closed, LO code is
not caused by water pressure switch fault. If open, proceed to next step (af-
ter removing jumper from wire leads and reconnecting wire leads to water
pressure switch).
E. Ensure that low pump pressure does not exist. Clean filter or clear block-
ages. Check position of valves in plumbing system. If OK proceed to next
step.
F. Adjust water pressure switch setting as shown on page 33 of UHS Installa-
tion Manual (only if heater is above or below water level). If LO does not
clear, the water pressure switch is defective and must be replaced.
DIAGNOSTIC SEQUENCE (CONTINUED)
Possibility 2: Vent Pressure Switch Fault
(For UHS indoor installations only)
G. Check the vent pressure switch for faulty wiring and connections: En-
sure wire harness terminals are securely fastened to spade terminals on
vent pressure switch. If OK, proceed to next step.
H. Verify the state of vent pressure switch contacts: Remove wire leads from
vent pressure switch and jumper leads. Then attempt to operate the
heater, measuring continuity across vent pressure switch. If closed, LO
code is not caused by vent pressure switch fault. If open, proceed to next
step (after removing jumper from wire leads and reconnecting wire leads
to vent pressure switch).
I. Ensure that flue is not blocked or restricted: See indoor vent sizing re-
quirements in installation manual. If OK, the vent pressure switch is
defective and must be replaced.
Possibility 3: High Limit Switch Fault
J. Check the high limit switch for faulty wiring and connections: Ensure
wire harness terminals are securely fastened to spade terminals on high
limit switch. If OK, proceed to next step.
K. Verify the state of high limit switch contacts: Remove wire leads from
high limit switch and jumper leads. Then attempt to operate the heater,
measuring continuity across the high limit switch. If closed, LO code
is not caused by a high limit switch fault. If open, proceed to next step
(after removing jumper from wire leads and reconnecting wire leads to
high limit switch).
L. Verify that water flow rate to heater is above minimum required:
20 GPM for H150--- and H200---,
25 GPM for H250--- and H300---,
30 GPM for H350--- and H400---.
If OK, the high limit switch is defective and must be replaced.
Finally, remember that the problem could exist
in the wiring harness and also the control module.
FAULT CODE THUMBNAILS LO SWITCH OPEN WITHIN SAFETY LIMIT STRING (UHS, IDL2)
 Loading...