4
8. Battery Door-On the top of the BitHead is a battery door. To replace your batteries (the
BitHead requires 4 AAA cells), gently pull up on the small tab sticking out of the back of the
battery door. This will lift the entire rubber door. This exposes the battery compartment;
remove the old batteries and insert four new ones. (Always replace all four batteries at
once.)
9. Audio Line Input-The jack on the left is the audio input. Inserting a stereo mini-plug into
this input will disable the audio from the USB input (if present). The included mini-to-mini
cable connects the BitHead to your portable player via this input.
10. USB Input-The jack on the right is the USB input. The BitHead uses a mini-B USB connector,
and a short cable for use with laptops is included with your purchase.
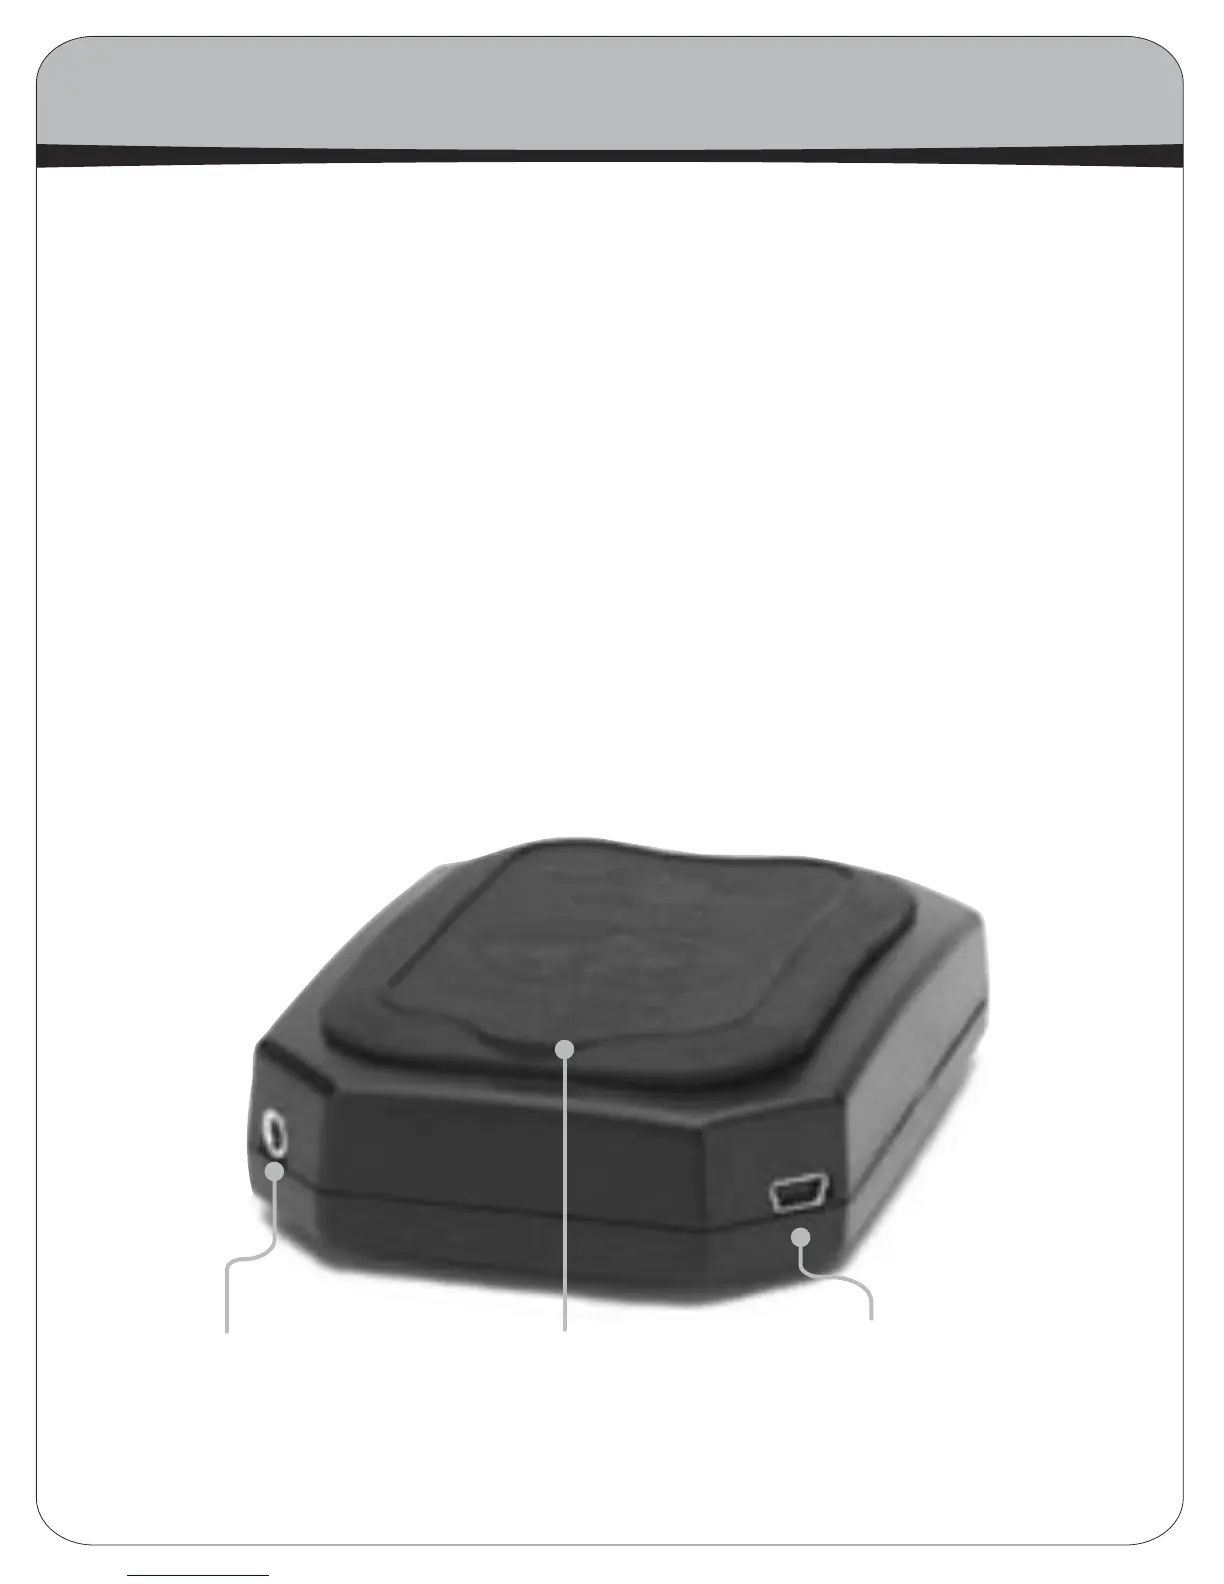
The Back of the BitHead
If you rotate the BitHead 1/2 turn, you’ll see the back of the unit, with two additional inputs,
one on each corner.
8.
Battery Door
9.
Audio Line Input
10.
USB Input