6-20 x 2-1/4"
SELF-TAPPING se
SCREW
CABIV,T
fc
s
BOTTOM
tc>"
CABINET I
TOP
fi
Page 20
^
,
.(4 ) Refer to Detail 5-2A and position your display tubes
as shown. If your display tubes have the two pins
marked with a
v,
bend these two pins toward each
other as shown in the inset drawing. They will not be
used. If your display tubes do not have these pins,
proceed to the next step.
PICTORIAL 5-3
Refer to Pictorial 5-3 for the following steps.
NOTE: When you install the display tubes in the following
steps, support the rear of the readout circuit board as shown
to prevent breaking the circuit board.
NOTE: In the following step, be sure you do not pinch any
wires between the cabinet top and cabinet bottom.
) Position the cabinet top over the cabinet bottom.
Then lower the top straight down onto the bottom.
(This will keep the window from being scratched by
the corners of the display tubes.) NOTE: Be sure the
line cord knot is positioned inside the cabinet and the
line cord is in the channel provided for it in the
cabinet.
* THESE PINS DO NOT GO
INTO A
CONNECTOR,
Detail 5-2B
Refer to Detail 5-2B and install a display tube at
V101. Examine the pins to make sure they are straight
(except as explained in the previous step) before you
install the tube. As you install each tube, watch the
leads to make sure each one goes into its connector, if
it has one. NOTE: Not all the leads go into
connectors.
) Likewise, install display tubes at V102 and V103.
Fasten the cabinet top and bottom together with four
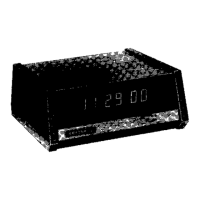
6-20 x 2-1/4" self-tapping screws.
Remove the paper backing from the rubber feet and
install the feet at the four corners as shown.
Remove the paper backing from the cord disconnect
label and press the label into position as shown.
DECORATING
)
he use of the remaining piece of wood-grain trim is
optional. Apply it to the cabinet top if you so desire.
This completes the "Step-by-Step Assembly."
Remove the backing paper from the Heathkit label
and apply it to the front of the cabinet as shown in
Pictorial 6-1.
 Loading...