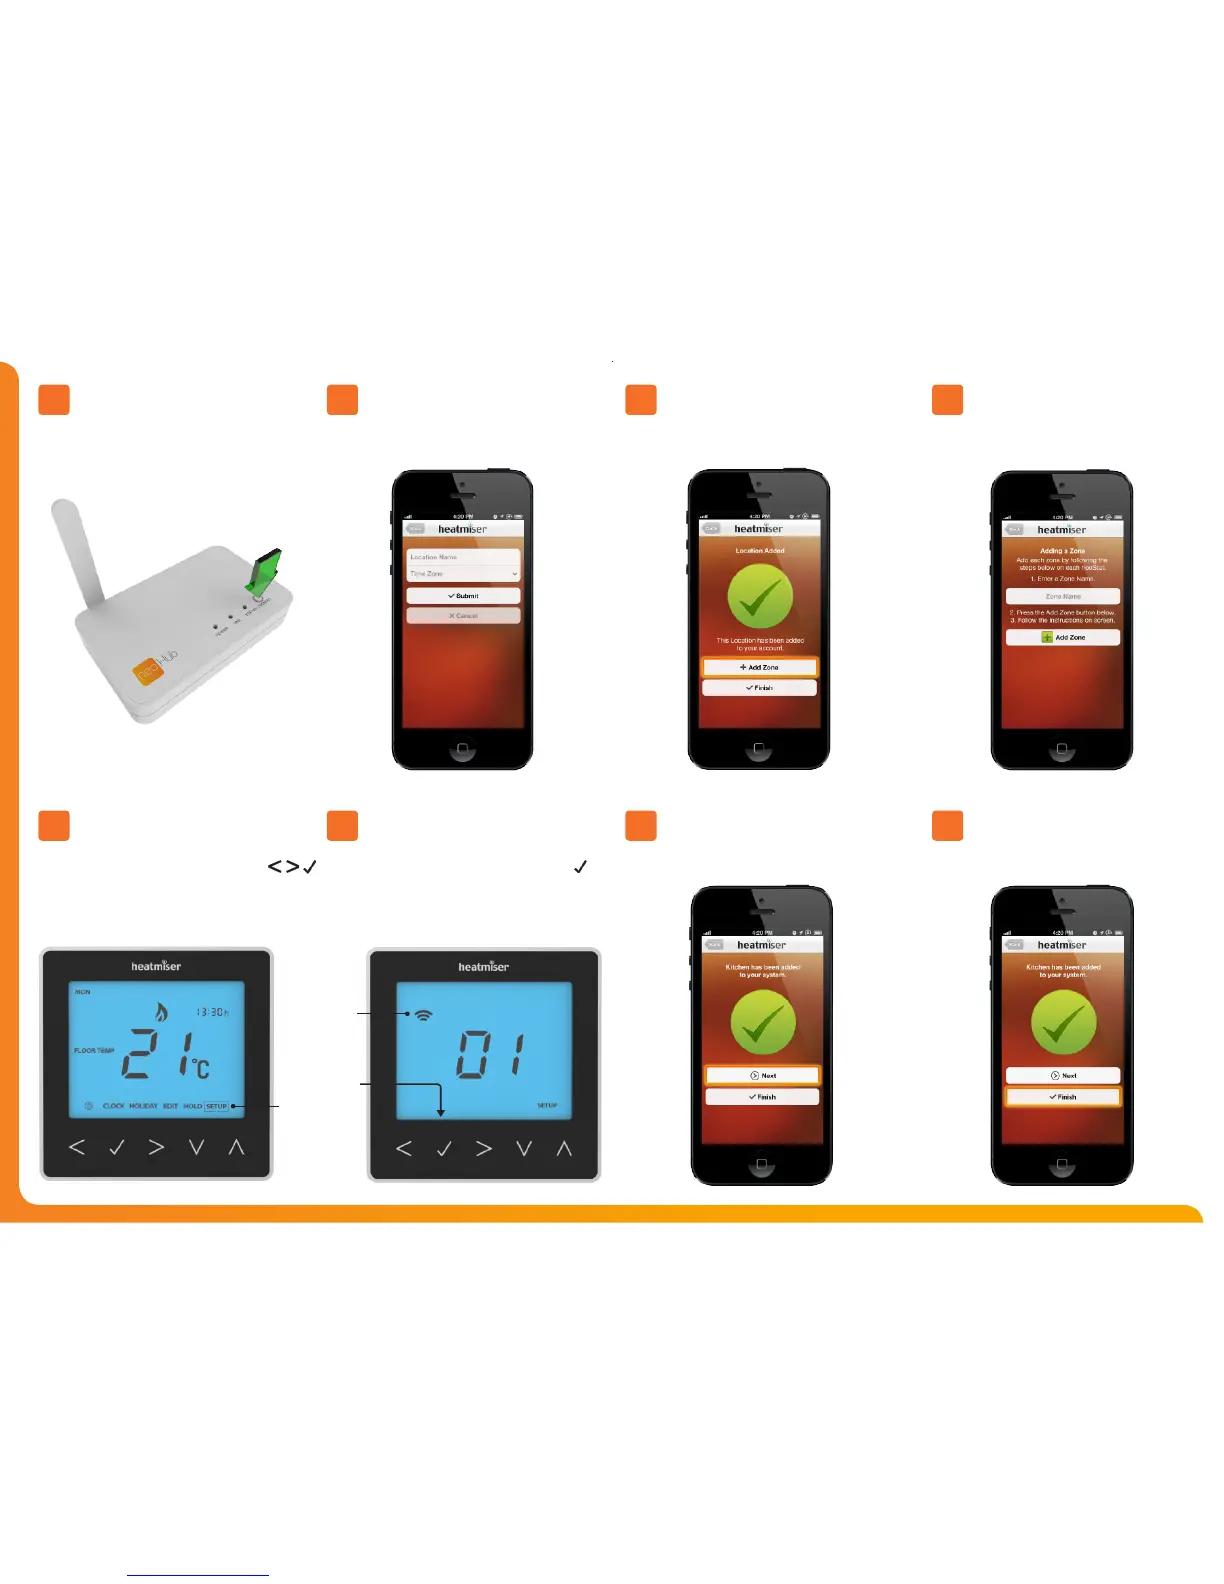
Press the connect button on the neoHub to add the
Location to your Account.
When successfully connected, add a title for the new
location (e.g. Home) and congure the time zone
for the system.
You should now enter the name for this new zone and
then press Add Zone.
The next step is to join neoStats to the neoHub.
Select Add Zone in the neoApp.
When complete, press Next and repeat these steps for all
additional zones on the network.
When all zones have been added, press Finish on
the app to complete setup.
Connect To neoHub
Pair Your neoStat
Name Your neoHub
Pair Your neoStat
Add Zone
Add Another Zone
Assign A Zone Name
Complete Setup
4
8
5
9
6
10
7
11
On the neoStat, use the Left / Right keys to select
SETUP and press Tick ....................................................
Feature 01 is displayed on screen.
Press the Tick key to pair the neoStat to
the neoHub ............................................................................
The MESH symbol appears ashing on the display.
When the neoStat successfully connects to the
neoHub the MESH symbol will then be
permanently displayed.
Setup
Mesh
Symbol
Tick Key
 Loading...