FULLY ASSEMBLED
STEP 6
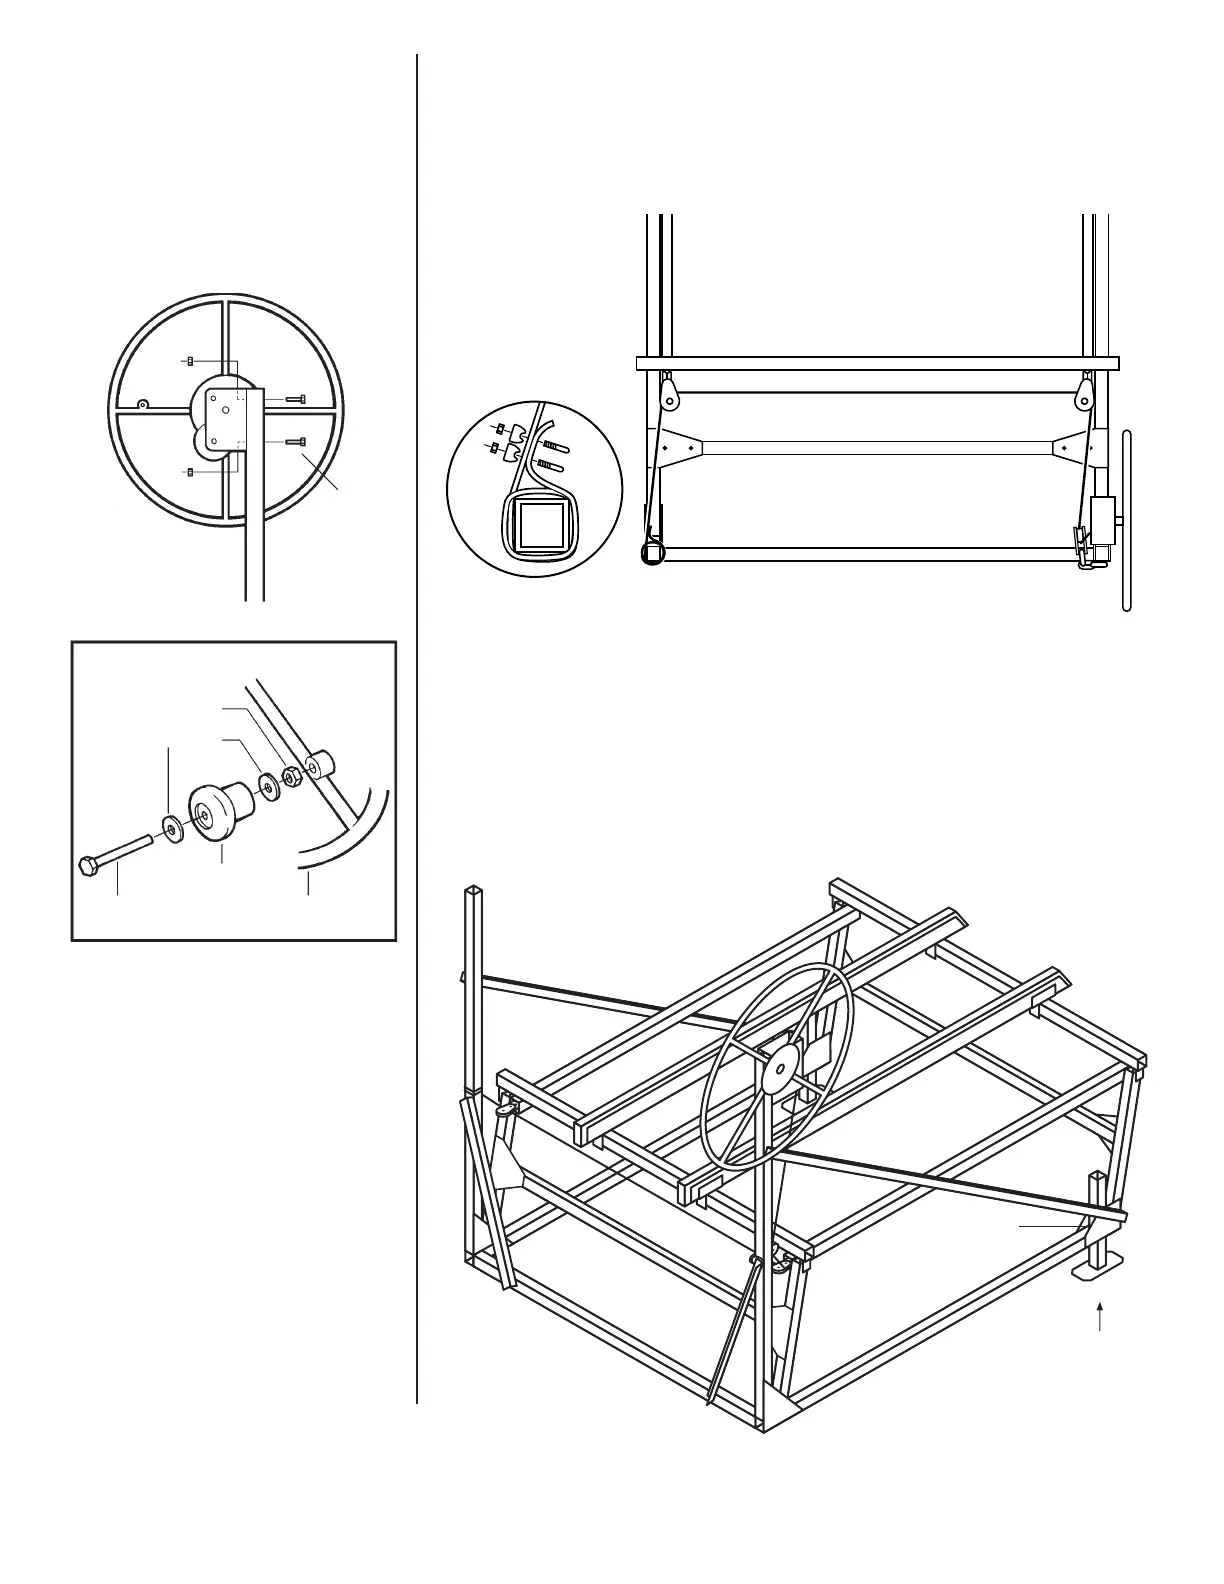
Install winch using two 3/8" x 3" bolts
and nuts. (Diagram shows winch
installed on right side. For left side in-
stallations, turn winch upside down).
Bolt winch wheel to winch and install
spinner knob. Spinner knob should
turn freely on bolt.
WINCH WHEEL
SPINNER KNOB
3
/
8
" X 2
1
/
2
" BOLT
3
/
8
" NUT
3
/
8
" WASHERS
STEP 7
Run cable down from winch and through pulley (1) mounted on Corner Post.
Run cable through pulley (2), over to opposite pulley (3) and secure at op-
posite Corner Post with two cable clamps (4) Note: cable should be wrapped
around the upright two times before securing. If winch is mounted on the other
side of the lift, simply route cable in reverse order.
STEP 8
Tip up back of lift and insert leveling legs. Set screws for rear leveling legs
are inserted into the welded nuts located between the side plates on the Long
Bases. Front leveling legs are also available as an option.
3
/
8
" x 3"
Bolts
1
/
2
" x 1"
Set Screw
(each side)
PAGE 3
LEVELING
LEGS
 Loading...