EasyManua.ls Logo

HiB 33100 - User Manual

Default Icon
4 pages
Print Icon
To Next Page IconTo Next Page
Loading...
FI #05 003 R160908 Ver No. 1.0 Jan 2016
Hush & Breeze Wall Mounted Fans
Thank you for purchasing this HiB product.
Please read through these instructions carefully and refer back to them during
installation to ensure that your product is fitted safely and that it retains its high
quality finish.
Please retain this leaflet for future reference.
Before drilling, ensure there are no hidden cables or pipes in the wall
Please see Fig. 1 on the back page for details
Suitable for installation in zones:
2 & Outside Zones
Breeze Chrome
Timer Art no.32800
Timer & Humidity Sensor Art no.32900
Breeze Matt Silver
Timer Art no.31300
Timer & Humidity Sensor Art no.31400
Breeze White
Timer Art no.31100
Timer & Humidity Sensor Art no.31200
Hush Chrome
Timer Art no.33100
Timer & Humidity Sensor Art no.33200
Hush Matt Silver
Timer Art no.31700
Timer & Humidity Sensor Art no.31800
Hush White
Timer Art no.31500
Timer & Humidity Sensor Art no.31600
Question and Answer IconNeed help?

Do you have a question about the HiB 33100 and is the answer not in the manual?

Overview

This document provides a comprehensive guide for the installation, operation, and maintenance of HiB Hush & Breeze wall-mounted bathroom fans. These fans are designed to enhance bathroom ventilation and are available in various finishes and with different control options.

Function Description

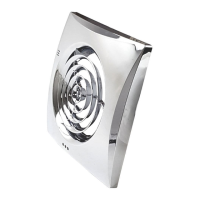
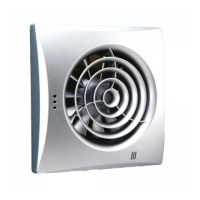
The HiB Hush and Breeze fans are designed to extract humid air from bathrooms, helping to prevent the build-up of moisture, mold, and mildew. They are wall-mounted or ceiling-mounted units that connect to the domestic electrical mains supply. Both models offer options for basic timer control or advanced timer and humidity sensor control, allowing for automated operation based on environmental conditions.

Important Technical Specifications

Hush Model:

  • Power Input: 220-240 V, 50 Hz
  • Maximum Ventilation Volume: 97 m³/hr (±5%)
  • Power Consumption: 7.5W
  • Dimensions: W158 x H158 x D107mm
  • Available Finishes: Chrome, Matt Silver, White
  • Control Options: Timer only, Timer & Humidity Sensor

Breeze Model:

  • Power Input: 220-240 V, 50 Hz
  • Maximum Ventilation Volume: 88 m³/hr (±5%)
  • Power Consumption: 14W
  • Dimensions: W152 x H152 x D126mm
  • Available Finishes: Chrome, Matt Silver, White
  • Control Options: Timer only, Timer & Humidity Sensor

Installation Zones:

Both Hush and Breeze products are suitable for installation in Zone 2 and Outside Zones of a bathroom, as defined by IEE wiring regulations. It is crucial to follow the provided zonal diagram (Fig 1 on page 4) to ensure safe installation. All electrical installations must comply with current IEE wiring regulations and relevant building regulations, and HiB recommends that all electrical bathroom products be fitted by a suitably qualified, Part P registered electrician.

Usage Features

General Operation:

The fans are designed to be connected to an on/off switch outside the bathroom or to a ceiling-mounted pull cord switch. Before drilling, it is essential to ensure there are no hidden cables or pipes in the wall.

Timer Only Models (Art Nos. 33100/31700/31500/32800/31300/31100):

These models activate when a control voltage is supplied to the LT terminal. Once the voltage is switched off, the fan continues to operate for a set time period (T), which is adjustable between 2 and 30 minutes. The run time is regulated by turning a potentiometer clockwise to increase and anticlockwise to decrease the duration.

Timer & Humidity Sensor Models (Art Nos. 33200/31800/31600/32900/31400/31200):

These advanced models operate when a control voltage is applied to the LT terminal OR when the humidity level in the bathroom exceeds a pre-set threshold. The humidity threshold is adjustable via a potentiometer (H). Setting H to its lowest (60%) will cause the fan to run most of the time, while setting it to the highest (90%) will make the fan operate only at higher humidity levels. Once the humidity has been reduced to the required setting, the fan will continue to run for the duration set by the timer potentiometer (T). Both the timer (T) and humidity (H) values are regulated by turning their respective potentiometers clockwise to increase and anticlockwise to decrease the running-out time and humidity level. To set the maximum humidity level, the potentiometer H should be set to the H max (90%) position. A plastic screwdriver is provided for adjusting these settings to prevent damage to the control unit.

Fascia Removal:

  • Hush: To remove the fascia, depress the plastic nodule on the side of the fascia and gently prise it away from the casing.
  • Breeze: For maintenance, remove the small retaining screw and gently prise the fascia away from the casing.

Installation Procedure:

  1. Positioning: Choose a suitable position for the fan according to Figure 1 on the back page. Use a cable finder to check for hidden cables or pipes. Draw around the fan's outline to mark its exact position.
  2. Hole Creation: Create a suitable-sized hole in the wall/ceiling using appropriate tools. If wall-mounted, angle the hole slightly downward to prevent moisture from running back into the motor. If ceiling-mounted, ensure the hole is between joists.
  3. Ducting: Fit flexible ducting into the hole, flush with both sides of the wall. Ensure the duct slopes slightly downwards towards the outside. Repair any plasterwork around the duct.
  4. Fixing: Position the fan, mark the four fixing points, and drill the required holes. Use a ceramic drill bit if drilling through tile. Insert wall plugs into the drilled holes.
  5. Outside Grille: Follow a similar procedure for the outside wall grille.
  6. Ceiling Mounting (Ducting): If ceiling-mounted, route the ducting to the nearest soffit.

Electrical Connection:

  1. Safety First: Ensure the domestic electrical mains supply is switched off before connecting the fan.
  2. Hush Specifics: Remove the front panel and protective cover (4). Pass the power wire through the hole in the rubber plug (beneath the protective cover) at the fan casing flange.
  3. Breeze Specifics: Remove the protective grille. Cut out the blanking plug of the electrical access point (3) and lead the power supply cords through the hole.
  4. Wiring: Make electrical connections according to the provided wiring diagrams for Hush, Breeze, and the ceiling rose. Note that the fan may operate immediately upon connection due to residual charge from testing.
  5. Mounting: Fix the fan to the wall using 4 screws.
  6. Finishing: Replace the cover and protective grille.

Ceiling Mounting Considerations:

For ceiling mounting, follow the wall mounting procedure, but ensure ducting is not mounted vertically to the outside. This prevents moisture from returning to the motor.

Maintenance Features

General Maintenance:

Fan maintenance should only be performed after the fan is disconnected from the mains power supply. Maintenance primarily involves periodic cleaning of the fan surfaces to remove dust and dirt.

Care Instructions:

  • Clean all surfaces with a diluted detergent (e.g., washing-up liquid) and a soft cloth.
  • Do not use abrasives or solvents when cleaning the product.
  • Wipe off any water spillages as soon as possible with a soft, damp cloth.

WEEE Compliance:

The product must not be mixed with general household waste, indicating it should be disposed of responsibly in accordance with WEEE regulations.

Aftercare Service:

In the unlikely event of product failure, customers should contact HiB customer services using the provided contact details.

Important Notes:

  • Always retain the leaflet for future reference.
  • Before drilling, ensure there are no hidden cables or pipes in the wall.
  • HiB reserves the right to alter specifications as necessary in the interest of continuous product development.

HiB 33100 Specifications

General IconGeneral
BrandHiB
Model33100
CategoryFan
LanguageEnglish

Related product manuals