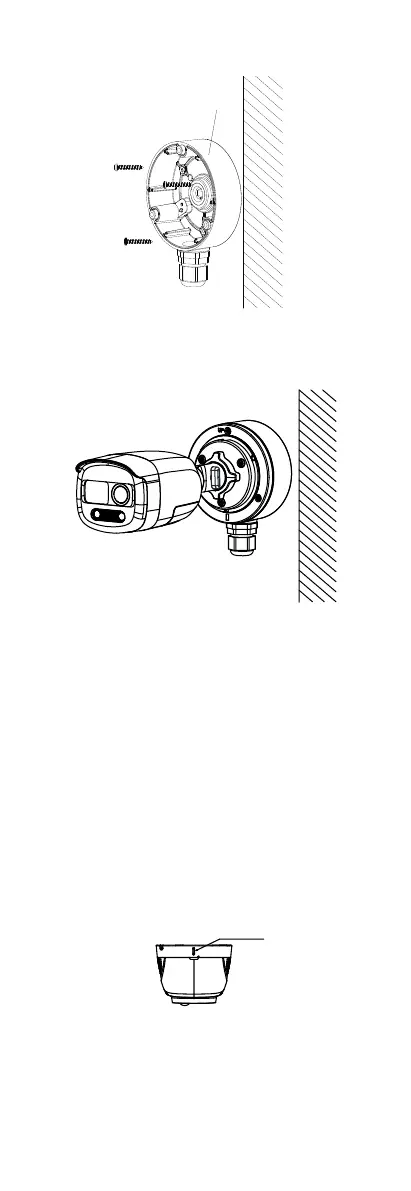
Figure 2-6 Secure the Junction Box on the Wall/Ceiling
6. Route the cables through the bottom cable hole or
the side cable hole of the junction box.
7. Combine the junction box cover with its body.
Figure 2-7 Combine the Junction Box Cover with
Body
8. Repeat the step 5 to 6 of 2.1.1 Ceiling/Wall
Mounting without Junction Box to finish the
installation.
2.2 Installation of Type II Camera
2.2.1 Ceiling/Wall Mounting without Junction Box
Before you start:
The installation of ceiling mounting and wall mounting
are similar. Following takes ceiling mounting as an
example.
Steps:
1. Disassemble the camera by rotating the camera to
align the notch to one of the line, as shown in the
figure below.
Figure 2-8 Dissemble the Camera
2. Pry the mounting base by using a flat object, for
example, a coin.
 Loading...