Do you have a question about the HILL PUMPS MK5 5128-005 and is the answer not in the manual?
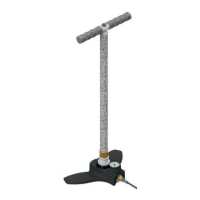
Step-by-step instruction to unpack the pump from its carton.
Instruction to detach the lock ring securing the pump.
Guidance on attaching the pump's base plate.
Instruction to re-attach and hand-tighten the lock ring.
Step for connecting the pump handle.
How to connect the hose using a 14mm spanner.
Final step to manually tighten the bleed screw.
Unpack the pump and Dry-Pac from its carton.
Instruction to detach the lock ring securing the pump.
Guidance on attaching the pump's base plate.
Instruction to re-attach and hand-tighten the lock ring.
How to connect the hose using a 14mm spanner.
Instruction to take the Dry-Pac from its packaging.
Steps to remove the canister for Dry-Pac insertion.
Steps to remove the cap for Dry-Pac insertion.
Guidance on filling the Dry-Pac with indicator media.
Use a straight edge to remove excess beads from the canister.
Instruction to replace the cap onto the canister.
Guide to refitting the canister onto the location arm.
Step for inserting the location arm onto the pump tube.
Press down to connect o-rings to the shoulder, rotating as needed.
Step for connecting the pump handle.
Final step to manually tighten the bleed screw.
Instructions for attaching hose connectors using two spanners.
Advice on stance, strokes, cooling, and maximum working pressure.
Recommended frequency and method for lubricating the inner tube.
Procedure for lubricating the internal floating o-ring.
Guidance on when and how to replace Dry-Pac material.
Explanation of the indicator for Dry-Pac saturation.
Solutions for stiffness, pressure loss, and inconsistent pressure.
| Brand | HILL PUMPS |
|---|---|
| Model | MK5 5128-005 |
| Category | Water Pump |
| Language | English |