2
Wall mount hole
pattern (mm)
200 × 200(43")
600 × 400(85")
Wall mount
screw size
M6(43")
M8(85")
CAUTION
When mounting the TV on a wall, follow instructions provided with the wall mount bracket. If
it is not correctly mounted, the TV may fall and cause property damage or personal injury.
Before mounting the TV, remove the TV stand if you have already attached it, and make
sure the wall mount bracket supports the weight of your TV.
NOTE
The diameter and length of the screws differ depending on the wall mount bracket model.
Wall mount bracket is optional, your device may not have wall mount bracket, please
refer to the actual accessories.
Place spacers between the TV and bracket.
Standard dimensions are shown below.
We do not recommend hanging the TV on a slanted wall, and
when wall mounting make sure your television remains parallel to
the wall and does not lean forward.
Installing the Wall Mount Bracket
TV
screen
Vertical
surface
Wall Mount
Bracket
Wall Mount Screw
Wall Mount Spacer
Rear cover
of the TV
8.0-10.0 mm(43")
9.5-11.5 mm(85")
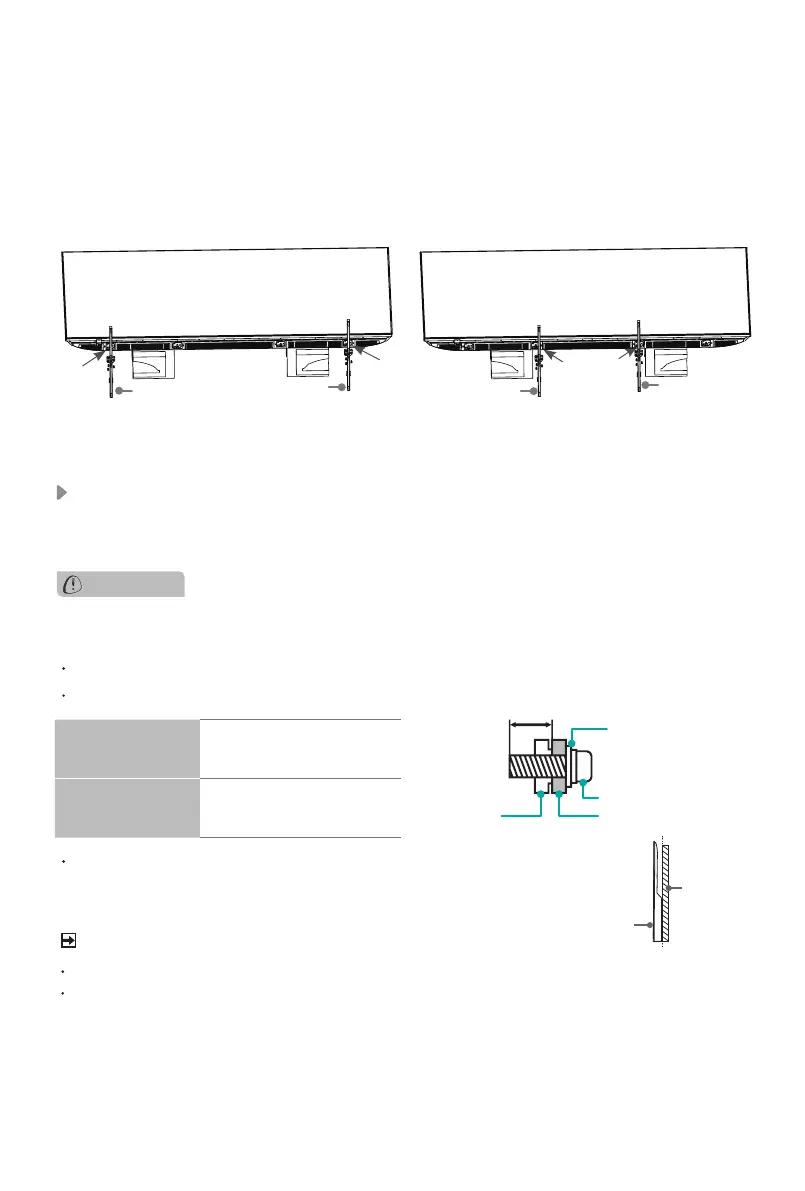
3. Secure the Base Stand to the TV with the 6 screws in the accessory bag tightly.
Then stand the TV up.
Note:
If your table is long enough to place the TV on top of, then insert the base stands into
the screw holes ‘A’ that are shown in the illustration. If your table is NOT long enough, then
insert the base stand into the screw holes ‘B’ that are shown in the illustration. Note that
these two installation methods types cannot be mixed.
A
A
Screws:
M5×16
Screws:
M5×16
B B
Screws:
M5×16
Base Stand
Base Stand
Base Stand
Base Stand