16
CPX1(M1-20)
6-2 Replacing The LCD/PRISM assembly
You should not replace separately the parts of the LCD/PRISM assembly. In case of a failure in any parts of
LCD/PRISM assembly, replace the whole LCD/PRISM assembly.
1. Preparation
Please prepare cleaning tools and materials as follows. And prepare relatively clean room not to work in
additional dust, while removing operation.
(1) Swab for cleaning : P#: NX08061, "Cotton stick L147"
(2) Air duster (Dust blower, spray can)
(3) Vacuum cleaner
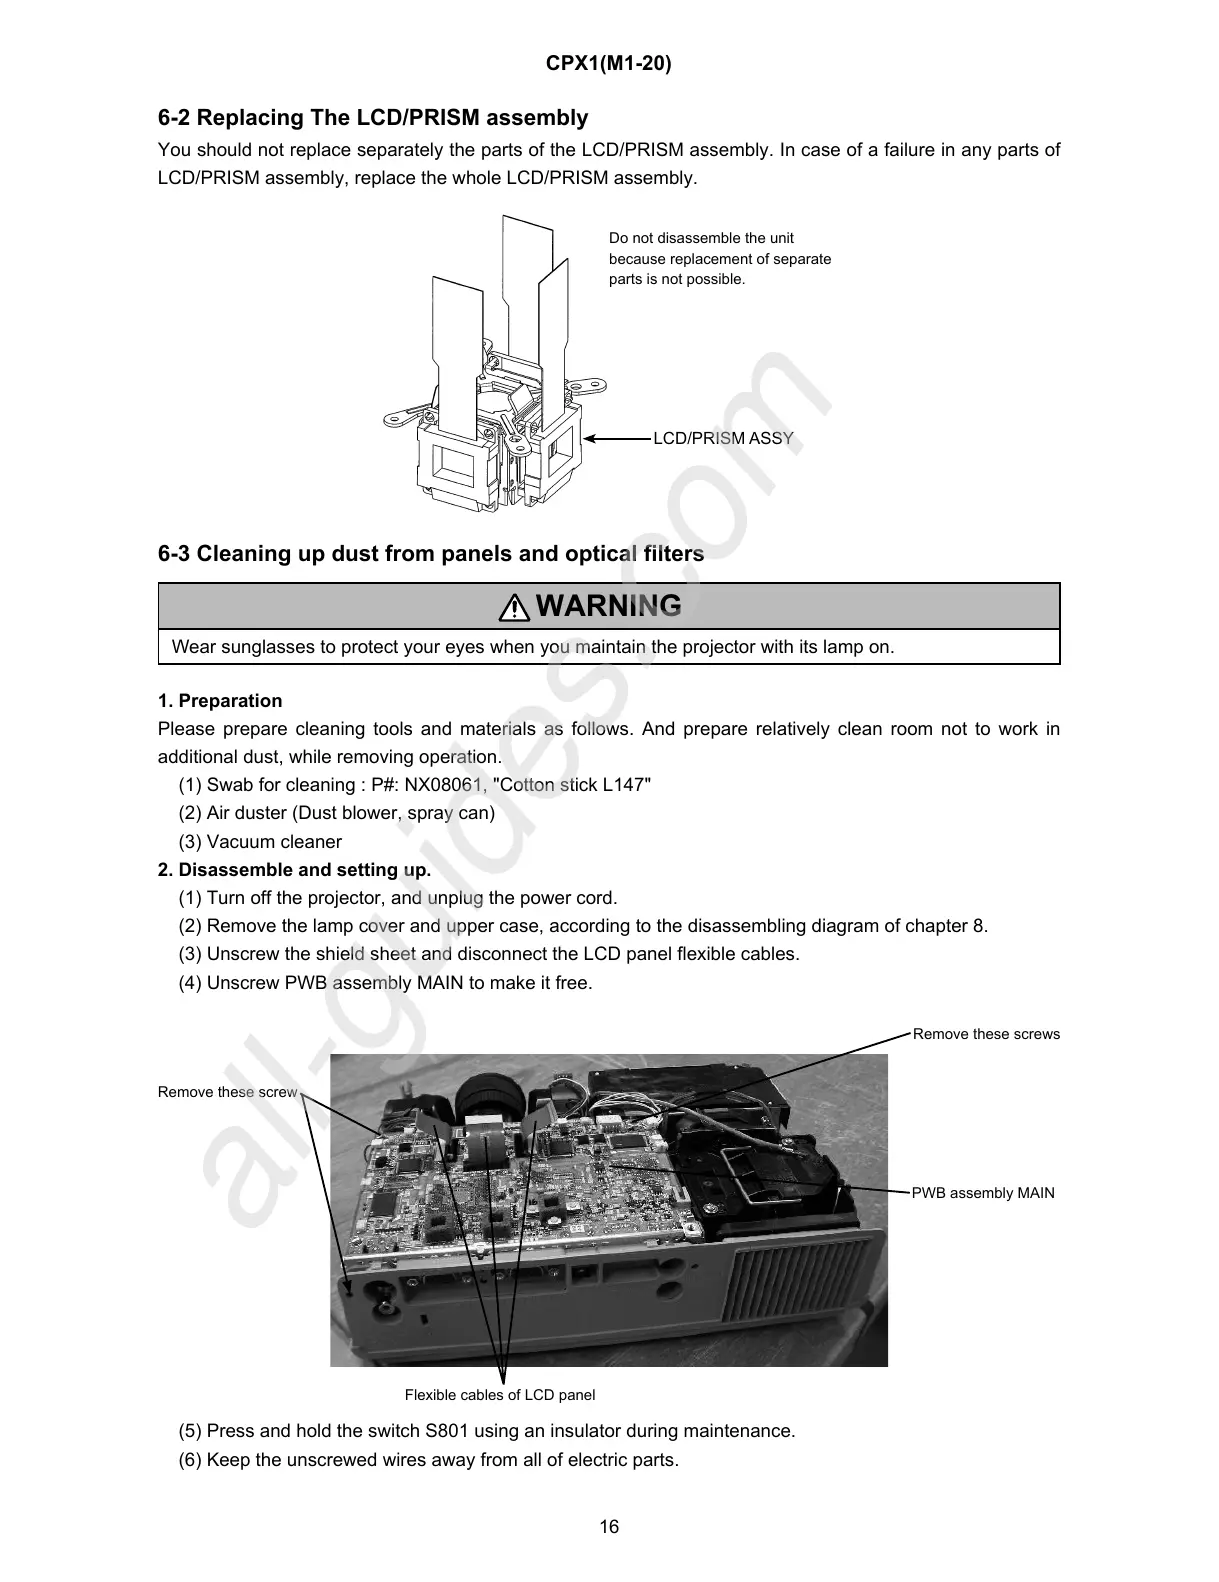
2. Disassemble and setting up.
(1) Turn off the projector, and unplug the power cord.
(2) Remove the lamp cover and upper case, according to the disassembling diagram of chapter 8.
(3) Unscrew the shield sheet and disconnect the LCD panel flexible cables.
(4) Unscrew PWB assembly MAIN to make it free.
Flexible cables of LCD panel
PWB assembly MAIN
Remove these screws
6-3 Cleaning up dust from panels and optical filters
WARNING
Wear sunglasses to protect your eyes when you maintain the projector with its lamp on.
(5) Press and hold the switch S801 using an insulator during maintenance.
(6) Keep the unscrewed wires away from all of electric parts.
Remove these screw
Do not disassemble the unit
because replacement of separate
parts is not possible.
LCD/PRISM ASSY
 Loading...