Menu
Initial Setup Wizard
Power Management
System Management
Information
CTL1
Storage System
S/N: 410006
S/N: 400001
Maintenance Utility
Chassis
Install Remove Locate LED
Drives Alerts
Alert System Locked Logged in as user 00
Logout ?
Last Updated : 2015/02/23 20:32
Firmware
Alert Notifications
Licenses
Network Settings
D & Time
Audit Log Settings
Hardware
Administration
Storage System
Storage System
Name
Contact
Location
Type
Storage System
Serial Number
03-xxxx-xxxx
Tokyo xxxx
HM800M
400001 25 degree C
Set up System Information
74 8 9 91
Data Spare Free Total
Number of Drives
IPv4 Address
IPv6 Address
CTL1
CTL2
CTL1
10.0.0.16
10.0.0.17
Temperature
CTL2
Controller Chassis
DB-00
Go to Detail
Go to Detail
TableGraphic
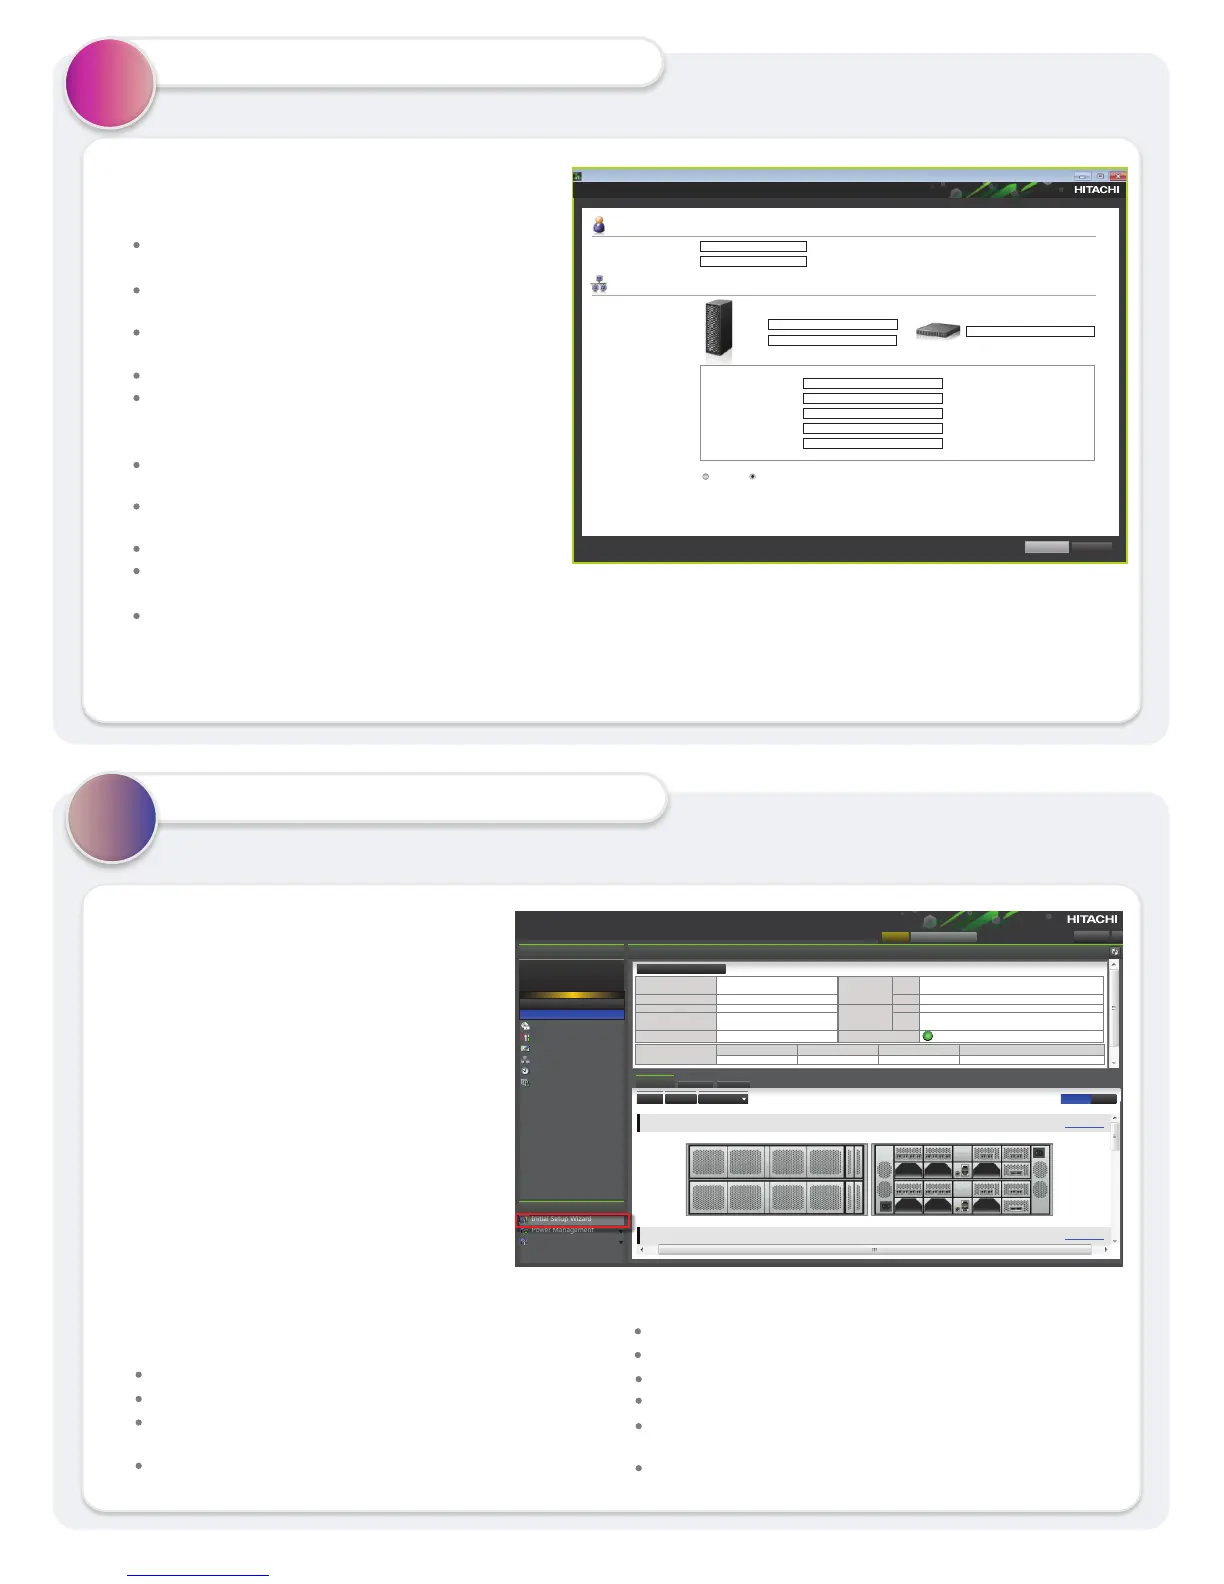
Run the Initial Startup Wizard
1. Congure the PC to use an IP address of 10.0.0.xxx, where
xxx = 1-99 or 101-254, and a subnet mask of 255.255.255.0.
2. Run Remote Desktop Connection:
Click Start > All Programs > Accessories >
Remote Desktop Connection.
In the Computer eld, type 10.0.0.100 and click
Connect.
On the Windows Security screen, type SVP-PC\SVP
in the top eld and raid-login in the bottom eld.
Click OK.
If prompted that the identity of the remote computer
cannot be veried, click Yes to continue.
3. In the Remote Desktop Connection window:
Click Start > All Programs > Hitachi Device
Manager - Storage Navigator.
Right-click Initial Startup and click Run as
administrator.
On the next screen, click Yes .
Click Start Setup at the bottom of the Initial Startup
screen.
When a message about checking the initial
environment appears, click OK.
4. Complete the Initial Startup elds.
5. Click Apply.
4
Cancel
Apply
Initial Startup
Default Account (maintenance)
Initial Startup Tool
New Password
Re-enter New Password
Network Setting
IPv4 Configuration:
IPv6 Configuration:
Storage System Address
CTL1:
CTL2:
Subnet Mask:
Default Gateway:
DNS Server 1:
DNS Server 2:
DNS Server 3:
Enable
Disable
SVP Address
6. When Initial Startup is complete, click Close, and then click Confirm.
The SVP reboots automatically. Rebooting takes 5 to 10 minutes.
7. If you did not connect your IP network (switch) to the LAN1 port on
the SVP, do so now.
Run the Initial Setup Wizard
5
1. Repeat step 2 above to run Remote Desktop
Connection.
2. In the Remote Desktop Connection window,
click Start > All Programs > Hitachi Device
Manager-Storage Navigator >
StorageDeviceList.
3. In the Storage Device List window, click the icon
of the registered storage system.
4. If prompted about a security certicate, select
Continue to this website.
5. Log in to Device Manager - Storage Navigator.
6. From the Maintenance Utility menu, click
Hardware > Other hardware maintenance.
7. In the left pane of the Maintenance Utility
window, under Menu, click Initial Setup Wizard.
8. Provide the requested information in the System
Information and Date & Time pages, and then click
Apply and Next on each page.
9. At the Network Settings page, click Apply and
then Close.
10. In the left pane, click Administration > Alert
Notifications.
In the Alert Notications page, click Set Up.
In the Email tab, congure the notication settings.
In the SNMP tab, congure SNMP settings, and click
Apply.
To send a test email, click Send Test Email in the
Email tab.
11. In the left pane, click Administration > Licenses.
Under License Keys, click Install.
Enter the key code or specify the license key le.
Click Apply.
When the completion message appears, click OK.
Check the licenses you want to enable, and then click Enable
and Apply.
When the completion message appears, click OK.

 Loading...