18. Main/Sub Display Setting
34
A16381H9HF
19.
Room Name Setting
Register the installation location of the controller.
1. Register Room Name
Step1. Select "Service Menu" on the Service & Installation screen and press "OK".
Step2. Select "Set Room Name" and press "OK".
Step3. Press " " to move cursor to font type. Press " " or " " to
select the font type.
*Each time you want to change the font type, press " " to
move the cursor back to font type.
Step4. Press " " to move the cursor to the keypad. Press" ", " ", " ",
or " " to select the font and press "OK" to register it.(Up to 32
characters can be used for each room name.)
Step5. After all the characters have been set, select "
" and press
"OK".
Step6. The confirmation screen is displayed. Select "Yes" and press
"OK" to confirm the settings and Step2 is displayed.
If "No" is selected, the screen returns to Step3.
Set Room Name
1
!
Q
€
Spce
FinDel.
<
2
@
W
A
>
3
#
E
S
Z
4
£
R
D
X
6
“
Y
G
V
→
7
&
U
H
B
5
%
T
F
C
←
8
^
I
J
N
9
(
O
K
M
0
)
P
L
,
ABC
abc
Sym.1
Sym.2
OK
Select Back
Meeting R
Set Room Name
ABCDEFGHIJKLMNOPQRSTUVWYZ12
Set this as Room Name?
NoYes
Back
OK
Select
Font type Keypad
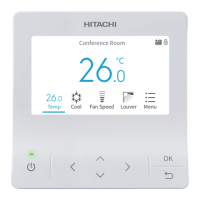
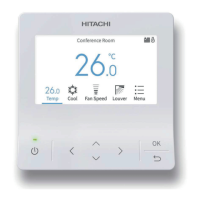
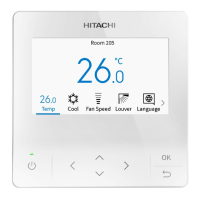
26.0
Conference Room
Cool Fan Speed LouverTemp Menu
26.0
A/C
Sav: Low | Main
18.
Main/Sub Display Setting
The main or sub display of the remote controller can be turned o.
1. Set the main/sub display invisible.
Step1. Select "Service Menu" on the Service & Installation screen
and press "OK".
Step2. Select "Main/Sub Display" and press "OK".
Step3. Press " ", " ", " ", or " " to select "Not Display".
Step4. Press "OK" to confirm the setting.
Step5. Press " " to return to Step2.
With Priority Setting No Priority Setting
Main
No icon
Sub

 Loading...