– 11 –
– 6 –
REMOTE CONTROLLER
Tr ansmits the operation and timer settings to the indoor unit.
The LCD shown in the illustration below is the display immediately after the reset switch is pressed. Usually not
all the data are displayed. On the LCD shown below, the functions not available for this room air conditioner are
also displayed.
Tr ansmission Part
Tr ansmission Indicator
The transmission indicator
lit when a signal is sent.
ROOM TEMPERATURE
Button
Press this button to set the
room temperature. Keep
pressing and the value will
change more quickly.
(Page 13, 14)
HUMIDITY Button
Press this button to set the
humidity for dehumidify and
dry cool operations.
(Page 14)
START/STOP Button
Press this button to start
operation. Press again to stop
operation.
HEAT Button
Press this button to start
heating operation.
(Page 15)
DEHUMIDIFY Button
Press this button to start
dehumidifying operation.
(Page 15)
COOL Button
Press this button to start
cooling operation.
(Page 17)
DRY COOL Button
Press this button to start dry
cool operation. (Page 17)
BUTTONS TO
START OPERATIONS
Remote controller can be used when it is fixed on a wall or pillar using the remote controller holder.
Before fixing it, make sure the indoor unit can be controlled from the remote controller fixing point.
Attach the remote controller
• Insert from above.
Take out the remote controller
• To remove, hold the upper part
of the remote controller and
pull it up.
• Do not remove the remote
controller by twisting it left
and right. Doing so could
result in coming off of the
rear cover.
PROHIBITION
SLEEP TIMER Operation Button
Press this button to start sleep timer
operation. (Page 31)
IONIZED MIST Operation Button
Press this button to start ionized mist
operation. (Page 18)
Screw
NAMES AND FUNCTIONS OF EACH PART (continued)
– 7 –
ENGLISH
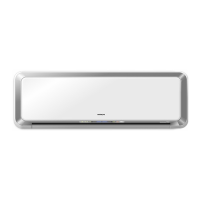
RAR-3R5
(When the door is open)
Operation Selector
Press this button to select the
operation mode. (Page 13, 14)
VERTICAL AIRFLOW Button
Use this button to swing the
vertical air deflector or to adjust
the angle to your preference.
(Page 25)
HORIZONTAL AIRFLOW
Button
Use this button to swing the
horizontal air deflector or
to adjust the angle to your
preference. (Page 26, 27)
PREFERENCE Button
Press this button to select your
preferred mode. (Page 23, 24)
TIMER Buttons
SET TIME Butto n
Use this button to set and
check the current time.
(Page 11)
RESET Button
Press this button after the
batteries are replaced and
when the air conditioner does
not function properly. (Page 11)
MANUAL CLEAN Button
Starts filter cleaning operation
while the air conditioner
operation is stopped. (Page 34)
AIR PURIFYING Button
Press this button to start
stainless plasma air purifying
(FAN) operation.
(Page 18)
BUTTONS TO
START OPERATIONS
FAN SPEED Button
Press this button to select
fan speed. (Page 13, 14)
These are preset functions
except for
(SAVE).
Preset can be done if these
buttons are pressed while the
air conditioner is stopped,
however, the unit will not
function accordingly.
FUNCTION SELECTOR
Buttons
Each time when you press,
blinking changes in the
following sequence (page 12,
19, 20, 21, 22):
ON/OFF Button
Use this button to set or cancel
the function selected by the
function selector.
FUNCTION SELECTOR
 Loading...