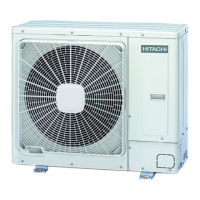
5.4 Installation Work
(1) Secure the outdoor unit with the anchor
bolts.
Fig. 5.6 Position of Anchor Bolts
NOTE:
When the mark * dimension is secured, the
piping work from bottom side is easy without
interference of foundation.
Fig. 5.5 Installation of Anchor Bolts
Fix the outdoor unit to the anchor bolts
with special washer of factory-supplied
accessory.
(2) :KHQLQVWDOOLQJWKHRXWGRRUXQLW¿[WKHXQLW
by anchor bolts. Refer to Fig. 5.6 regarding
WKHORFDWLRQRI¿[LQJKROHV
NOTE
L A B
0 < L < 1/2H 600 or more 300 or more
1/2H < L < H 1400 or more 350 or more
(3) ([DPSOHRI¿[LQJRXWGRRUXQLWE\DQFKRU
bolts.
Fig. 5.7 Fixing Example
(4) )L[WKHRXWGRRUXQLW¿UPO\VRWKDWGHFOLQLQJ
making noise, and falling down by strong
wind or earthquake is avoided.
Fig. 5.8 Additional Fixing Arrangement
75
BA
Fixing Plate
(Field-Supplied)
Both sides on the unit fixing
can be possible.
When vibration measures
are necessary,
add vibration proof rubber.
(Field-Supplied)
(mm)
Dim.
Model
A B
RAS-3HVRNM2 529
116
RAS-4HVRNM2
RAS-5HVRNM2
RAS-6HVRNM2
RAS-7HVRNM2
1109 116
• 7KHDLUÀRZJXLGH2SWLRQDOLVUHTXLUHGZKHQWKHUHDUHLQWHUIHUHQFHVLQERWKIURQWDQGUHDUVLGHRIWKH
outdoor unit.
• The installation of multi-row and multiple outdoor units should be up to 3 outdoor units on a roof, etc. Use
WKHDLUÀRZJXLGH2SWLRQDOLQRUGHUWRSUHYHQWVKRUWFLUFXLWLQJLIPRUHWKDQRXWGRRUXQLWVDUHLQVWDOOHG
• If L is larger than H, mount the units on a base so that
H is greater or equal to L.
In this situation ensure that the base is closed and
GRHVQRWDOORZWKHDLUÀRZWRVKRUWFLUFXLW
In each case, install the outdoor unit so that the
GLVFKDUJHÀRZLVQRWVKRUWFLUFXLWHG
Max.
21mm

 Loading...


