OM-316 Page 31
Return To Table Of Contents
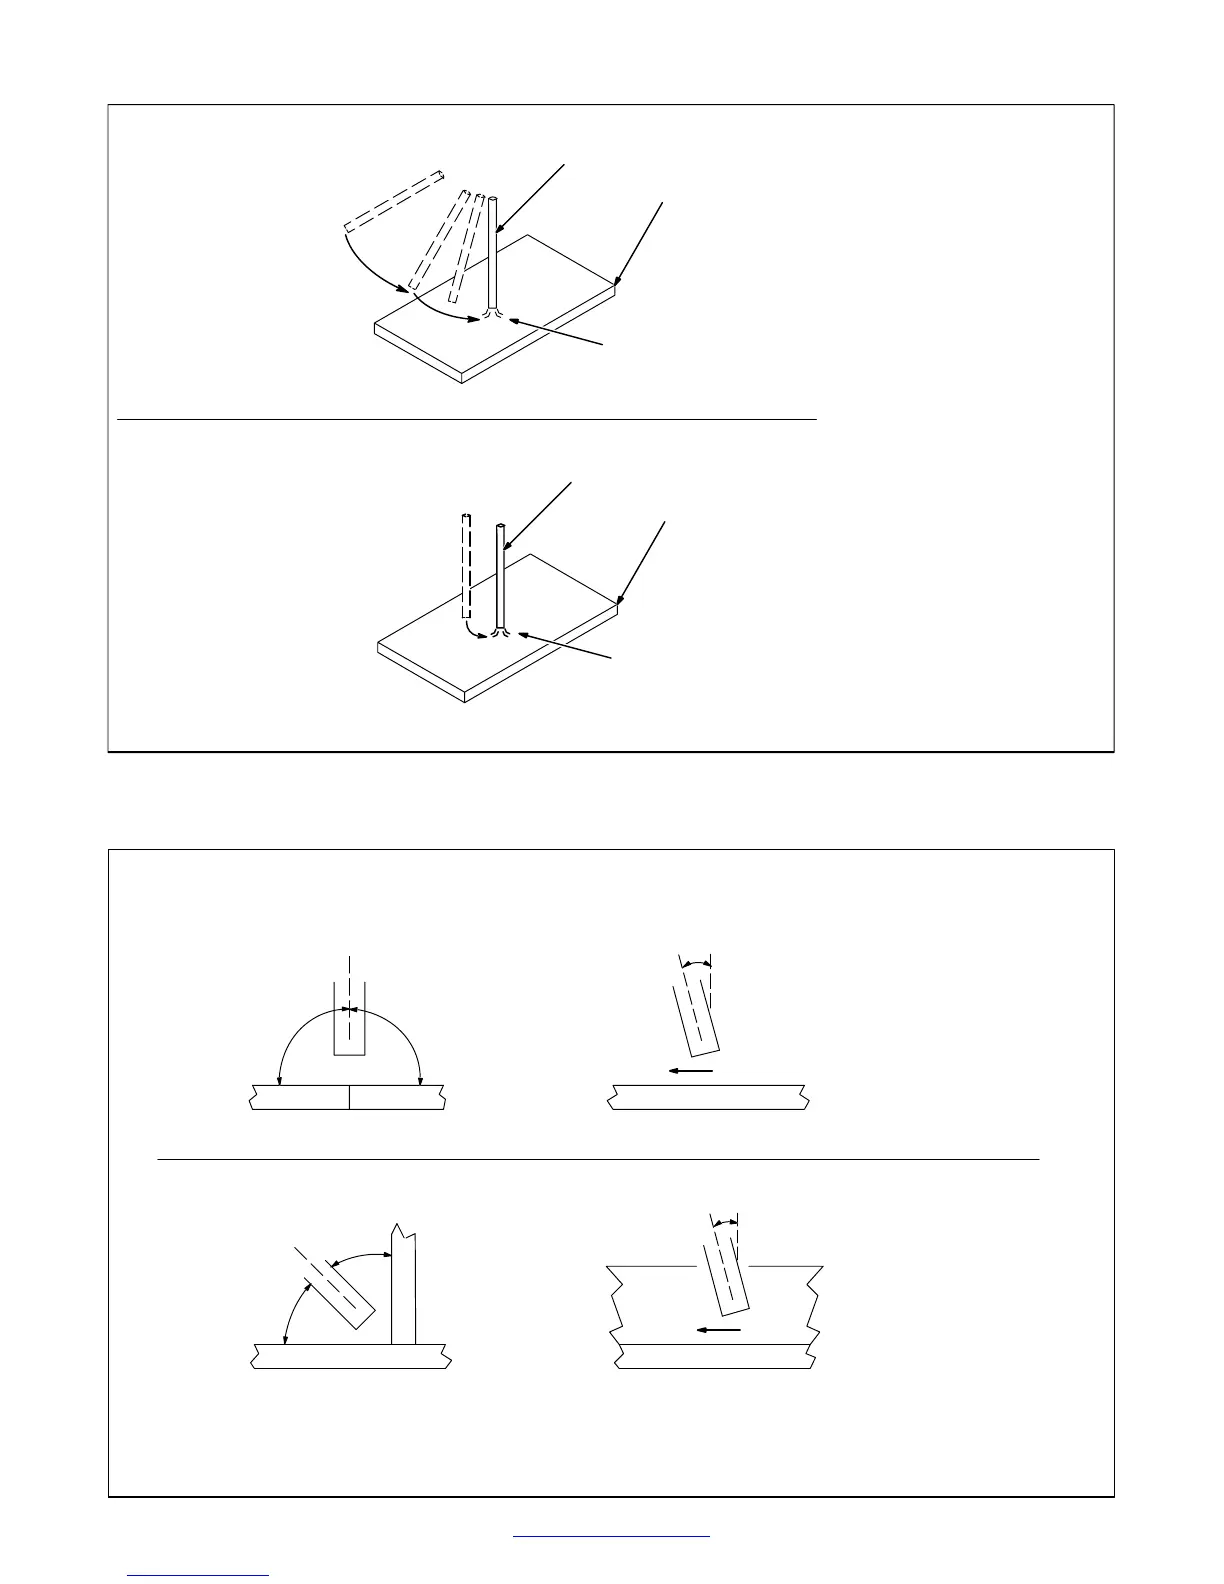
7-3. Striking An Arc
S-0049 / S-0050
1 Electrode
2 Workpiece
3 Arc
Drag electrode across workpiece
like striking a match; lift electrode
slightly after touching work. If arc
goes out electrode was lifted to
high. If electrode sticks to work-
piece, use a quick twist to free it.
Bring electrode straight down to
workpiece; then lift slightly to start
arc. If arc goes out, electrode was
lifted too high. If electrode sticks to
workpiece, use a quick twist to free
it.
1
2
3
1
2
3
Scratch Start Technique
Tap Start Technique
7-4. Positioning The Electrode Holder
S-0660
90° 90°
10°−30°
45°
45°
10°−30°
Groove Welds
End View Of Work Angle Side View Of Electrode Angle
Fillet Welds
End View Of Work Angle Side View Of Electrode Angle
 Loading...