OPERATING INSTRUCTIONS
3
DISCHARGING;
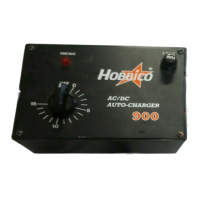
Model 900
• Run the battery in your model until it slows to be sure it is discharged
to the proper level.
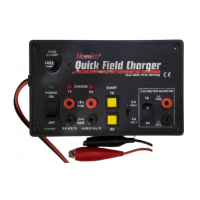
Model 905
• Connect the Battery to the Output Connector (3)
• Move the Charge/Discharge Switch (5) to the DISCHARGE Cycle.
• Turn the Timer (6) clockwise to begin the Discharge Cycle
• Monitor the ammeter (9) closely When the current drops to 1.5 amps,
the Battery is discharged to a safe level.
QUICK CHARGING:
WARNING:
NEVER LEAVE BATTERIES UNATTENDED DURING QUICK CHARGE
• Discharge the Battery Pack (see Discharging instruction above).
• Connect the Input Power, either 120V AC Cord (1) or 12V DC Cord (2)
• If you are using 12V DC, connect the red lead to the positive (+) terminal and
the black lead to the negative (-)
• Connect the Battery to be charged to the Output Cord (3).
Model 905
• Move the Charge/Discharge Switch (5) to the CHARGE position.
Model 900, 905
• Set the Timer (6) to the desired amount of charge time.
• The Timer will automatically switch to Trickle Charge at the end of the quick
charge cycle The Trickle Charge Light will glow at this time The Model 900
is equipped with a Trickle Charge Light to indicate when the charger is in the
trickle charge mode
• If the Battery becomes warm to the touch, this is a good indication that it is
fully charged
• You may periodically wish to let the Battery trickle charge for a few hours after
quick charging. This will equalize the cells which increases capacity and run times.
 Loading...