Do you have a question about the hobbylock 776 and is the answer not in the manual?
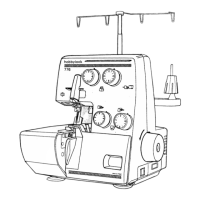
Ensures the machine is placed on a stable, flat surface for optimal operation.
Connects the foot controller to the sewing machine and then to the power source.
Explains how to control sewing speed by applying pressure to the foot pedal.
Details how to operate the machine's integrated sewing light via the master switch.
Provides instructions on oiling critical machine parts to ensure smooth operation and longevity.
Guides on how to access internal components by opening and closing covers.
Step-by-step instructions for correctly threading the machine for proper seam formation.
Performing a test run after threading to check interlocking threads and machine function.
Guidance on setting correct thread tension based on fabric and thread for normal hemming.
A chart providing recommended dial settings for thread tension based on fabric type and stitch.
Chart correlating fabric types, thread types, and appropriate stitch lengths for optimal results.
Illustrations showing the appearance of correct thread tension on the top and reverse sides of the fabric.
Identifies common thread tension issues and provides methods for correction.
Instructions for performing roll hemming, including presser foot replacement.
Key considerations and techniques for successful sewing, including fabric handling and seam finishing.
Guidance on setting up and executing a 3-thread overedge seam for different seam widths.
Procedure for changing the seam width using the upper knife control knob and dial.
Instructions on how to set the desired stitch length using the feed regulator dial.
Explains the differential feed mechanism and how to adjust it to prevent fabric puckering.
Detailed steps for safely removing and installing needles, including important precautions.
Instructions for removing and fitting a new upper knife, including setting the cutting position.
Procedure for safely removing and installing the lower knife, ensuring correct alignment.
Steps for replacing the machine's light bulb, with a caution on wattage.
| Brand | hobbylock |
|---|---|
| Model | 776 |
| Category | Sewing Machine |
| Language | English |