area of interest, then scan across with up and down
motions until you locate the hot spot.(please turn on
the laser to for accurate measuring)
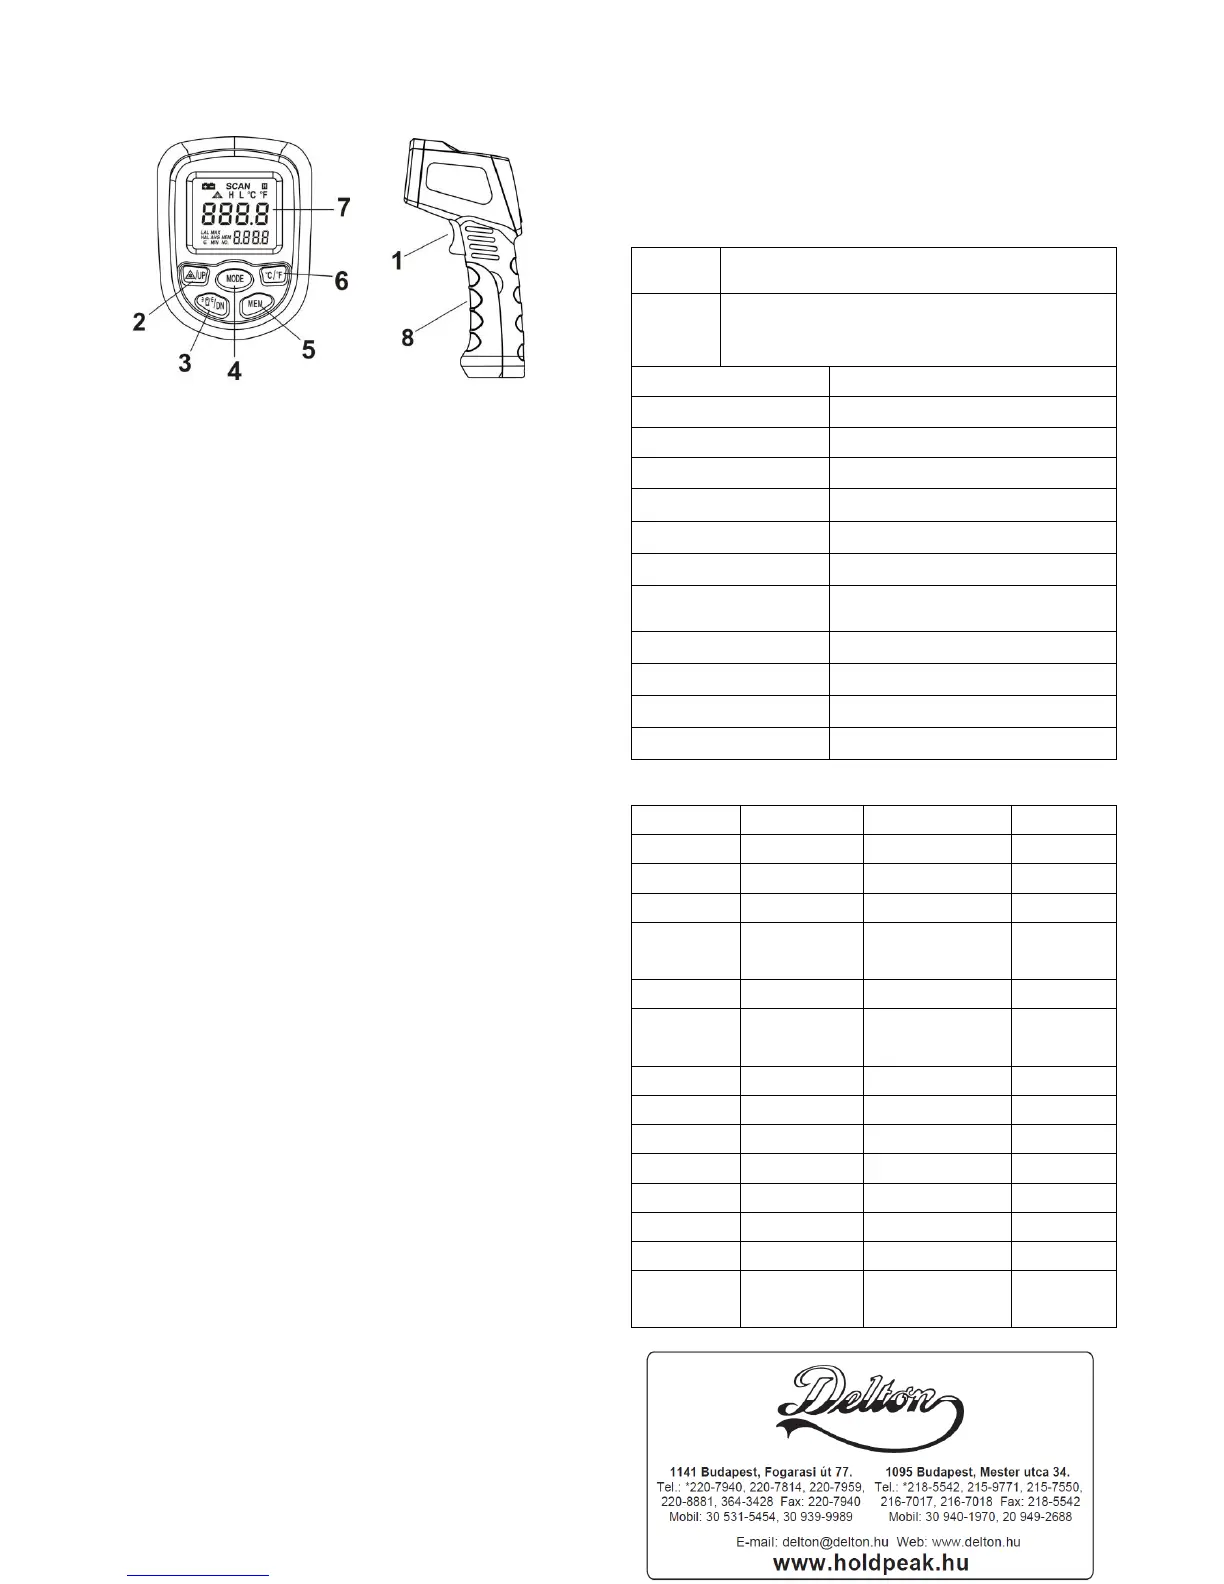
3. Diagram description
(1) Trigger:Press once, Power on. Press one more time ,
Reading shows on the screen and Turn to Date HOLD
model while release the trigger, auto data hold will
keep for 10 seconds. 10 sencond without any
operation, will auto power off.
(2) Laser Light&Up bottom:Press once, turn on laser
light, press one more time, turn off laser light. While
setting on “warning temperature setting” ,” emissivity
setting” and “Date storage Reading” this bottom
work as UP bottom.
(3) Back Light/Down bottom:Press once, turn on back
light , press one more time, turn off backlight. While
setting on “warning temperature setting” ,” emissivity
setting” and “Date storage Reading” this bottom
work as DOWN bottom.
(4) MODE Bottom:Press this bottom to chose mode
E-MAX-AVG-MIN-LAL-HAL circularly。
A、MAX:Measure current max reading ;
B、MIN:Measure current min reading;
C、AVG:Average of all the reading data ;
D、HAL:High Temperature Warning , Chose mode
HAL to set the warning temperature(HIGH), press
“UP/DN” to select temperature. while measure date is
higher than setting temperature, “H” will display on
the screen
E、LAL:Low Temperature Warning , Chose mode
HAL to set the warning temperature(LOW), press
“UP/DN” to select temperature. while measure date is
lower than setting temperature, “L” will display on
the screen
(5) MEM Bottom:For reading the storage data。Press
once to read the date。Press“UP/DN”to select date。
It can store only 12 data, while over 12 date, the new
one will cover the old one。Once take out battery, all
the date will be gone.
(6) ℃ /
0
F: ℃ /
0
F Change, If you want to change the
temperature unit,Please press this bottom。
(7) LED Screen。
(8) Battery door: When replace battery door, please using
the finger indents to pull open the battery door.
3、Maintenance
1) Lens cleaning: Blow off lose particles using clean
compressed air. Gently brush remaining debris away
with a moist cotton cloth.
2) Case cleaning: Clean the case with a damp
sponge/cloth and mild soap.
3) Please take out the battery when not using for a long
time.
Note:
1) Do not use solvent to clean lens.
2) Do not submerge the unit in water.
4、specifications
 Loading...