EasyManua.ls Logo

Home Accents Holiday 24SV24386 User Manual

Home Accents Holiday 24SV24386
17 pages
To Next Page IconTo Next Page
Page #1 background imageLoading...
Page #1 background image
USE AND CARE GUIDE
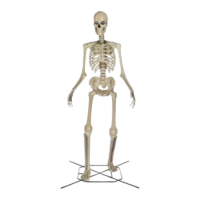
12FT GIANT SIZED SKELLY
USA Item #1010749792
Model #24SV24386
THANK YOU
We appreciate the trust and confidence you have placed in Home Depot through the purchase of this 12ft Giant Sized Skelly. We strive
to continually create quality products designed to enhance your home. Visit us online to see our full line of
products available for your home improvement needs. Thank you for choosing Home Accents Holiday!
Video assembly
instructions
available online
1-855-HD-HOLIDAY (1-855-434-6543)
HOMEDEPOT.COM
Questions, problems, missing parts? Before returning to the store, call Home Accents Holiday
Customer Service 8 a.m. - 7 p.m., EST, Monday - Friday, 9 a.m. - 6 p.m., EST, Saturday
Questions and Answers:

Home Accents Holiday 24SV24386 Specifications

General IconGeneral
BrandHome Accents Holiday
Model24SV24386
CategoryHousehold Appliance
LanguageEnglish

Summary

Safety Information

Warranty and Purchase Information

Pre-Assembly Steps

Planning Installation Details

Provides estimated installation time and number of people required for assembly.

Tools Required for Assembly

Lists the necessary tools for assembling the product.

Package Contents Overview

Assembly Instructions

Placing the Feet

Instructions on how to place the Right and Left Feet onto the Base.

Attaching Lower Support Poles

Connects the Right and Left Lower Support Poles to the Base.

Placing the Shins

Guides on sliding the Right and Left Shins onto the corresponding support poles.

Attaching Upper Support Poles

Attaches an Upper Support Pole to both the Right and Left Lower Support Poles.

Placing the Femurs

Attaches the Right and Left Femurs to the Upper Support Poles and Shins.

Attaching the Pelvis

Connects the Pelvis to the Upper Support Poles and Femurs.

Laying Down the Assembly

Recommends leaning the assembly onto the box for easier assembly.

Attaching the Spinal Support

Attaches the Spinal Support to the top of the Pelvis.

Attaching the Rib Cage

Slides the Rib Cage over the Spinal Support and connects cables.

Securing the Loop Screw

Installs the Loop Screw into the threading at the upper back of the Rib Cage.

Attaching the Right Humerus

Attaches the Right Upper Arm to the Rib Cage using a Hex Wrench.

Attaching the Left Humerus

Attaches the Left Upper Arm to the Rib Cage using a Hex Wrench.

Attaching the Forearms

Connects the Right and Left Forearms to the Upper Arms.

Securing the Tether Cable

Threads the Tether Cable through the Base and Loop Screw.

Attaching the Head

Connects Head cables to Rib Cage, tucks excess, and secures Head.

Plugging in the Adapter

Connects the power adapter to the control panel or pelvis.

Standing Up the Skeleton

Instructions for safely standing the assembled skeleton upright.

Attaching Base Extensions

Attaches the Base Extensions (S) to each corner of the Base (A).

Securing the Base

Uses Stakes (V) to secure the base to the ground for stability.

Adjusting to Preference

Final adjustments for eye controls, positioning, and arm posing.

Operation and Controls

Control Panel Functions

Details the control panel with 3 function settings and 8 eye options.

Remote Control Usage

Explains how to use the remote control for settings and battery replacement.

Care and Cleaning

General Cleaning and Storage

Instructions for cleaning the product and proper storage to avoid damage.

Product Specifications

Power Adapter Specifications

Details the input, output, and wattage of the power adapter.

Troubleshooting Common Issues

Service Parts Availability