
S
Sarah SandersAug 6, 2025
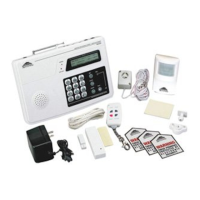
Why won't the auto-dialer work on my Home Sentinel WA110 Security System?
- KKaren SmithAug 6, 2025
To ensure the auto-dialer functions correctly on your Home Sentinel Security System, verify that the system is armed and set to AUTO mode. Keep in mind that a touch-tone service is necessary for the auto-dialer to operate properly.