Do you have a question about the Home Venus Smart Bulb and is the answer not in the manual?
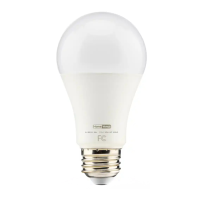
Details the smart bulb's design, connectivity, app compatibility, and features like color temperature and dimming.
Instructions on how to physically install the smart bulb into a light fixture.
Guide on searching for and downloading the 'HVS Smart' mobile application.
Process for creating a new account or logging into the HVS Smart application.
Instructions for adding the smart bulb device within the HVS Smart app interface.
Steps to set the bulb's indicator light to flash rapidly for pairing.
Guide for entering Wi-Fi network credentials to connect the device.
This document describes the Home Venus Smart Bulb, a lighting solution designed for modern smart homes. The smart bulb offers remote control capabilities, allowing users to manage their lighting from smartphones or tablets. It connects via Wi-Fi and Bluetooth, with Bluetooth enhancing the Wi-Fi network for a better user experience, especially if the Wi-Fi signal is weak.
The Home Venus Smart Bulb is primarily a tunable white light source, offering a continuous change in light color temperature from warm to cold white. This feature allows users to adjust the ambiance of their space to suit various activities or moods. The bulb also includes a dimming option, enabling users to control the brightness from 10% to 100%.
The bulb is controlled through the Hvs Smart app, which is compatible with both Android and iOS devices. Beyond basic on/off and dimming functions, the app provides additional features such as scheduling to set specific times for the bulb to turn on or off, and a timer for automatic shutdown. It also offers preset modes like "reading," "working," and "night," which adjust the light settings for optimal comfort during these activities.
The Home Venus Smart Bulb is designed to integrate seamlessly with popular smart home ecosystems, being compatible with Amazon Alexa and Google Assistant. This allows for voice control, adding convenience to daily use.
To get started, users first need to install the smart bulb properly into a light fixture. Once installed, the next step is to download the "HVS Smart" app from major application markets or by scanning the provided QR code.
After downloading the app, users will need to register or log in. Registration can be done via an authentication code, which involves entering a verification code sent to the user's phone or email and then creating a password.
Adding the device to the app involves clicking "Add Device" or the "+" icon on the app's homepage. Users can choose between "Add Manually" or "Search Device." For manual addition, users select "Lighting" and then "Light Source" from the device list. The initial setup requires connecting to a 2.4GHz Wi-Fi network. Bluetooth and Hotspot (AP Mode) are also available for direct control after the setup is complete.
A crucial step in the setup process is to set the indicator light to rapid flashing. This is achieved by powering the device on, then powering it off after 10 seconds, and then powering it back on. Following this, the user needs to turn the light on-off-on-off-on, ensuring that the time interval between turns is not too short. The app will then prompt the user to confirm that the light bulb is rapidly flashing (typically two times per second).
Once the light is flashing, users enter their Wi-Fi password into the app. The app will then connect to the device, register it to the smart cloud, and initialize it. During this "Connecting" phase, it's recommended to keep the router, mobile device, and smart bulb as close as possible.
After successful connection, users can access the bulb's control interface. This includes a "Switch" function for turning the bulb on or off, and a "Color Mood" section for adjusting the tunable white light and brightness. The app also offers a "Scenes" feature, allowing users to select curated color scenes based on their mood or activity, such as "Night," "Read," "Working," and "Leisure."
The smart bulb also supports "Smart Features - Automation," which allows users to create custom automation rules. By clicking "Add Smart" or "+" on the "Smart" page and selecting "Automation," users can configure conditions and actions. For example, they can set a "Time Schedule" to automate the bulb's operation based on specific times, temperature, humidity, weather, or even sunrise and sunset. This enables the bulb to turn on or off automatically at set times or under certain environmental conditions. Users can also create groups of bulbs for synchronized control, which can be managed from the "Home" page of the app.
The manual provides troubleshooting tips for common issues. If the bulb cannot connect to the Wi-Fi network, users should first verify that the correct Wi-Fi password was entered and check their internet connection. If the Wi-Fi signal is weak, resetting the Wi-Fi router and trying again is recommended. Bluetooth can help improve the Wi-Fi network connection for a better experience.
If the setup is not working properly, users are advised to close all apps running in the background and then re-open the Hvs Smart app. If the problem persists, uninstalling and reinstalling the Hvs Smart app and repeating the setup process is suggested.
For further assistance, users can contact customer support via email at service@routesun.com.
| Wattage | 9W |
|---|---|
| Color Temperature | 2700K-6500K |
| Brightness | 800 Lumens |
| Connectivity | Wi-Fi |
| Dimmable | Yes |
| Compatibility | Amazon Alexa, Google Assistant |
| Life Span | 25, 000 hours |
| Type | LED |
| Base Type | E26 |
| Color | RGB |
| Operating Temperature | -20°C to 40°C |
| Certification | RoHS |
| Brand | Home |