EasyManua.ls Logo

Honey Bee AirFlex 225 - User Manual

Honey Bee AirFlex 225
137 pages
Print Icon
To Next Page IconTo Next Page
Loading...
Revision 1.3 P/N: 95029
FLEX Header
Operator Manual
2018
®
200 Series

Table of Contents

Questions and Answers

  • K
    kathrynmossSep 23, 2025
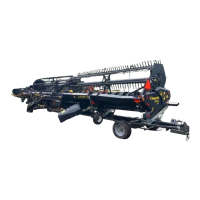
    What to do if Honey Bee AirFlex 225 reel height is uneven?
    • W
      William JohnstonSep 23, 2025
      Uneven reel height and fore/aft can be caused by a couple of issues. The reel cylinders might be out of phase. Another potential cause is that the reel stops are not set to the same height. Adjust the reel stops to ensure they are even.
  • Y
    yjenningsAug 25, 2025
    What to do if cut crop is building up on Honey Bee AirFlex 225?
    • D
      Destiny RosarioAug 25, 2025
      To address cut crop building up and falling from the front of the cutterbar, or loss of grain heads at the cutterbar on your Honey Bee Tractor Accessories, make sure the reel is set low enough to sweep material from the cutterbar. Increase ground speed if it's too slow for the crop conditions. Move the reel closer to the cutterbar if it's too far forward. Adjust the angle of the cutterbar using the tilt adjuster at the center of the platform. Decrease the Cut Set Point if the FLEX Cut Set Point is set too high (more than 2”).
  • L
    Lisa SummersAug 25, 2025
    How to stop reel wrapping in tangled conditions on Honey Bee Tractor Accessories?
    • M
      martin46Aug 26, 2025
      To resolve reel wrapping in tangled and weedy conditions with your Honey Bee Tractor Accessories, adjust the reel forward and down. Slow the reel speed until the crop flows smoothly onto the belts. Adjust the reel timing to the next more aggressive setting (lower number) to help the reel fingers eject material properly.
  • B
    Brianna SharpAug 27, 2025
    Why is there uneven feeding of crop on Honey Bee AirFlex 225 Tractor Accessories?
    • I
      ishawAug 27, 2025
      To correct uneven or bunched feeding of crop in your Honey Bee Tractor Accessories, adjust the reel settings. Also, adjust the lower stops downward if they are set too high. Ensure proper feeder house conveyor chain tension. Adjust the belt tension, and increase draper tension if it is too loose. Finally, adjust the reel if crop is bunching on the feather plate.
  • K
    katelynwallaceAug 27, 2025
    How to prevent reel carrying crops on Honey Bee AirFlex 225?
    • P
      Patrick FranklinAug 27, 2025
      To prevent reel carrying around crops or excessive shattering of grain heads with your Honey Bee Tractor Accessories, slow down the reel speed so it turns slightly faster than the ground speed. Raise the reel height to reduce the amount of straw gathered by the reel. Reduce finger pitch by adjusting the reel timing to the next less aggressive setting (higher number). If the pickup fingers are too tightly spaced, replace the 2.5” spaced reel fingers with 5” spaced reel fingers by removing every 2nd finger.
  • P
    Peter MontgomerySep 13, 2025
    How to stop crop dividers riding up on Honey Bee AirFlex 225?
    • J
      Jessica WilliamsSep 14, 2025
      To resolve the issue of crop dividers riding up on top of the crop with your Honey Bee Tractor Accessories, adjust the crop divider float settings to be ‘heavier’.
  • C
    Carly WilsonSep 12, 2025
    What to do if crop is not feeding properly on Honey Bee AirFlex 225?
    • S
      simpsoncameronSep 12, 2025
      If the crop is not feeding properly on your Honey Bee Tractor Accessories, lower the reels, increase the speed of the power unit/reel, set reel finger timing to be more aggressive, and set reel fore/aft to clear feather plates.
  • J
    Jill RogersSep 12, 2025
    How to fix excessive knife drive loads on Honey Bee Tractor Accessories?
    • S
      Sara BeasleySep 12, 2025
      To address excessive knife drive loads or inconsistent cut heights on your Honey Bee Tractor Accessories, replace dull knife sections and dull knife guard edges. Inspect for bent guards, a bent cutterbar, or improper position of guards if there is excess binding between the top of knife sections and the top of guard slots.
  • M
    Manuel DudleySep 4, 2025
    How to fix uneven reel height on Honey Bee AirFlex 225?
    • J
      Jose CampbellSep 4, 2025
      To resolve uneven reel height and fore/aft issues on your Honey Bee Tractor Accessories, rephase the cylinders. The header reel must be running to fully rephase the reel lift cylinders. Also, adjust the reel stops to the same height.
  • A
    Ashley HendrixSep 2, 2025
    How to fix drapers slipping on Honey Bee AirFlex 225?
    • K
      Kenneth WilliamsSep 2, 2025
      To address the issue of drapers slipping on your Honey Bee Tractor Accessories, adjust the draper tension.

Summary

2 - Introduction

2.1 - Directions

Defines front/rear, left/right based on travel direction.

2.2 - Warranty

Outlines warranty coverage, limitations, and claim procedures.

3 - Safety

3.1 - Recognize Safety Information

Explains safety alert symbols and precautions for safe operation.

3.2 - Understand Signal Words

Defines signal words like DANGER, WARNING, CAUTION for hazard identification.

3.3 - Read and Understand Instructions and Warnings

Emphasizes importance of reading manual and safety signs.

3.4 - Protective Clothing

Advises on wearing appropriate clothing and hearing protection for safety.

3.5 - In Case of Emergency

Recommends keeping first aid and fire extinguisher readily available.

3.6 - High Pressure Spray

Warns against spraying oneself or equipment with pressure spray.

3.7 - Store the Header Safely

Provides guidelines for securing header and keeping bystanders away.

3.8 - Safety Around Moving Parts

Advises caution around moving parts and keeping guards in place.

3.9 - High-Pressure Hydraulics

Warns of severe injury from high-pressure hydraulic leaks.

3.10 - Transporting the Header

Details safety precautions and regulations for transporting the header.

3.11 - Using Correct Torque Values

Stresses importance of correct torque for servicing to prevent damage.

3.12 - Practice Safe Maintenance

Guides on performing maintenance safely, securing equipment, and proper cleaning.

3.13 - Fire Safety

Highlights fire hazards from debris and recommends extinguisher use.

3.14 - Keep Equipment Clean

Emphasizes cleaning equipment to prevent fire and ensure proper function.

3.15 - Safety Feature & Decal Locations

Directs users to familiarize with safety decals and features on the equipment.

4 - Equipment Overview

4.1 - Flexible Cutter Bar

Explains the flex capability and its benefits for hugging terrain.

4.2 - Optional Transport Package

Details the features and benefits of the optional transport package.

4.3 - Automatic Header Height Control (HHC)

Describes how HHC relays table proximity to the combine for height adjustment.

4.4 - Interchangeable Combine Adapters & Drive Pulleys

Explains adaptability to major combine brands.

4.5 - Drive System

Details the mechanical and hydraulic drive components and their function.

4.6 - FLEX Mode

Explains how the cutter bar flexes to follow terrain contours.

4.7 - RIGID Mode

Describes the rigid mode where the cutter bar has no vertical flexibility.

4.8 - Automatix Calibration and Operation

Directs users to calibration procedures for the Automatix system.

4.9 - Suspended Subframe

Explains the subframe's role in smoothing motion and sensing.

4.10 - Gauge Wheels

Describes gauge wheels' function in floating the header in RIGID mode.

5 - Before First Use and Pre-Season Inspection

5.1 - Combine Specific Header Modifications

Outlines special modifications required for certain combine models.

5.2 - Header Inspection

Details pre-season checks for dirt, cutting system, belts, drapers, etc.

6 - Before First Use and Pre-Season Checklist

7 - Mounting the Header to the Combine

7.1 - Combine Preparation

Guides on preparing the combine before attaching the header.

7.2 - AirFLEX Preparation

Steps for preparing the AirFLEX header before mounting.

7.3 - Mounting The AirFLEX

Step-by-step instructions for mounting the header onto the combine.

7.4 - Optional Transport Package

Instructions for handling the optional transport package during mounting.

7.6 - Hydraulic & Electrical Connections

Guides on connecting hydraulic couplers and electrical harnesses.

7.7 - Drive Shaft Hookup

Instructions for connecting the PTO drive shafts to the header.

7.8 - Automatix Installation

Details the installation process for the Automatix control system in the cab.

7.11 - Automatix Header Height Calibration

Explains the importance and procedure for calibrating header height.

7.12 - Combine Calibration

Details the calibration process for the combine and header settings.

7.13 - Reel Calibration

Details how to calibrate reel timing, height, and centering.

7.14 - Feed Auger Finger Timing

Explains critical finger timing for material flow and avoiding damage.

8 - Daily Inspection

8.1 - Safety & Protective Shields

Checks safety shields for proper installation and tightening.

8.2 - Dividers

Ensures crop dividers are installed correctly and free of buildup.

8.3 - Air Hoses

Inspects air hoses and bags for damage or leaks.

8.4 - Knife Guards & Sections

Inspects cutter bar for broken guards and sections.

8.5 - FLEX Header Height Control Sensors

Guides on inspecting and adjusting FLEX HHC sensors.

8.6 - Feed Auger

Advises checking feed auger finger timing and clearance.

8.7 - Drapers

Ensures drapers are tensioned, aligned, and tracking properly.

8.8 - Belts

Checks drive belts for alignment, tension, and debris.

8.9 - Lubrication

Recommends greasing knife heads every 10 hours of operation.

9 - Operation

9.1 - Cutting mode selection

Explains choosing between Flex and Rigid modes for different crops and terrain.

9.2 - Hydraulic Header Tilt

Details controlling header tilt using the Automatix panel and combine controls.

9.3 - Reel Settings & Controls

Covers reel finger pitch, fore/aft position, height, and speed settings.

9.4 - Knife, Feed Auger Drum and Draper Speed.

Explains how these speeds are linked to combine PTO speed.

9.5 - Crop Dividers

Guides on adjusting and using different types of crop dividers.

9.6 - Operating in Flex Mode

Details operating the header in Flex mode for low or tangled crops.

9.7 - Operating in Rigid Mode

Explains operating the header in Rigid mode for inflexible cutting.

9.8 - Reverse Operation

Describes reverse operation for unplugging and potential reel reversal.

9.9 - Feed Auger Drum Settings

Guides on setting feed auger finger timing and position.

9.10 - Combine Header Height Settings

Explains setting header height sensitivity and raise/drop rates.

9.13 - General Crop Specific Productivity

Provides guidance for harvesting different crop types.

10 - Automatix System

10.1 - Screen Icons

Explains the icons used on the Automatix display for easy understanding.

10.5 - Cutting Mode Selection

Details how to select between FLEX and RIGID cutting modes.

10.8 - Automatix Main Menu

Navigational overview of the main menu options for system settings.

10.8.1 - Errors & Warnings

Lists and explains critical and operating errors and warnings.

10.8.2 - Header Height Sensor Calibration

Provides detailed steps for calibrating header height sensors.

10.9 - Information Screens

Describes screens showing equipment and crop conditions for monitoring.

10.10 - FLEX Operating Screens

Details live view and air pressure settings for FLEX mode operation.

10.11 - RIGID Operating Screens

Explains live view and sensor selection for RIGID mode operation.

11 - Troubleshooting

11.1 - Reel

Lists common reel symptoms, causes, and solutions for troubleshooting.

11.2 - Drapers

Provides solutions for draper jams, stops, and slipping issues.

11.3 - Cutting Platform

Addresses issues like shattering, buildup, ragged cutting, and vibration.

11.4 - Cutting Platform (continued)

Continues troubleshooting for cutting platform issues like drive loads.

11.5 - Active Header Height Control

Troubleshoots issues with the automatic header height control system.

11.6 - RIGID Header Height Control

Addresses bouncing issues when operating in RIGID header height mode.

11.7 - Cross Auger

Provides solutions for crop wrapping around the cross auger.

11.8 - Miscellaneous

Covers troubleshooting for various issues like feeding, leaks, and PSI settings.

12 - Header Transport & Storage

12.1 - Read before Transporting

Emphasizes awareness of local regulations and safety for transport.

12.2 - Measurements for Flatbed Transport

Provides dimensions for flatbed trailer transport compatibility.

12.3 - Transporting on Combine

Details safety precautions for transporting the header on the combine.

12.4 - Prepare the AirFLEX for Transport on Cart or Trailer

Guides on preparing the header for transport on a cart or trailer.

12.5 - Transport Using Optional Transport Cart

Step-by-step instructions for using the optional transport cart.

12.6 - Transporting on Flatbed Trailer

Instructions for securing the header on a flatbed trailer.

12.7 - Quick Dismount

Procedures for safely lowering the header to the ground for storage.

12.8 - End of Season Storage

Guidelines for preparing and storing the header at the end of the season.

13 - Regular Service & Adjustment

13.1 - Fasteners

Emphasizes checking and securing fasteners due to vibration.

13.3 - Reel;Feed Auger Speed Sensor Adjustment

Details adjusting speed sensors for proper operation.

13.4 - Cleaning the Header

Instructions for daily cleaning to maintain performance and prevent fires.

13.5 - Drive Belt Tension

Explains proper tension and alignment for all drive belts.

13.5.1 - Tension Verification Using Smartphone App

Guides on using apps to verify belt tension by frequency.

13.6 - Drive Belt Replacement

Provides procedures for replacing various drive belts on the header.

13.7 - Drapers

Covers tensioning and tracking for draper belts.

13.8 - Reel

Covers reel safety stops, height, and finger adjustments.

13.9 - Knife

Covers torque, timing, maintenance, and replacement of knife components.

13.10 - Dividers

Covers adjustments for divider handles and extensions.

13.11 - Feed Auger

Covers feed auger finger timing and drum position adjustments.

13.12 - Hydraulic Tilt Cylinder

Explains the positions and adjustment of the hydraulic tilt cylinder.

13.13 - Center Rock Trap and Draper Cleanout

Details opening and cleaning the rock trap and draper cleanout.

13.15 - Drive Shaft Lubrication

Explains the lubrication points and intervals for drive shafts.

13.16 - FLEX Header Height Control Sensor Bar Alignment

Guides on aligning the sensor bar and sensors for FLEX mode.

13.17 - Checking for Air Leaks

Provides methods for detecting air leaks in the system.

13.18 - Lubrication

Emphasizes the importance of correct lubrication for component longevity.

13.18.1 - Grease Specifications

Lists recommended grease types and specifications for various components.

13.18.8 - Lubrication Location & Interval

Details specific lubrication points and recommended service intervals.

15 - Appendix

15.1 - AGCO Bezels

Details bezel layouts and components for AGCO adapter compatibility.

15.2 - Permanently Lubricated Bushing Locations

Identifies locations of permanently lubricated bushings for inspection.

15.3 - Header Height Control Sensor Locations

Illustrates the locations of various header height sensors.

15.4 - Speed Sensor Locations

Shows the locations of reel, feed auger, and knife speed sensors.

15.5 - Lift Valve Performance BeeBox

Explains the BeeBox installation for ‘Bang-Bang’ style control valves.

15.6 - JD Combine Check valve Kit

Details the check valve kit required for 2016+ John Deere combines.

15.7 - Recommended Torque Values (ft-lb)

Provides a table of recommended torque values for various fasteners.

15.8 - Drive Shaft Lengths

Lists drive shaft lengths for different combine makes.

15.9 - Electrical Layout

Illustrates the header’s electrical wiring diagram.

Honey Bee AirFlex 225 Specifications

General IconGeneral
BrandHoney Bee
ModelAirFlex 225
CategoryTractor Accessories
LanguageEnglish

Related product manuals