K0020V4C 7/11 Rev. C
ADEMCO 5828/5828V
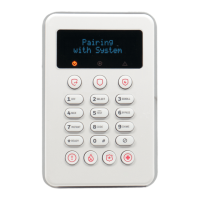
Wireless Bidirectional Fixed-Word Keypads
Installation and Setup Guide
GENERAL INFORMATION
The ADEMCO 5828 and 5828V are wireless, bidirectional,
fixed-word, keypads that may be used in conjunction with
LYNX and VISTA series residential control panels. VISTA
systems require use of either a 5883 Transceiver (micro P/N
WAK5119-X, where X = 3 or higher), 6150RF Keypad/
Transceiver (PC board P/N SA6150RFAS-T3 or higher), or
6160RF Keypad/Transceiver. The 5828/5828V keypads are
not compatible with commercial control panels that have
three-digit zone numbers (e.g., VISTA128BPT).
Both keypads provide:
• Four programmable special function keys
• Wall-mount plate for easy removal of the keypad and
battery replacement
• Optional Desktop mount /AC adapter kit, ADEMCO
P/N 5828DM)
• Battery-powered with 3-AA batteries
The 5828V keypad additionally provides:
• Memo/Message center
• Voice Response – system status, zone information, and
alarms with zone information
• Stored Message LED indication
• Built-in microphone and speaker
NOTES:
• The 5828/5828V cannot be used as the primary system
keypad, and may not be used to program or test any
security system. All systems require a hardwired
keypad (or Compass Downloader) to do so. Once
programmed, the 5828/5828V can be used to initiate all
common functions of a fixed word keypad.
1
OFF
4
MAX
7
INSTANT
READY
2
AWAY
5
TEST
8
CODE
0
3
STAY
6
BYPASS
9
CHIME
#
ARMED
READY
5828-00-001-V0
A
B
C
D
5828 Keypad with Front Cover Removed
5828V-00-002-V0
1
OFF
4
MAX
7
INSTANT
READY
2
AWAY
5
TEST
8
CODE
0
3
STAY
6
BYPASS
9
CHIME
#
MESSAGE
MIC
ARMED
READY
RECORD VOLUME
PLAY
STATUS
FUNCTIONVOICE
D
C
B
A
5828V Keypad with Front Cover Removed
Operation (See NOTE below)
1. Battery
BatteryBattery
Battery-
--
-Powered Operation:
Powered Operation:Powered Operation:
Powered Operation: When powered by
battery, the keypad activates when any key is
any key is any key is
any key is
pressed
pressedpressed
pressed. When the [✱] key is pressed, the keypad
sends a system status request, and displays and/or
annunciates the present status transmitted by the
system.
2. AC
ACAC
AC-
--
-Powered Operation:
Powered Operation:Powered Operation:
Powered Operation:
When powered by AC, the
keypad remains active at all times. Any change in
system status will cause the display to automatically
turn on (if blank) and display/annunciate the new
status.
If AC power is lost, the keypad will revert to battery power
after the ([✱] key) is pressed.
NOTE: Whether the unit is powered by battery or AC, the
5828/5828V may take up to 5 seconds to display and/or
annunciate the new status after pressing the [✱] key.
UL NOTE: For UL985 installations use the battery powered
keypad only.
WALL MOUNTING
Before mounting the 5828 & 5828V permanently, determine
a good RF location as follows:
• If using with a LYNX panel, try communicating with the
panel from different locations.
• If using with a VISTA panel, perform a Go/No Go test
from the panel. Refer to the Go/No Go test mode in the
Installation and Setup Guide for the panel.
Avoid mounting locations on or near large metal objects,
since these can decrease the transmission range or block
transmissions.
• Secure the mounting plate to the wall using proper sized
hardware through the six mounting holes.
• Plug the cord from the optional power pack into the
keypad’s DC input connector, and route the wires
through the wire guides on the back of the keypad.
• Position the keypad over the mounting plate and slide
down, engaging the four retaining clips on the plate with
the receptacles on the keypad.
DESKTOP MOUNTING
For full portability, the keypad may be placed in any
convenient, RF
RFRF
RF-
--
-suitable
suitablesuitable
suitable location and operated on battery
powered power or AC power by wiring the optional Power
Pack/Desktop Mounting Kit, ADEMCO P/N 5828DM.
BATTERY INSTALLATION OR REPLACEMENT
CAUTION:
CAUTION:CAUTION:
CAUTION: Remove the AC/DC power connector from the
keypad (if applicable), before attempting to install or replace
the batteries.
1. Separate the keypad from its mounting plate by
sliding the keypad up and away from the mounting
plate.
2. Open the battery compartment door to expose the
batteries.