6808 Manual — P/N LS10146-001SK-E:C 09/28/2017 33
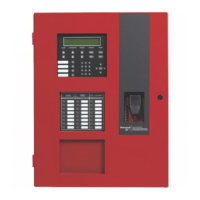
Control Panel Installation
The 5860 comes from the factory fully assembled. You must disassemble it for mounting. To disassemble the annunciator, use a 5/64 hex
wrench to remove the set screws, located on the bottom of the annunciator bezel. (See Figure 4.11 for location of the set screws).
Figure 4.11 Annunciator Back Box and Bezel Details
Flush Mounting
This section of the manual describes flush mounting. You can flush-mount with or without an electrical box.
Flush Mounting with an Electrical Box
The 5860 annunciator can be used with the following types of electrical boxes: 4S, single-gang, and double-gang. If an electrical box is
used, the box must be 1-3/8” back from the face of the wall to accommodate the annunciator. Studs used with an electrical box must be
two by fours (or larger).
Figure 4.12 Placement of Electrical Box for Flush Mounting
Set screw location.
Loosen set screws to remove bezel
when disassembling annunciator.
Knockout holes
Holes for surface mounting.
Holes for inserting
wires for flush mounting
(located in all corners).
Stand-off
(throughout)
Screw for placement
of mounting wires
(top and bottom).
Sheet rock
Sheet rock
Electrical Box
Annunciator
back box
1-3/8"
When flush-mounting using an
electrical box, the box must be
1-3/8" from face of wall.
Electrical box applications require
2 by 4 construction minimum.
studs
electrical
box
annunciator
back box
(outline)
wall
Examples of Electrical Box Use
Electrical Box Placement

 Loading...