8 Supplement for ES-200XP Applications — P/N LS10387-000FL-E:A 2/23/2023
2.8 CLSS Communicator
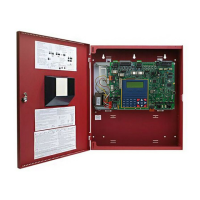
The CLSS Pathway Pro comes pre-installed and wired in the cabinet. The antenna must be mounted 8” (20cm) away from the display/key-
pad. Refer to Figure 2.10 above.
2.8.1 Configuration
After programming the panel via FS-Tools or the keypad, a CLSS account must be created and used to finalize communication from the
Pathway Pro to the central station. Use either the CLSS Site Manager or CLSS Mobile app to configure the CLSS Pathway Pro.
Configuration must be done using a PC along with FS-Tools or the panel, and CLSS Site Manager. Follow the steps below.
1. Configure the panel via the keypad or FS-Tools.
2. Request a CLSS account and sign in.
Navigate to www.fire.honeywell.com. Click Request Access and follow the on-screen instructions.
3. Build the customer site in CLSS.
In the CLSS Site Manager, go to the Quick access Menu or Feature Activation Screen and click Install Pathway Pro. Follow the on-
screen instructions to install the device.
4. Configure the Central Station.
5. Activate the CLSS Pathway Pro.
6. Upload the device list from panel/FS-Tools and download the Central Station Report.
3.5.7 Communicator
The communicator settings allow the user to configure the settings for the pre-installed CLSS Pathway Pro.
Pressing 2 while viewing the Programming Screen #3 will cause the following Communicator options to be
displayed:
Communicator Installed
The pre-installed communicator provides communication to a central station. Use of the communicator requires it be enabled in user pro-
gramming. Pressing 1 while viewing the Communicator Screen #1 will change the display to Installed Yes. Each press of the 1 key will cause
the display to toggle between Installed Yes and Installed No.
Primary Communication Path
The Primary Communication Path screen is used to configure the method for reporting to central station. Press-
ing 1 for Pri will display the following screens.
Cellular
To configure the communication method to contact central station using the CLSS Communicator, select 3 for
Cellular from the Comm Path Screen. The following screens will display.
Enable
To enable the Cellular connection, press 1 while viewing the Cellular Options Screen #1 to change the display to Enabled Yes. Each press of
the 1 key will cause the display to toggle between Enabled Yes and Enabled No.
PROGRAMMING
1=HISTORY
2=COMMUNICATOR
3=ANNUNCIATORS
Programming Screen #3
COMMUNICATOR
1=PRI COMM PATH
2=SEC COMM PATH
3=TBL REPRT LIMIT 0
Communicator Screen #2
COMMUNICATOR
1=INSTALLED NO
2=POTS SETTINGS
3=IP SETTINGS
Communicator Screen #1
COMMUNICATOR
1=REPORT SYTLE POINT
2=EVENT CODES
Communicator Screen #3
COMMUNICATOR
1=PRI COMM PATH
2=SEC COMM PATH
3=TBL CALL LIMIT 0
Communicator Screen #1
XXX COMM PATH
1=POTS
2=ETHERNET
3=CELLULAR
Comm Path Screen
XXX COMM PATH
1=POTS
2=ETHERNET
3=CELLULAR
Comm Path Screen #1
CELLULAR OPTIONS
1=ENABLED NO
2=CS ACCOUNT
Cellular Options Screen #1
CELLULAR OPTIONS
1=SUPV. SETTINGS
NFPA 2010 DUAL PATH
Cellular Options Screen #2
NOTE: When using the CLSS Pathway Pro, CS Account Options and Supervision Settings are not configured at the panel. Use the CLSS Site
Manager or the mobile app to configure Central Station settings. Visit www.fire.honeywell.com and refer to Section 2.8 for more information.

 Loading...