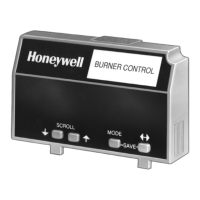
7800 SERIES S7800A KEYBOARD DISPLAY MODULE
65-0090—4 22
Fault 68
*Preignition ILK*
Preignition Interlock fault. 1. Check wiring and correct any errors.
2. Inspect the Preignition Interlock switches and make sure they
work properly.
3. Check fuel valve operation. Valve must close within five
seconds.
4. Reset and sequence the relay module.
5. During STANDBY or PREPURGE, measure the voltage
between terminal 17 and L2(N). Supply voltage should be
present. If not, the Preignition Interlock switches are defective
and need replacing.
6. If the fault persists, replace the relay module.
Faults 69 - 70
*Call Service*
Unused faults. —
Fault 71
*Dynamic LFS*
Low Fire Switch closed, High
Fire Switch must be open
(EC/RM 7850 only).
1. Check firing rate position switches (usually in Modutrol®
Motor) for proper operation.
2. Check wiring and correct any errors.
3. Reset and sequence the relay module.
4. If the fault persists, replace the relay module.
Fault 71
*Limits Complete*
Limit Input (terminal 7) is off
when it should be on (RM7888
only).
1. Check limits to make sure they are satisfied after resetting.
2. Check electrical connections to terminal 7 of wiring subbase.
3. Reset relay module.
4. If the fault persists, replace the relay module.
Fault 72
*Dynamic HFS*
High Fire Switch closed; Low
Fire Switch must be open
(EC/RM7850 only).
1. Check firing rate position switches (usually in Modutrol®
Motor) for proper operation.
2. Check wiring and correct any errors.
3. Reset and sequence the relay module.
4. If the fault persists, replace the relay module.
Fault 72
*Spec.Func.2*
Special Function 2 Input
(terminal 17) is off when it
should be on (Device specific).
1. Check operation of Special Function 2 of PLC.
2. Check electrical connection to terminal 17 of wiring subbase
and confirm presence of supply power when Special Function
2 is activated.
3. Reset relay module.
4. If the fault persists, replace the relay module.
Fault 73
*Spec.Func.3*
Special Function 3 Input
(terminal 19) is off when it
should be on (Device specific).
1. Check operation of Special Function 3 of PLC.
2. Check electrical connection to terminal 19 of wiring subbase
and confirm presence of supply power when Special Function
2 is activated.
3. Reset relay module.
4. If the fault persists, replace the relay module.
Fault 75
*Flame Proven
Feedback*
Flame Indication Feedback
(terminal 21) either on when it
should be off or off when it
should be on (Device specific).
1. Remove wire to terminal 21 and reset relay module.
2. If the fault persists, replace relay module.
3. Reconnect wire to terminal 21. If the fault returns, verify wiring.
Faults 76 - 93
*Accessory Fault*
——
Faults 94 - 104
*Call Service*
——
Fault 105
*Call Service*
Relay Module self-test failure. 1. Reset and sequence the relay module.
2. If the fault reappears, remove power from the relay module and
reapply the power; reset and sequence the relay module.
3. If the fault persists, replace the relay module.
Fault 106
*Call Service*
Relay Module self-test failure.
Fault 107
*Call Service*
Relay Module flame signal
crosscheck failure.
—
Table 7. Hold and Fault Message Summary (Continued).
Fault Code System Failure Recommended Troubleshooting
Artisan Technology Group - Quality Instrumentation ... Guaranteed | (888) 88-SOURCE | www.artisantg.com

 Loading...