3 69-2715EF—07
Installing your thermostat
You might need the following tools to install this thermostat:
• No. 2 Phillips screwdriver
• Pen
• Pencil
• Level (optional)
• Drill and bits (3/16” for
drywall, 7/32” for plaster)
(optional)
• Hammer (optional)
• Electrical tape (optional)
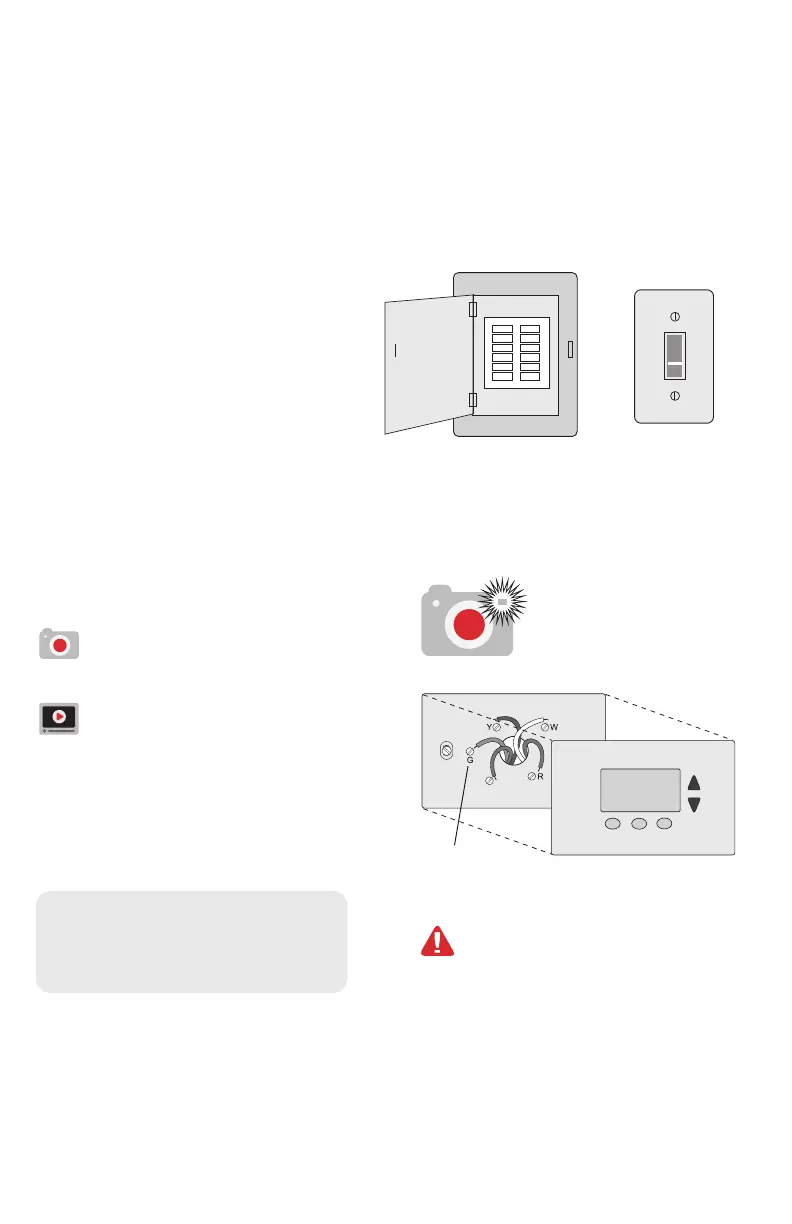
1 Switch OFF power to your
heating/cooling system.
Important! To protect your
equipment, switch OFF the power
to your heating/cooling system
at the breaker box or the system
switch.
or
Circuit
breaker
box
Heating/
cooling system
power switch
C
If you have an older thermostat
with a sealed mercury tube,
turn to page ii for proper
disposal instructions.
Terminal
designation
2 Remove old thermostat faceplate
and leave wires connected.
2a Take a picture of the wire
connections for later
reference.
2b If no wire is connected to
a terminal labeled C or no
C terminal exists on the
old thermostat, view the
Alternate Wiring videos at
honeywellhome.com/wifi-
thermostat or reference the
C-wire addendum in the box.
Important! C wire is required
and is the power source for your
thermostat. Without a C wire, your
thermostat will not power up.
Note: You will need a
picture of your wire
connections to wire the
new thermostat.
 Loading...