EasyManua.ls Logo

HORIBA ABX ABX Pentra 60C+ - User Manual

HORIBA ABX ABX Pentra 60C+
4 pages
Print Icon
To Next Page IconTo Next Page
Loading...
FORM 0860 - rev 1
ABX Pentra 60C+, Pentra 80, Pentra XL 80,
Pentra 400, ABC Vet
OKI B4200 Printer toner and drum kit replacement
Instrument User Manual Update
RAM190A
Please, take note of the modifications on next pages. Please, cross out the
appropriate sections in the user manual prior to inserting this addendum
at the beginning of the user manual.
Date: 31/1/05
Question and Answer IconNeed help?

Do you have a question about the HORIBA ABX ABX Pentra 60C+ and is the answer not in the manual?

Summary

Toner Cartridge Replacement

Toner Cartridge Information

Details on how long your toner cartridge lasts based on print density and average page yield.

When to Replace Toner Cartridge

Indicators for when to replace the toner cartridge, including LED status and print output.

Procedure for Replacing Toner Cartridge

Step-by-step guide for replacing the toner cartridge, including cleaning the LED array.

Drum Kit Replacement

Image Drum Life

Information on image drum lifespan, factors affecting it, and expected page count.

When to Replace Image Drum

Indicators for replacing the image drum when print quality deteriorates.

Procedure for Replacing Image Drum

Steps for replacing the image drum, handling precautions, and LED array cleaning.

Resetting Drum Counter

Instructions to reset the drum counter after replacing the image drum unit.

Overview

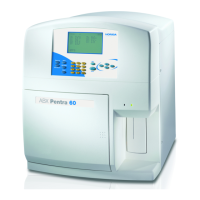
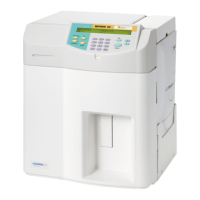
The provided document is an update to an instrument user manual, specifically addressing procedures for the OKI B4200 printer, which is used with various ABX Pentra diagnostic instruments (60C+, 80, XL 80, 400, and ABC Vet). This update focuses on the replacement of the toner cartridge and the drum kit, offering detailed instructions and important considerations for users.

Function Description

The OKI B4200 printer serves as an output device for the ABX Pentra diagnostic instruments, enabling the printing of results, reports, and other relevant information generated by these medical analysis systems. Its primary function is to convert digital data into physical printouts, which are crucial for record-keeping, patient diagnosis, and laboratory operations. The printer utilizes a toner-based printing process, which involves a toner cartridge and an image drum to create text and graphics on paper.

Usage Features

The OKI B4200 printer is designed for straightforward operation, with features that assist users in monitoring its status and performing routine maintenance.

Monitoring Toner and Drum Life: The printer provides indicators to help users monitor the life of both the toner cartridge and the image drum.

  • Toner Cartridge: The Error LED indicator (4) will slowly blink when the toner cartridge is running low. After a "Toner Low" message displays, the printer can still print approximately 100 more pages before stopping. To check the exact toner level, users can press button (5) to switch off LED indicator (2), then press button (5) again for 2 to 5 seconds. This action will cause LED (2) to blink and print three status pages. The toner level, expressed as a percentage, can be found on status page 2.
  • Image Drum: Similar to the toner, the Error LED indicator will slowly blink when the image drum reaches 90% of its life, signaling that it requires changing. The print quality will also begin to deteriorate, becoming faint, as the drum nears the end of its lifespan. The drum life status can be checked in the same manner as the toner status, providing a clear indication of when replacement is necessary.

Print Density and Page Yield: The lifespan of a toner cartridge is directly influenced by print density, which is the percentage of a page covered in black. A typical letter, with 3% to 5% print density, will yield more pages than graphics-heavy prints. A standard toner cartridge is expected to print an average of 2500 pages at 5% density, though actual results may vary. The initial toner cartridge installed in a new printer will yield fewer pages (approximately 1,000) because some toner is used to fill the image drum reservoir and saturate the developing roller.

Maintenance Features

The manual update provides detailed instructions for replacing the toner cartridge and the image drum, emphasizing safety and proper handling to ensure optimal printer performance and longevity.

Toner Cartridge Replacement:

  1. Preparation: It is recommended to clean the LED array when changing the toner cartridge. Users should have a sheet of paper ready to place the used cartridge on.
  2. Safety First: Switch off the printer and allow the fuser to cool for about 10 minutes before opening the top cover. The fuser can be hot if the printer has been powered on, and this area is clearly labeled with a warning not to touch it.
  3. Accessing the Cartridge: Press the top cover release button and open the printer's top cover fully.
  4. Removing the Old Cartridge: Pull the colored lever on the right side of the toner cartridge towards the front of the printer to close the cartridge, then remove it.
  5. Installing the New Cartridge: Follow the installation instructions provided with the new toner cartridge.
  6. Cleaning: Gently wipe the LED array surface using the LED lens cleaner supplied with the new cartridge or a soft tissue.
  7. Finalizing: Close the top cover and press it down to latch it securely.
  8. Post-Replacement Check: After replacement, the toner percentage will reset to 100%.

Image Drum Replacement:

  1. Timing: The image drum should be replaced when the Error LED indicator blinks slowly (at 90% life) or when print quality deteriorates. It is also recommended to change the toner cartridge and clean the LED array simultaneously with the image drum.
  2. Safety Precautions:
    • The green image drum surface is very delicate and light-sensitive. Users must avoid touching it and exposing it to normal room light for more than 5 minutes. If the drum unit needs to be out of the printer for an extended period, it should be wrapped in a black plastic bag to protect it from light. Direct sunlight or very bright room lighting should always be avoided.
    • Always hold the image drum unit by its ends or from the top.
    • As with toner replacement, switch off the printer and allow the fuser to cool before opening the top cover.
  3. Accessing the Drum: Press the cover release and open the printer's top cover fully.
  4. Removing the Old Drum: Remove the used image drum and toner cartridge.
  5. Installing the New Drum: Follow the installation instructions provided with the new image drum.
  6. Cleaning: Gently wipe the LED array surface with the LED lens cleaner or a soft tissue.
  7. Finalizing: Close the top cover and press it down to latch it securely.

Resetting the Drum Counter: After replacing the image drum, it is crucial to reset the drum counter to maintain an accurate count of printed pages.

  1. Power Off: Switch the printer off.
  2. Open Cover: Open the printer cover.
  3. Power On with Button: Switch the printer on while pressing button (5).
  4. Close Cover: Close the printer cover.
  5. Verification: Check that the counter now displays 99%.

Toner Handling and Spills: The toner used in the printer is a very fine, dry powder. If toner powder is spilled, users should lightly brush it off. If residue remains, a cool, damp cloth can be used. Hot water and solvents should never be used, as they can make stains permanent.

Health and Safety Warnings:

  • Inhalation/Eye Contact: If toner is inhaled or gets into the eyes, users should drink a little water or bathe their eyes liberally with cold water and seek medical attention immediately.
  • Waste Disposal: Used cartridges should be disposed of responsibly, ideally inside the pack the new one came in, following all applicable regulations and recommendations for waste recycling.

The image drum's life is approximately 25,000 pages of continuous printing, but this number can vary based on factors like temperature, humidity, paper type, and the number of pages per job. This comprehensive guide ensures that users can effectively maintain their OKI B4200 printer, contributing to the reliable operation of their ABX Pentra diagnostic systems.

HORIBA ABX ABX Pentra 60C+ Specifications

General IconGeneral
TypeHematology Analyzer
Throughput60 samples per hour
Sample TypeWhole blood
DisplayLCD color touch screen
Power Requirements100-240V AC, 50/60 Hz
Operating Temperature15°C to 30°C
Humidity30-85% non-condensing
ParametersWBC, RBC, HGB, HCT, MCV, MCH, MCHC, PLT

Related product manuals