EasyManua.ls Logo

Horizon Fitness 642E User Manual

Horizon Fitness 642E
6 pages
To Next Page IconTo Next Page
Page #1 background imageLoading...
Page #1 background image
Operators Manual
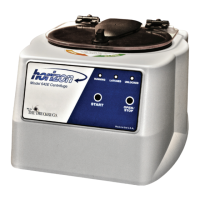
Model 642E • Laboratory Centrifuge
Rev. F
Programmable
Run Time is Factory
Preset to
10
MINUTES
See Page 5
Replacement Parts:
Part No. Description
7724037 Foot, rubber
7751068 Switch, lid safety
7786061 Rotor, six-place, horizontal
7735049 Motor, 1/30 H.P., 115 V.A.C. permanent split capacitor
7729006 Capacitor, 4uF, 250V A.C.
7717051 Electronic timing and locking board
7751043 Circuit Breaker
03-0-0003-0068 Front Panel Label
7760002 Power cord
7714101 Pawl, latch, lid
7714103 Knob, latch, lid
7724071 Hinge, friction
7732018 Seal, lid gasket
7713031 Red Tube Holder, for 17 mm x 100 mm tubes
7713033 Green Tube Holder, for 17 mm x 75 mm Tubes
02-002-1-0011 Lid Assembly
Available Accessories:
Shield caps
p/n 7713011
1” Tube cushion
p/n 1525
Made in the USA by
Protected by U.S. patent # 6,811,531
P/N 03-0-0002-0039
0.5 to 1 mL Tube Adapter
p/n 7713068
13 x 75 mm Insert
p/n 7713064
13 x 100 mm Insert
p/n 7713066
1.5 to 2 mL Tube Adapter
p/n 7713065
200 Shady Lane, Suite 170 • Philipsburg, PA 16866
Phone: 814-342-6205 or 814-692-7661 • Fax: 814-692-7662 • www.druckercompany.com
WARRANTY:
The Drucker Company warranties that this centrifuge is free from defects
in workmanship and parts for 2 years.
0.25” Tube cushion
p/n 9150
Question and Answer IconNeed help?

Do you have a question about the Horizon Fitness 642E and is the answer not in the manual?

Horizon Fitness 642E Specifications

General IconGeneral
BrandHorizon Fitness
Model642E
CategoryLaboratory Equipment
LanguageEnglish

Summary

Safety Features

Lid Safety Switch

Ensures centrifuge operates only when lid is closed and latched.

Lid Safety Interlock System

Locks lid until rotor has completely stopped, preventing entry during operation.

Circuit Breaker

Protects the machine from electrical shorts by cutting power.

Emergency Rotor Chamber Entry

Procedure for accessing rotor chamber in case of power failure.

Model Description

Intended Use

Supplied Equipment

Calibration and Ground Testing

Troubleshooting Guide

Rotor Does Not Spin Freely

Addresses issues with rotor obstruction or damage.

Excessive Noise When Running

Guides on checking load balance and rotor integrity.

Centrifuge Does Not Run

Troubleshoots power, lid latch, and circuit breaker issues.

Latch Light Not On

Diagnoses problems with the lid latch and safety switch contact.

Machine Does Not Unlock

Solutions for the lid failing to unlock after a run.

Run Time Not Set Correctly

Instructions for setting or verifying the run time preset.

Key Features

General Specifications

Setup Location Requirements

Initial Setup Procedure

Care and Preventative Maintenance

Provide Adequate Ventilation

Ensures proper airflow for cooling and prevents overheating.

Always Spin Balanced Loads

Maximizes sample separation, prevents damage, and extends centrifuge life.

Keep Tube Holders Clean

Prevents contamination and potential injury from glass fragments.

Motor and Electrical Maintenance

Highlights brushless motor and reliable electrical components.

Keep Rotor Chamber Clean

Recommends cleaning the rotor chamber every six months or after tube breakage.

Tube Holder Replacement

Advises replacing tube holders after 24 months or if cracks are found.

Remove Accessories Before Moving

Essential step to prevent damage or injury during transport.

Tube Holder Configurations

Control Panel Overview

Indicators and Buttons

Details on RUNNING, LATCHED, UNLOCKED lights and START/OPEN buttons.

Verify Preset Run Time

Procedure to check the factory preset run time and brake setting.

Change Preset Run Time

Instructions for programming a custom run time and brake setting.

Operating the Centrifuge

Balanced Loads

Rotor Removal and Installation

Rotor Installation and Removal Procedures

Step-by-step guide for safely removing and installing the rotor.

Replacement Parts

Available Accessories