EN
Transmitter Setup (BNF)
IMPORTANT: After you set up your model, always rebind the transmitter and
receiver to set the desired failsafe positions.
If you are using a 6 channel transmitter, the FLAP Channel (CH 6) controls the aps.
Dual Rates
Attempt your rst ights in Low Rate. For landings, use high rate elevator.
NOTICE: To ensure AS3X technology functions properly, do not lower rate values
below 50%. If lower rates are desired, manually adjust the position of the
pushrods on the servo arm.
NOTICE: If oscillation occurs at high speed, refer to the Troubleshooting Guide
for more information.
Expo
After rst ights, you may adjust expo in your transmitter.
†
Some of the terminology and function locations used in the iX12 and iX20
programming may be slightly different than other Spektrum AirWare™ radios.
The names given in parenthesis correspond to the iX programming terminology.
Consult your transmitter manual for specic information about programming your
transmitter.
* Flap programming values may vary slightly. For your initial ights use the
recommended ap travel settings provided in the Flaps section and adjust the
ap travel to your preference on subsequent ights.
Computerized Transmitter Setup
Start all transmitter programming with a blank ACRO model (perform a model
reset), then name the model.
Set Dual Rates to
HIGH 100%
LOW 70%
Set Expo to
HIGH 20%
LOW 15%
Set Servo Travel to 100%
Set Throttle Cut to -130%
DXe
Refer to spektrumrc.com for the appropriate download setup.
DX6i
1. Go to the SETUP LIST MENU
2. Set MODEL TYPE: ACRO
3. Go to ADJUST LIST MENU
4. Set TRAVEL: FLAPS £-100 100
5. Set FLAPS: Norm -100 Flap Elev 0
LAND £100 Flap Elev 35
DX7S
DX8
1. Go to the SYSTEM SETUP
2. Set MODEL TYPE: AIRPLANE
3. Set WING TYPE: 1 AIL 1 FLAP
4. Go to the FUNCTION LIST
5. Set FLAP SYSTEM: Choose Flap
NORM: -100% FLAP
MID: 0% FLAP 25% Elevator
LAND: 100% FLAP 35% Elevator
SPEED 2.0S: SWITCH = D
DX6e
DX6 (Gen2)
DX7 (Gen2)
DX8e
DX8 (Gen2)
DX9
DX10t
DX18
DX20
iX12
iX20
1. Go to the SYSTEM SETUP (Model Utilities)
†
2. Set MODEL TYPE: AIRPLANE
3. Set AIRCRAFT TYPE (Model Setup, Aircraft Type)
†
:
WING: 1 AIL 1 FLAP
4. Set CHANNEL ASSIGN (Model Setup, Channel Assign)
†
:
(Default switch assignments with a new model setup)
Flap (CH6): SWITCH D
5. Go to the FUNCTION LIST (Model Adjust)
†
6. Set FLAP SYSTEM:
SELECT SWITCH D:
POS 0: -100% FLAP*
POS 1: 0% FLAP* 25% Elevator
POS 2: 100% FLAP* 35% Elevator
SPEED 2.0
6
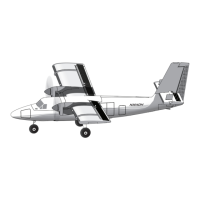
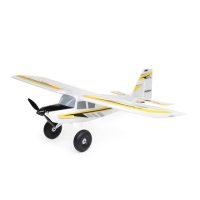
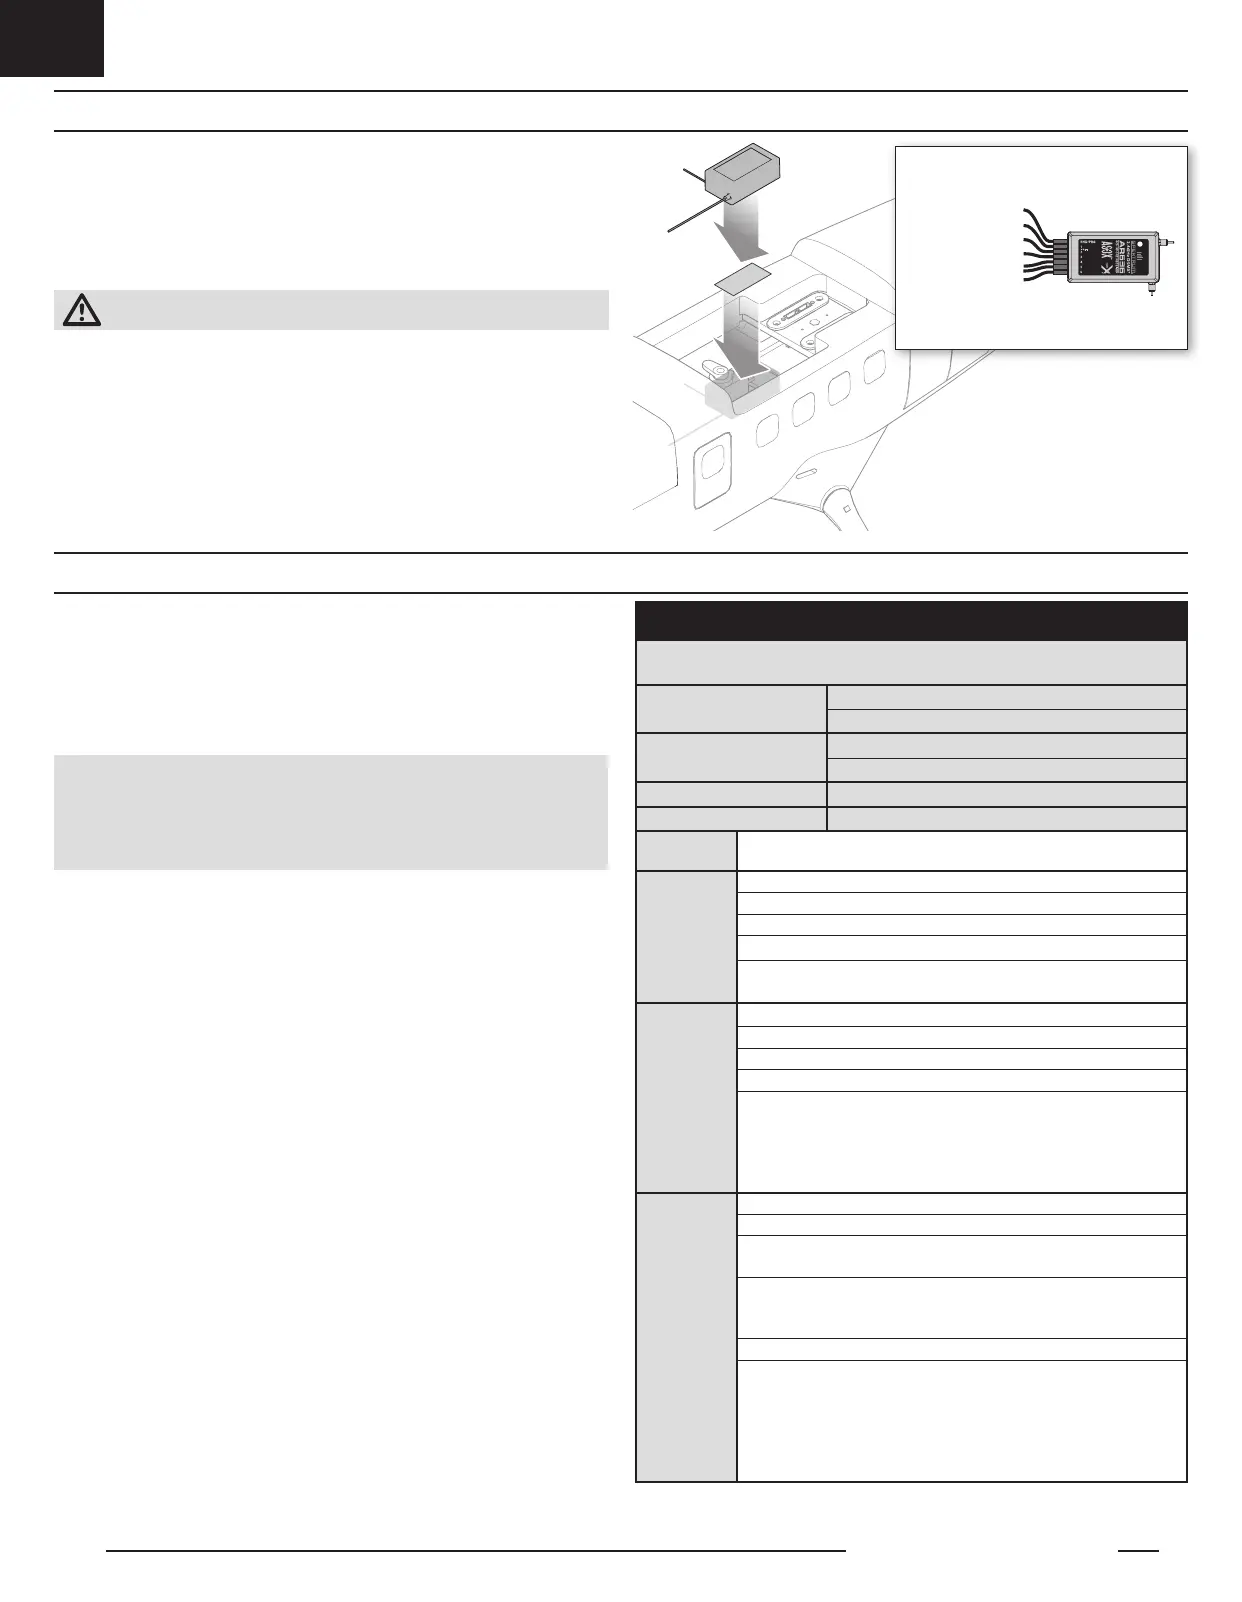
Twin Otter 1.2m
Receiver Installation (PNP)
The Spektrum AR636 receiver is recommended for this airplane. If you choose
to install another receiver, ensure that it is at least a 5-channel full range (sport)
receiver. Refer to your receiver manual for correct installation and operation
instructions.
Installation (AR636 shown)
1. Mount the receiver parallel to the length of the fuselage as shown. Use
double-sided servo tape.
CAUTION: Incorrect installation of the receiver could cause a crash.
2. Attach the appropriate control surfaces to the their respective ports on the
receiver using the chart in the illustration.
AR636 Port Assignments
BND/PRG = BIND
1 = ESC
2 = Aileron
3 = Elevator
4 = Rudder
5 = LED Lights
6 = Flaps
 Loading...