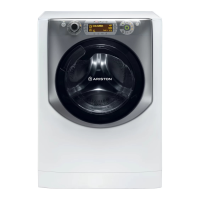
Do you have a question about the Hotpoint Ariston AQUALTIS AQD1170D 49 X and is the answer not in the manual?
| Brand | Hotpoint Ariston |
|---|---|
| Model | AQUALTIS AQD1170D 49 X |
| Category | Washer/Dryer |
| Language | English |
Details on how to unpack the appliance and ensure it is correctly positioned.
Instructions for connecting the appliance to the water and power supply systems.
Guidance on how to connect the drain hose correctly to prevent water drainage issues.
Details on safe electrical connection, including plug, socket, and wiring requirements.
Instructions for safely removing and disposing of the appliance's power plug.
Guidelines for environmentally responsible disposal of the washing machine.
Procedure for safely disconnecting water and electricity before maintenance.
Methods for cleaning the outer parts and rubber components of the appliance.
Step-by-step guide to removing and cleaning the detergent dispenser drawer.
Advice on how to prevent unpleasant odours by leaving the drum door ajar.
Information on the self-cleaning pump and potential blockages from small items.
Recommendation to check the water inlet hose annually for cracks and replace if necessary.
Essential safety guidelines for operating the appliance, including child safety.
Information on the proper disposal of packaging materials and the appliance itself.
Procedure to manually open the porthole door in case of power failure.
Details on the porthole door and handle for accessing the drum.
Location and function of the detergent dispenser drawer compartments.
Overview of the touch control panel and its sensitive areas.
Explanation of the ON/OFF button and its indicator light for machine power.
How to use the knob to select the desired wash cycle.
Functionality of M1-M2 buttons for storing and recalling custom wash cycles.
How to adjust or exclude the drying cycle settings.
How to modify or exclude the temperature setting for wash cycles.
How to modify or exclude the spin cycle settings.
How to set a delayed start time for wash or drying cycles.
How to select and activate available wash options.
Illumination of icons indicating the progress of the wash cycle phases.
How to start, pause, and resume wash cycles using the START/PAUSE button.
Indicates when the porthole door is locked for safety during operation.
How to activate/deactivate the control panel lock to prevent accidental changes.
Indicates when energy-saving settings are active during operation.
Instructions for changing the display language settings of the appliance.
Procedure to switch on the washing machine and initial display indications.
How to select the desired wash programme using the selector knob.
Guidance on loading laundry into the drum, respecting maximum load limits.
Instructions for adding detergent to the correct dispenser compartments.
Simple instruction to close the porthole door before starting a cycle.
How to adjust temperature, spin speed, and drying settings.
Details on setting drying level or time, and specific drying modes.
Instructions for running a drying cycle without a prior wash cycle.
How to set a delayed start time for wash or drying cycles.
How to select, activate, and deactivate wash options and their compatibility.
How to start the selected wash cycle and monitor its progress.
Indication of cycle completion and how to unload the machine.
Detailed table listing all available wash cycles with their parameters.
High-performance wash option for stubborn stains, using more water and time.
Enhances rinse efficiency for sensitive skin and optimal detergent removal.
Reduces creases by modifying wash and spin cycles for easier ironing.
Reduces cycle duration by up to 50% for lightly soiled garments, saving energy.
Information on choosing and using the correct type and quantity of detergent.
Guidance on sorting, checking pockets, and loading laundry correctly.
Table providing estimated weights for common laundry items.
Specific advice for washing whites, coloureds, and dark garments.
Explanation of how the load balancing system works to prevent vibrations.
Common causes and solutions for the appliance failing to power on.
Troubleshooting steps for when the wash cycle fails to initiate.
Causes and solutions for the machine not filling with water correctly.
Reasons and procedures for dealing with a locked porthole door.
Diagnosing and resolving issues where the machine fills and drains repeatedly.
Solutions for problems related to the draining and spinning functions.
Troubleshooting excessive vibration during the spin cycle.
Identifying and resolving causes of water leaks from the appliance.
Meaning of flashing phase icons and the ON/OFF indicator light.
Causes and solutions for excessive foam generation during the wash cycle.
Troubleshooting reasons why the drying function is not working.
Steps to take before contacting technical support to resolve issues.
Required information to provide when contacting technical assistance.





 Loading...