This document provides an overview of the Hotpoint Ariston oven, detailing its functions, technical specifications, usage, and maintenance.
Function Description
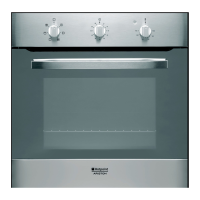
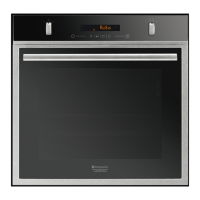
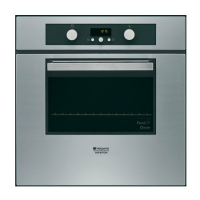
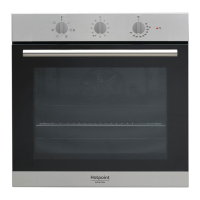
The Hotpoint Ariston oven is a versatile cooking appliance designed for various culinary tasks. It features multiple cooking modes, including:
- Traditional Oven: Ideal for conventional baking and roasting, utilizing heat from both the top and bottom elements.
- Multi-cooking: Allows for cooking different dishes simultaneously on multiple levels, ensuring even heat distribution.
- Barbecue: Engages the grill element for browning and crisping, suitable for meats and vegetables.
- Grill: Provides intense top heat for grilling and gratinating, perfect for achieving a crispy finish.
- Pizza Oven: Specifically designed for baking pizzas, ensuring a crispy crust and perfectly cooked toppings.
- Baking Mode: Optimized for delicate baking, such as cakes and pastries, with precise temperature control.
- Fast Cooking: A rapid preheating and cooking mode for quick meal preparation.
- Proving Mode: Creates a warm, humid environment for dough to rise effectively.
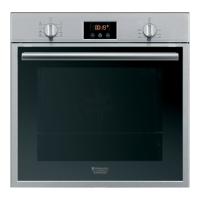
The oven is equipped with a control panel featuring a selector knob for choosing cooking programs, a thermostat knob for temperature adjustment, and a display for showing time, temperature, and program status. Key functions include setting the clock, programming cooking duration, and utilizing the FAST CLEAN automatic cleaning function.
Important Technical Specifications
The Hotpoint Ariston oven is designed for built-in installation and requires specific dimensions for proper fitting.
Overall Dimensions:
- Width: 43.5 cm
- Height: 32 cm
- Depth: 40 cm
Volume:
Electrical Connections:
- Voltage: 220-240 V ~ 50/60Hz
- Maximum absorbed power: 2800 W
The appliance is designed to comply with European Directives 2002/40/EC (on the energy label of electric ovens) and EN 50304. It also adheres to various other directives concerning electromagnetic compatibility and electrical safety. The energy label indicates its energy consumption for both traditional and forced convection heating modes.
Installation Requirements:
- The oven must be installed in a cabinet with specific ventilation openings to ensure proper heat dissipation.
- Minimum dimensions for the cabinet opening are 45 x 560 mm (height x width).
- The electrical connection requires a three-pole power supply cable with a minimum cross-section of 3 mm, connected to a suitable wall socket or a multi-socket system.
- The appliance must be earthed, and the earth cable should be longer than the phase cables to ensure it is the last to disconnect in case of an issue.
Usage Features
Setting the Clock:
- Press the clock button.
- Use the "+" and "-" buttons to adjust the hour and minute.
- Confirm by pressing the clock button again.
Programming the Timer:
- Press the timer button.
- Use the "+" and "-" buttons to set the desired time.
- Confirm by pressing the timer button again. An acoustic signal will sound when the set time elapses.
Starting the Oven:
- Select the desired cooking mode using the selector knob.
- The oven will preheat, indicated by a flashing preheating indicator.
- Adjust the temperature using the thermostat knob.
- Once preheating is complete, the oven is ready for use.
Programming Cooking Duration:
- Select a cooking program.
- Press the cooking duration button.
- Use the "+" and "-" buttons to set the desired cooking time.
- The oven will start cooking and automatically switch off when the set time is reached, accompanied by an acoustic signal.
Practical Cooking Advice:
- Multi-cooking: Utilize positions 2 and 4 for dishes requiring more heat, and place the dripping pan on the bottom rack.
- Barbecue: Position the rack in position 3 or 4, and place the food in the center of the grill. The power level is set to maximum.
- Pizza Oven: Use a light aluminum pizza pan. For a crispy crust, do not use the dripping pan. If adding cheese, place it towards the end of the cooking process.
Cooking Advice Table:
The manual includes a comprehensive table with recommended cooking modes, food types, weight, rack positions, preheating requirements, recommended temperature, and cooking duration for various dishes, including:
- Traditional Oven: Duck, roast beef, lasagna, cakes.
- Multi-cooking: Pizza, roast chicken, vegetables, fish.
- Barbecue: Sausages, skewers, fish fillets, hamburgers.
- Grill: Grilled chicken, cutlets, roast pork.
- Pizza Oven: Pizza, focaccia.
- Baking Mode: Fruit cakes, small cakes, puff pastry.
- Fast Cooking: Pizza, roast chicken, lasagna.
- Proving Mode: Dough for bread, pizza, brioches.
Maintenance Features
Switching Off the Appliance:
- Before any cleaning or maintenance, disconnect the appliance from the electrical supply.
Cleaning the Appliance:
- External Surfaces: Clean with a sponge soaked in lukewarm water and neutral soap. Avoid abrasive products or corrosive substances.
- Internal Surfaces: The oven interior should be cleaned regularly after each use. Use hot water and detergent, then rinse and dry with a soft cloth. Do not use abrasive products.
- Accessories: Wash accessories in a dishwasher or by hand using suitable detergents.
- Door: Clean the glass part of the door with a sponge and non-abrasive cleaning product. For thorough cleaning, the door can be removed.
Removing the Oven Door:
- Open the oven door fully.
- Lift and rotate the levers situated on the two hinges.
- Grip the door on the two external sides and close it approximately halfway.
- Pull the door towards you, lifting it out of its seat.
- To refit the door, reverse the procedure.
Replacing the Light Bulb:
- Unscrew the glass cover using a screwdriver.
- Unscrew the light bulb and replace it with a similar one (Wattage 15 W, cap E 14).
- Replace the glass cover, ensuring the seal is positioned correctly.
Automatic Cleaning with FAST CLEAN Function:
- The FAST CLEAN program heats the oven interior to approximately 500°C, incinerating food residues.
- Before initiating FAST CLEAN:
- Remove large or coarse food residues from the inside of the oven using a damp sponge.
- Remove all accessories.
- Do not place tea towels or pot holders over the oven handle.
- Turn the SELECTOR knob to the "0" position.
- Activating FAST CLEAN:
- Press the FAST CLEAN button for approximately 4 seconds.
- Select the desired cleaning duration:
- ECO (Economy): 1 hour.
- NOR (Normal): 1 hour and 30 minutes.
- INT (Intensive): 2 hours.
- Confirm by pressing the FAST CLEAN button.
- During the cleaning cycle, the oven door will automatically lock, and the display will show the remaining time. An acoustic signal will sound when the cycle is complete, and the door will unlock.
Safety Devices:
- The oven door automatically locks when the temperature reaches a high value.
- The STOP icon indicates that the cleaning cycle can be canceled at any time by pressing the STOP button.
- In case of an event anomaly, the alimentation of the heating elements is automatically interrupted.
- The oven door has been locked, you cannot change the duration and cycle end time.
Assistance:
- The appliance is equipped with an automatic diagnostic system that detects any malfunctions. Messages like "F" followed by numbers will be displayed in case of an error.
- Contact technical assistance if a malfunction occurs.
- Provide the type of problem encountered, the appliance model (Mod.), and the serial number (S/N) found on the appliance's data plate.
- Do not attempt to repair the appliance yourself or use unauthorized technicians.