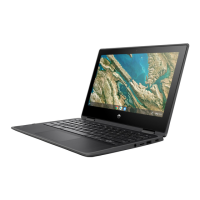
1. Remove the clear shield (1) that covers the system board connectors.
2. Remove the Phillips M2.0 × 3.5 screw (2) that secures the WLAN module bracket to the system board, and
then remove the WLAN module bracket (3).
The WLAN module bracket is available using spare part number M45807-001.
3. Carefully disconnect the two wireless antenna cables (4) from the WLAN module.
NOTE: The #1 white WLAN antenna cable connects to the WLAN module #1 Main terminal. The #2 black
WLAN antenna cable connects to the WLAN module #1 Aux terminal.
4. Release the wireless antenna cables (5) from the retention clips built into the bottom cover.
5. Disconnect the webcam/microphone module cable (6) from the system board.
6. Detach the webcam/microphone module cable (7) from the bottom cover. (The webcam/microphone
module cable is attached to the bottom cover with double-sided adhesive.)
7. Release the webcam/microphone module cable (8) from the retention clips built into the bottom cover.
8. Release the retention bar (9) that secures the display panel cable to the system board, and then disconnect
the display panel cable (10) from the system board.
9. Release the display panel cable (11) from the retention clip built into the bottom cover.
NOTE: The display bezel is attached to the display assembly with double-sided tape. Use rm pressure
when exing the display bezel to remove it.
10. Carefully ex the inside edges of the top (1), left (2) and right, and bottom edges (3) of the display bezel to
detach it from the display assembly.
ENWW Component replacement procedures 41
 Loading...
