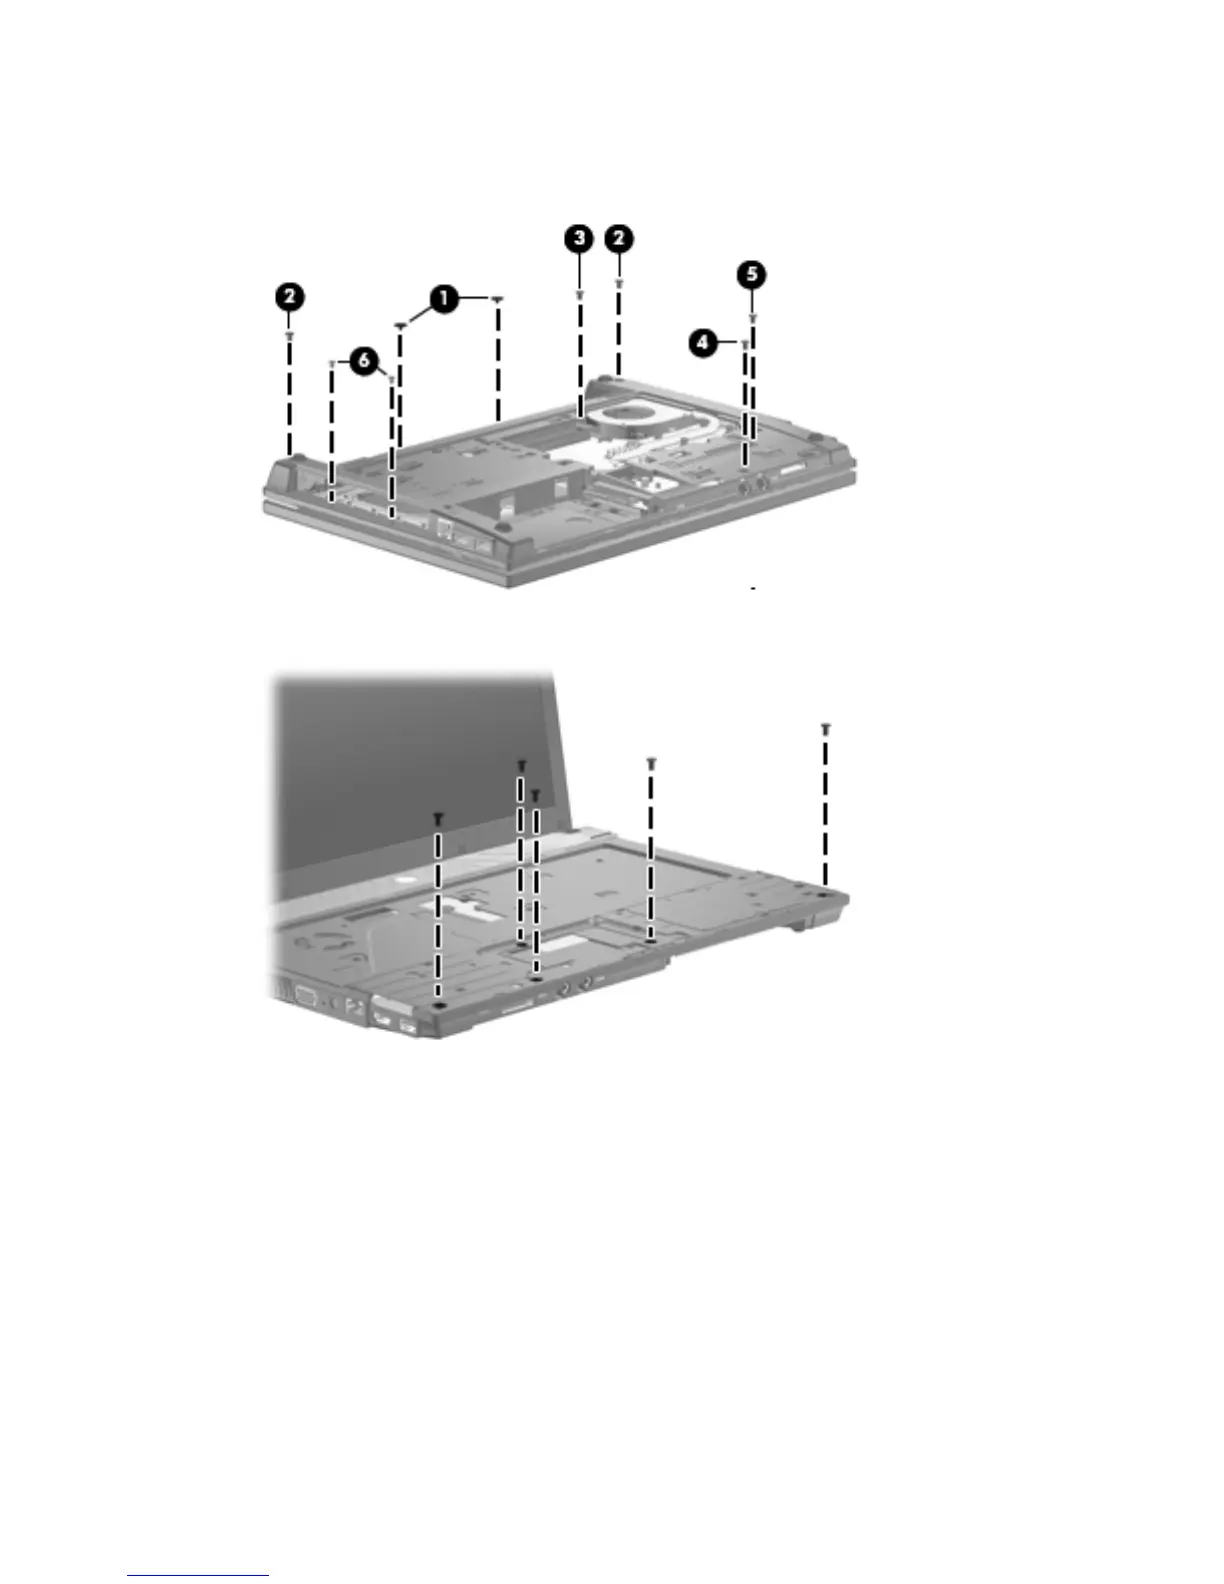
EasyManuals Logo

HP Compaq 325 User Manual

HP Compaq 325
168 pages
To Next Page IconTo Next Page
To Previous Page IconTo Previous Page
Page #89 background imageLoading...
Page #89 background image
3.
Remove the two Phillips PM2.0×2.0 screws (1) located in the battery bay, the five Torx M2.5×6.0
screws (2), (3), (4), and (5), and the two Phillips PM2.0×3.0 screws (6) located in the recess
near the optical drive.
4. Turn the computer over so it is right-side up and remove five Torx M2.5×6.0 screws.
Component replacement procedures
81

Table of Contents

Questions and Answers:

Question and Answer IconNeed help?

Do you have a question about the HP Compaq 325 and is the answer not in the manual?

HP Compaq 325 Specifications

General IconGeneral
BrandHP
ModelCompaq 325
CategoryLaptop
LanguageEnglish

Related product manuals