EasyManuals Logo

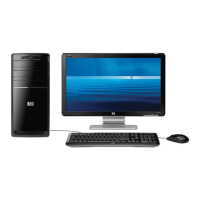
HP Pavilion p6000 - Desktop PC User Manual

HP Pavilion p6000 - Desktop PC
30 pages
To Next Page IconTo Next Page
To Previous Page IconTo Previous Page
Page #14 background imageLoading...
Page #14 background image
10 Upgrading and Servicing Guide
4 Make a note of each cable and
plug orientation attached to the
back of the optical disc drive
before removing the cables.
5 Disconnect the power cable
and then the data cable from
the back of the optical disc
drive. Pull the tab on the data
cable. Use a gentle rocking
motion on the power cable.
6 Disconnect the sound cable, if present.
7 Remove the screw from the optical disc drive side.
8 Pull the latch away from the drive, and push the drive through the front of the
computer.
NOTE: The SATA data cable may include a latch. Press the latch, and pull the plug to
remove the data cable from the drive.
CAUTION: Pull the connector by the handle only.
IMPORTANT: Do not tilt the drive during removal.

Questions and Answers:

Question and Answer IconNeed help?

Do you have a question about the HP Pavilion p6000 - Desktop PC and is the answer not in the manual?

HP Pavilion p6000 - Desktop PC Specifications

General IconGeneral
Operating SystemWindows 7 Home Premium
AudioIntegrated High Definition Audio
ProcessorIntel Pentium or AMD Athlon II
RAMUp to 8GB DDR3
StorageUp to 1TB HDD
GraphicsIntegrated Intel HD Graphics or AMD Radeon HD
Optical DriveDVD Writer
Networking10/100/1000 Gigabit Ethernet
PortsUSB 2.0
Card ReaderMulti-format digital media card reader

Related product manuals